


First Frozen Buttercream Transfer
Decorating By stephanie214 Updated 1 Nov 2005 , 3:09am by stephanie214

I am so excited about this...my first one, also first time doing reverse shell border. 
It was suppose to be a gel transfer on sheet cake but for some reason the gel would not show on the icing. ![]()
I've always wanted to give it a try but had not gotten around to doing one.
Have alot of improves that I need to practice on. Thank goodness this is for my great neice's birthday this weekend so the mistakes will be overlooked...might give them extra discount
Thank goodness for you here at CC for discussing and showing pictures on fbct.
Please give me comments so that I can do better next time...I can take it ![]()
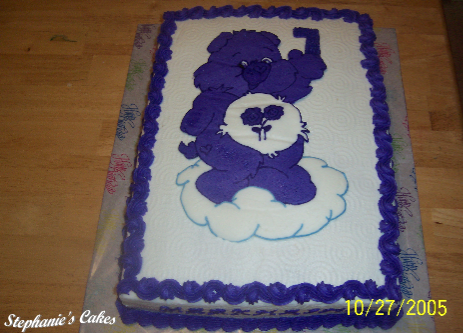
You did a wonderful job, really cute! Nicely done cake! Love Care Bears, how cute is that!
One of the issues with buttercream transfers is getting a bit of rippling in the icing. Parchment paper usually gives you less rippling than waxed, but it has to do also with the way that the paper lifts up as we icing it. I have tried just about everything to avoid this, including spray adhesive, but that gets pretty messy when it freezes, the adhesive is hard to remove from the glass.
What can be done, is after the transfer is removed from the freezer, I use the tiny fondant roller and roll carefully over any ripples. But you don't want to do this on the outlining because it will blur it somewhat.
I think I may go back to using the adhesive on the picture back and also on the parchment.
Another option is to do the transfer by inserting it in a plastic sheet protector and doing it on the plastic. Also, you can use any food safe transparency plastic.
Hugs Squirrely Cakes

Thanks Squirrelly,
I had no idea that I would end up doing a transfer yesterday.
For some reason my gel wouldn't show on the icing...first time this has happened.
When I roll do I do it on the front of the transfer with the wax paper side or wait unti it thraws to do it.
Can't wait to do another one.
ge978,
Thanks...the color is purple, for some reason my camera made it blue as it did for my basketweave cake.

Thanks Mrs Missey and cocopuff.
cocopuff, good luck...can't wait to see it.


That looks great! It's huge.. You did a wonderful job.. Now only if I can get that reverse shell border... I have tried so many times, no luck! Even stuck my tongue out to the left, to the right and still NOTHING ![]() !!!
!!!
LOL ![]()

Way to go Steph!!! Looks awesome!! I still haven't gotten brave enough yet to try one...still too much of a newbie. Maybe soon.... ![]()
Hugs, ~Denise


Thanks Squirrelly,
I had no idea that I would end up doing a transfer yesterday.
For some reason my gel wouldn't show on the icing...first time this has happened.
When I roll do I do it on the front of the transfer with the wax paper side or wait unti it thraws to do it.
Can't wait to do another one.
Good for you kiddo!
Yes, I gently roll wherever there are creases, on the front while it is frozen and before I apply the tranfer to the cake. Sometimes I use my finger gently and go over the crease or any air bubbles (which you obviously didn't get) with my fingers. I usually end up with a few creases. I am thinking of going back to the adhesive. It happens mainly because we tape the outer edges, which means that the centre of the parchment has some give and comes up a bit as we pipe the icing on. I discovered that it is worse with waxed paper because waxed paper is more effected by condensation. Read that somewhere and it is true. Drives me nuts, haha!
And I didn't say it to be critical here, it just happens to nearly everyone I know. I should have added that your transfer looks totally professional. And, I am so impressed, you didn't get the wormies, haha!
Hugs Squirrelly Cakes
Wow that looks great! I also love the way you smoothed using a patterned paper towel!
Thanks everyone for your compliments and replies.
Sorry I haven't responsed until now...just getting back in town.

stephanie...you did an awesome job!!!! I will probably never do a bct only because I am just too lazy!!!! I find that I can use my printer to do a coloring page...cut it out...and fill it in!!!!
Yours looks absolutely perfect...I don't see any mistakes!!!
traci ![]()

SquirrellyCakes, have you ever tried using a silicone pad to make the BCT on? You think it'd work? Definately stop the rippling and wouldn't be affected by miosture.
SquirrellyCakes, have you ever tried using those non-stick pads?(I completely forgot what they were called! I'll look it up). The ones you can use to bake, sugar, and anything else... grrr.. i'll look up the name right now.
Do you mean sil-pat? No, I haven't , how would you use it for this purpose? Curious!
Hugs Squirrelly Cakes
Yeah! those! I'm pretty sure they are completely non-stick. I'd just use it like it was a big peice of parchment or wax paper.

Hey, way to go with the Care Bear BCT!!! I'm considering my 1st one this upcoming week on either a 9x13 or 10x15, depending on scale of overall design-BTC will just be a small part of overall picture. Oh, I will need to use 2 boxes of 2-layer cake mix, right, in a 10x15? How long would it (10x15) need to bake & would the oven need to be 25 degrees lower for a Magic Line aluminum pan??
1. Can I use Wilton's recipe for Buttercream-1/2c. Crisco, 1/2 c. butter/marg. for BCT? Will Mrs. Fibert's marg. mess it up? This is a simple figure-hard for me since it's my 1st time-with just 1 color & dark (blk) outline (I think ![]() ).
).
2. In the BCT instructions here on CC, I need to use Wilton's tube of Black decorating icing for outline-NOT homemade buttercream tinted black? Do I let the outline dry before adding colored part so it doesn't run? Freeze it between outlining & filling color?
3. Is it okay to ice overall cake with homemade buttercream & how far in advance of placing frozen BCT on cake?
4. How far in advance of b-day (in this case) do I need to bake & ice cake?
5. Can I ice it the same day I bake it-after it has completely cooled?
6. Do I wait to the last minute to lay FROZEN or THAWED ![]() BCT on cake?
BCT on cake?
7. (Should have been 1st ???) Are we supposed to use thinned icing or medium or stiff for BCT?
8. How do I ice overall BCT with icing that will be on the cake without it pulling up my design & outline? Do I freeze it in-between?
9. How long can BCT be in freezer?
Thanks for all of your help! So sorry for sooooo many questions. ![]()
Sooo unsure & don't want to mess up so only I'll know what picture is supposed to be!!! LOL ![]()

Looks great Stef!! You did a great job~ The whole cake looks great~
Brainsbaker,
Ntertayneme taught me the reverse shell border when she was at the DOS I had this year. She taught me to start w/ a cursive L & another one & just keep it going & going & going till you've completed the border. It turns out great! You can make the shells close or make them further apart. It took me a few tries but I got it. Now it's one of the easiest borders to do. HTH~
Yeah! those! I'm pretty sure they are completely non-stick. I'd just use it like it was a big peice of parchment or wax paper.
Well, not sure how you do buttercream transfers, but I do them on a piece of plexiglass. Then on the plexiglass I attach my reversed picture. So then you put the parchment paper or waxed paper on top of that and attach. That way you can see the outlining through the waxed or parchment paper so that you can do your outlining and fill in. I don't think that the sil-pat would be translucent enough to see through, is it? Perhaps I am misunderstanding?
Hugs Squirrelly Cakes
I hadn't done one of these in about 20 years and we did them differently back then. So when I saw Cali4Dawn's directions, I realized that some people would not understand what the correct texture needed to be for the icing to work. So I experimented and created my own icing for buttercream transfers. It works fine, had no trouble with using black colouring in it for outlining, I now use it all the time. No expert here, I have only done a dozen or so, but it seems to work well for me and for other first-timers I have sent the recipe to. Just follow the Cake Central instructions Dawn put under Articles, Tutorials and follow these in addition. I copied the post I made on another site, www.r-bdesigns.com and they follow.
Just go without about 1/4 inch of colours and top that off when set with some more icing of the colour of the top of your cake.
So I played with the icing until I got the right consistency and here is what worked for me. It also worked just fine for the black outlining, I didn't have to freeze it or dry it before continuing with the other colours. All I did was add black Wilton paste food colouring to a small portion of this icing, no special fudge icing or Wilton black icing ready-made or anything.
So you are going to follow the usual steps. You use a sheet of plexiglass or a board that can go into the freezer. You tape your picture on well. Cover it with waxed paper or preferably parchment paper and tape it well too. I had my brother-in-law get a 16 inch square of plexiglass cut for me, I figure that would be about the biggest size I would ever use for anything, but you can get various sizes cut.
1/2 cup Crisco shortening
1/2 cup butter, softened, I use salted
1 1/2 tsp. vanilla extract, I used the pure brown, but you will get an ivory tinge to your icing so you can switch to clear (the brown really does not affect any colouring except your white will be more of an ivory, but for eyeballs etc. it isn't noticable)
2 cups of sifted before you measure it out, icing (powdered) sugar
No other liquid and you don't need to dip your spatula in hot water or any of that stuff!
Blend butter on low until softened. Add Criso and continue on low. Add vanilla and continue on low. Add icing sugar, one cup at a time and continue on low until well incorporated. Then colour and apply. I use a tip 3 for outlining and a tip 12 for filling it in. I don't use a coupler in my icing bags for this. You can use parchment bags with just a tip cut off the end or whatever. Let it set for a few minutes and dipping your finger in icing sugar or cornstarch smooth out I dip my fingers and use a gentle pouncing motion vertically. When all colours are done and set a bit (usually about 25 minutes or so), smooth out with a spatula (again I sprinkle on some powdered sugar and again I sort of gently pounce down vertically so as to get rid of any wormies or such and apply your backing and outlining colour. Again smooth out with a spatula, once set. Now I also covered the finished product in parchment paper, then inserted the whole thing in a green unscented garbage bag and froze it overnight. In the morning I take it out, flipped it onto parchment, lifted off the waxed paper and then reinserted it with a piece of parchment over it, back on plexiglass and back in freezer if I don't need it, for up to two weeks. But really these freeze up in a chest freezer in about 90 minutes. It is solid enough that you don't need the plexiglass on it to re-insert in freezer, I just do because I needed a flat surface as the freezer is pretty full! You could just put it parchment paper and all, into a freezer bag.
Hugs Squirrelly Cakes
Bakersofcakes,
I wasn't responding to your post, I understood that you meant if for Stephanie214, I just wanted to make sure and say that, in case you thought I was and wondered why I hadn't answered your questions.
Hugs Squirrelly Cakes
Actually, I was asking my MANY ![]() questions to anyone who could help, though Stephanie214, your cake is BEAUTIFUL! SquirrellyCakes, your detailed explanation does help me understand more about the actual BCT technique itself, so thanks!
questions to anyone who could help, though Stephanie214, your cake is BEAUTIFUL! SquirrellyCakes, your detailed explanation does help me understand more about the actual BCT technique itself, so thanks! ![]()
Oh, well in that case I will give my answers to the questions, which may or may not be similar to anyone else's. I won't tackle the Magic Line question though, don't have those pans.
1. Can I use Wilton's recipe for Buttercream-1/2c. Crisco, 1/2 c. butter/marg. for BCT? Will Mrs. Fibert's marg. mess it up? This is a simple figure-hard for me since it's my 1st time-with just 1 color & dark (blk) outline (I think ). Dawn seemed to think that you are best off with some butter and some shortening in your recipe, but I do know some folks that use all shortening. Personally, I wouldn't go with the margarine because of freezing it, but someone else may have tried this and had success, I just don't use margarine in my icing. I know Kiddiekakes does, but I don't know if she uses the same icing for a buttercream transfer.
2. In the BCT instructions here on CC, I need to use Wilton's tube of Black decorating icing for outline-NOT homemade buttercream tinted black? Do I let the outline dry before adding colored part so it doesn't run? Freeze it between outlining & filling color?
I have heard that you need to let it set up for about 25 minutes and some folks do refrigerate or freeze it, but I just colour my own icing black.
3. Is it okay to ice overall cake with homemade buttercream & how far in advance of placing frozen BCT on cake? Yes use homemade buttercream and I don't find that it really matters if your icing is set up before applying the buttercream transfer, but some people may think so. I usually frost the cake and take the buttercream transfer out of the freezer and apply it right away. But remember, you want to apply the same colour icing that will be the back of your transfer also to the top of your cake. Where you may have problems is if you say, use a red icing on your cake and a white icing on the back of your transfer, it might bleed through.
4. How far in advance of b-day (in this case) do I need to bake & ice cake? Well, most people bake a cake about the Wednesday or Thursday before a Saturday celebration. I tend to make up the cakes, freeze. Make up the transfer, freeze. Then on the day before put it all together. But you can vary it. I keep buttercream transfers in the freezer for up to two weeks.
5. Can I ice it the same day I bake it-after it has completely cooled?
Sure you can, but some people find it best to let a cake rest for a day or so. Personally, I don't find it makes much difference, but if you have any problems with the cake being too delicate, it is likely better to let it set up overnight or so before frosting.
6. Do I wait to the last minute to lay FROZEN or THAWED BCT on cake?
No, but as soon as you take that sucker out of the freezer, get it onto the cake. Otherwise you may have problems. But I have done this up to the day before - placed the transfer on the cake - and the cake was fine, I just box it and bag the box and leave at room temperature.
7. (Should have been 1st ???) Are we supposed to use thinned icing or medium or stiff for BCT? Ah, you will get different opinions on this. You don't want it really runny, but you want it to be able to flood somewhat easily. Which is why I came up with my icing, because I knew people would wonder, how thin should it be. Some people say medium, but I think mine is sort of a thinner medium. Definitely you do not want stiff for this. I think the consistency that you would normally use for a writing tip, is the way to go.
8. How do I ice overall BCT with icing that will be on the cake without it pulling up my design & outline? Do I freeze it in-between?
Oh, ok, you mean when you go over the whole transfer with the same colour that will be your cake top colour. Well, this is why I set it up for awhile, then I apply icing blobs and very carefully smooth on with a spatula. You cannot really pull the spatula or you will blur the icing. But as usual, if you make sure your spatula is always on the new icing when you are icing the transfer, this will work fine.
9. How long can BCT be in freezer? A minumum of 90 minutes to up to about 2 weeks, that is the maximum I have left one in the freezer, it may work longer, but I stay within two weeks.
May I suggest that you make up a small one to get some experience first? It is always good to do this to get used to how to outline and how not to have that wormy appearance by pouncing lightly down where your piped lines meet.
Hugs Squirrelly Cakes
SquirrellyCakes, THANK YOU!!! ![]() I'm going to try it out! (Cross your fingers.
I'm going to try it out! (Cross your fingers. ![]() )
)
stephanie...you did an awesome job!!!! I will probably never do a bct only because I am just too lazy!!!! I find that I can use my printer to do a coloring page...cut it out...and fill it in!!!!
Yours looks absolutely perfect...I don't see any mistakes!!!
traci
Thanks traci,
Remember I have to take all those breaks. lol but this was fairly easy once I got into it and I didn't have to use a lot of different colors.
You can do it
Looks great Stef!! You did a great job~ The whole cake looks great~
Brainsbaker,
Ntertayneme taught me the reverse shell border when she was at the DOS I had this year. She taught me to start w/ a cursive L & another one & just keep it going & going & going till you've completed the border. It turns out great! You can make the shells close or make them further apart. It took me a few tries but I got it. Now it's one of the easiest borders to do. HTH~
Thanks tc,
I had to keep repeating the reverse shell to myself.
Finally got up the nerve to try the shell and love doing it now...still need practice ![]()
Quote by @%username% on %date%
%body%