The link to this tutorial is also on my Facebook page, Fifi's Cakes : https://www.facebook.com/media/set/?set=a.507348202682717.1073741844.183774861706721&type=1&l=df6c704baf
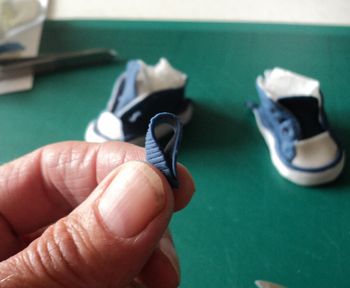
These measured under 2" in length. Made with modelling paste which I make using a mixture of Flower Paste (home made - see my notes for the recipe) and normal shop bought fondant. As with all modelling, water is lightly brushed on as adhesive and kitchen roll is used to support shapes as they dry.
I don't know who the original author is of the shapes as I found it on the net but I have adjusted it with descriptive numbering to match this tutorial.

1. Sole/Midsole. Smooth the edges after cutting to shape. Turn template over to cut the opposite shoe.

2. Throat and Tongue. lightly ball the edges.


3. White toe cap.

4. Upper with lace holes.


The end of a paintbrush that has lost its bristles is handy as a hole punch!

Place on white icing and cut to shape for inner fabric.

Place on white icing and cut to shape for inner fabric.


5. Stick a white piece of the blue for the outer sole

smooth and trim to size.


gently smooth over the toe cap, taking care not to smudge colour onto the white.

6. mark the heel tab with a knife.

7. Mark the outer front piece


eyelets

use the end of a paintbrush to place on the shoe and create the holes.


8. Heel logo counter


paint the eyelets...

... and logos.. shame about the mini breakage but this was later repaired with edible glue and I used the shoe lace to disguise the join. see later pic..

and VOILA! :)

On the Cake:

The link to this tutorial is also on my Facebook page, Fifi's Cakes : https://www.facebook.com/media/set/?set=a.507348202682717.1073741844.183774861706721&type=1&l=df6c704baf


