


Who Can Iced A Cake With Perfect Straight Up And Down Sides? *but* Can You......
Decorating By dailey Updated 5 Sep 2014 , 1:36pm by imagenthatnj

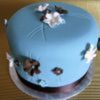
AThis is a question for those of you who can iced a cake with perfect straight up and down sides. I can do it too....But ONLY if my cakes are baked perfectly straight...which they NEVER are, ugh! :D So, the question is Who can iced a cake perfectly *without* the actual cake being perfect to start with? If you are one of those people, please share how you do it! I've searched for videos but they ALL start with perfect cakes which is not helpful for me. Also, I always do 4 layers of cake with 3 layers of filling so that makes it even harder. Oh, and I also used SMBC. Any help would be GREATLY appreciated or if this has been discussed before, please point me in the right direction, thanks!:-)
AUse a board the same size as your cake i.e. 8" cake, 8" board. Glue it down with some buttercream. Trim the cake all around so it is just smaller than the board - this might not be necessary as most cakes shrink slightly on cooling. Then apply a layer of bc and scrape away with a bench scraper, ensuring you have one edge on the turntable, and one edge right up against the cake board, so youhave a perfect 90 degree angle. Apply more if necessary, scrape, apply, etc til you are done. It can be easier if your cake is chilled. Hope this helps....

Ayou're always getting little nagly brown spots showing through right ? i trim/shave the sides of my cakes after filling them -- even just a little makes all the difference in the world -- i just set it on the turntable and shave off an inch at a time top to bottom -- just keep turning the turntable -- put a pan there to catch the drips -- straightforward -- takes no time at all -- better than xanax ;)

I struggle with this, too.... I found a great video by cupadeecakes (she's a member here, too!) on youtube on how to ice sharp, straight edges on a square cake, which I found very helpful. She starts with a decidedly non-perfect cake. I will try to post the link, hopefully it will work. If not, search for "sharp edges on buttercream cake" on youtube and her video is one of the first that comes up.

http://www.notquitenigella.com/2010/11/04/how-to-make-a-two-tier-wedding-cake-with-faye-cahill/
https://www.facebook.com/notes/torta-couture-cakes/how-to-ganache-a-cake-my-way/517220834972659
http://www.cakecentral.com/tutorial/upside-down-icing-technique-for-perfectly-smooth-icing
I know people who have adapted these techniques to buttercream.
Awhen I started shaving/trimming the sides of my cakes I realized I could use a moderate and consistent amount of icing all the way around -- then the sliced cake looks uniform on the serving plate

Quote:
I can ice a square cake perfectly round, and a round cake square. A bumpy cake perfectly straight, blah blah blah. As mentioned, you ice to shape of the board the cake sits on, not at all to the "outline" of the cake itself.
I feel like there is a broadway show tune in there somewhere...

I bought a set of acrylic disks and I'm trying to learn this upside down technique. So far, I still free hand smooth better than I do with the acrylics. HELP!
So here's two things I'm stuck on (not improving upon yet):
1. getting the base (which will be the top eventually) perfectly smooth. So far I've had too many air pockets (just not a perfectly smooth surface with my butter cream) so I have to go back and retouch my cake free hand to smooth. AZ, are you using parchment paper or acetate when you build upside down on the acrylic disk?????
2. when I use parchment paper on the base acrylic it slides around while I'm applying a layer of butter cream so it's not lining up perfectly with my acrylic disks. Which than mars the top of the cake once I invert it.
Can anyone help me please?????????? I could use some advise.

I definitely suggest trying out the upside method, a quick google search will find you multiple tutorials and videos!
A bench scraper and a good turntable is all I usually use, unless I'm having a hard time with a cake.
Load up the sides with icing, rest the flat bottom edge of the scraper on your turntable, so that the scraper butts up against the board. Hold your hand still and spin spin spin!
I don't put a thick layer of icing on the outside of my cakes if they are being covered, really just enough so no cake shows through, but if you want it thicker you can just scoot the scraper further out, use a larger board or trim your cake.
Stitches, have you tried a press n' seal type wrap? I use a generic brand one, and that works perfect for me. I got sick of parchment moving around.
I'm border line violent with my frosting when I do the top, really slapping it down, and push down a lot when I spread it. I still have to do the odd touch up, but it's good to go 3/4s of the time.
AI remember that Jeff, the creator of that upside down technique, changed the parchment paper to freezer paper (on the shiny, slippery side). I know because a friend in NZ contacted him about this and he nicely offered to send her a pack of freezer paper because she didn't know what it was.
AHere's Jeff Arnett's post.
http://www.cakecentral.com/t/776453/questions-about-jeff-arnetts-upside-down-buttercream-tutorial
Thank-you ladies. I'm thinking that changing to acetate should make all the difference............I'll find out this afternoon!
Just read Jeff Arnett's take (from the link above):
1. Cover your boards with PLASTIC COATED FREEZER PAPER (I use Reynolds brand, but any plastic coated freezer/butcher paper will work fine) rather than parchment...it doesn't wrinkle and it releases very cleanly!
2. To prevent air bubbles on the top surface, smear a very thin coat of icing on the board first...practically thin enough to see through.... then come back with a thicker coat...you should get no air holes then!
YES, those were my problems, thanks to Jeff I hope they won't be today!

I use the upside down method from Three Little Blackbirds but with freezer paper instead of wax. The link is for ganache but can be used for butter cream.
Like AZ stated, it's the cake board that is used as the guide. A good bench scaper is key. You want something that sits flat with a 90 degree edge. Look into Fat Girls and I also use Bash N Chop.
As with anything else, practice makes perfect.
http://www.threelittleblackbirds.com/2012/10/simply-ganache-a-tutorial/
I used acetate today instead of parchment and it worked beautifully. that made a big difference! But my triangle/t-square was broken so I had to guess on lining up my two acrylics disks. Still can't get that perfected, but it was better.
Over all, I kept screaming at myself as I was using this technique today. It takes me about 3 times longer to ice this way than free hand. If I don't get past this learning curve it's gonna kill me!

You know this reminds me of watching a professional golfer play a round of golf with just a 9 iron and a putter. He beat the pants off of an average player with a full bag of clubs.
It is the skill and the experience that makes it easy for some people to do great work in their craft, even without a panoply of tools.
AZCouture you have the magic touch.
AOh MB, you are the sweetest gal on this board, you know that? F'real. :)
Oh boy, now I'm really gonna sound like a smarty pants. You wouldn't want to use a nine iron, you'd be dead meat on the par fives. A five iron would be the best bet, cause you'll get distance for the long drives, and you choke down on the shaft, lay the club almost completely sideways, and turn your body the other direction you want the ball to go to loft it way up high when you're closer to the green, say one hundred to seventy yards out. A five or other low number iron is also perfect for a chip and run, where you get very little loft, but distance from rolling, and that's harder with higher number irons, such as that nine. Those throw the ball up high, and stick relatively close to where they land.
Long story short, if you're gonna golf with two clubs, take a five and a putter. :D
I know...I'm ridiculous, can't help it, I was the team captain in high school, and should have been in Hawaii on a scholarship. Stay in school kids, or else you'll end up being a cake decorator! :D :D
Credit given, where credit is due. Appreciation and applause to all of you successful Bakers and decorators. You are teachers, coaches, motivators and a great inspiration to all. Keep up the good work. I'm always wishing you great success and prosperity in your businesses.
Just received an acrylic round in the mail. Now I can try the upside down method. When my hubby saw it he asked why I thought it would work!
Answer: "cause I saw it on Cake Central" 
I was wondering what happened to you. Thanks to this discussion, I was able to get my sister acrylic discs with a half an inch extra for the frosting, and a hole in the center (or not). I got them from a place in Texas called CakeThings dot com. My sister had the same kind of problem as you. Hopefully, she won't anymore.
Quote by @%username% on %date%
%body%