

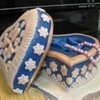
I need to make Captain America shield cupcakes
https://www.halloweenunlimited.com/images/product/products/18346.jpg
The ones I've seen on here are multi-layered: red fondant circle on bottom, white smaller circle on top of that, smaller still red circle on top of that, etc. I don't want the graduated heights, though. Is there a way to make it flush without driving myself crazy? I'm thinking, can I do the white star & red circles of fondant & pour inside of each with royal icing (blue & white, respectively)? I'm afraid if I try to patchwork it all together with fondant cut outs some won't line up right & I'll have gaps. Any advice is extremely appreciated!
I'm thinking I'd probably try it patchwork first. Maybe if your fondant is a little thicker than you might normally roll out, you may have an easier time lifting out the cut outs and putting in the next cut out. Plus, for the graduating circles, I'd start with the largest first, and then cut out the inner circle, place a circle of the same size, then cut out the next smaller circle until I got to the one with the star, and then cut out the star and put in a star. It sounds quite labour intensive this way though . But I don't know if you'd have success filling in with royal.
Maybe someone else has an idea.

Yes with a little work you can make this flush.
For the outside red ring -- with a circle cutter that is the size you want your topper to be cut out a red ring then use the next size down circle cutter and cut out the center of the red circle. Using that same cutter (the 2nd one) cut out a white circle. Use the next size down circle cutter to cut the center out of the white circle and using that same cutter cut out the next red circle, again using the next size down cutter cut out the center of the red circle. Using that same cutter cut out a blue circle. Use a star cutter to to cut out the center of the blue circle and then using the same star cutter, but out a white star. You can piece them all together and using some crisco on your finger tips lightly rub you hands over the completed piece and that will help to lessen the seams from your cuts. Wow. I Sounds like a lot of work for such a little piece doesn't it? I think it will give you a nice effect though. I hope you can make sense of my instructions. Sometimes it's easier to think it in my head then it is to put it on paper!
Thanks for the instructions! They're for my special needs 4 year old's birthday - I'd spend 40 hours working on them just to see him smile, you know?!
To adhere the cutout to the cupcake, can I put it directly on a slightly warm cupcake so it'll stick? I'd rather not show any icing under the image.
Thanks again!
I would start with a circle cut from VERY thinly rolled fondant (almost see through) in either the white or the red and then proceed as pmarks0 and price suggested using the using the circle as a backing to hold the whole thing together. That way, when you go to move it to the cupcake there is less chance it will separate at the joins.

I just did a captain america shield and used graduated circle cutters and a star cutter for the middle. It wasn't hard at all and the pieces all went together without any problem.
Quote by @%username% on %date%
%body%