


Being a steel fabricator by profession I have a good working knowledge of tools and different media that most would not think to use in cake construction.
A little side note about me; I look at a cake project as a contractor looks at blueprints. I for lack of a better term build cakes, referring to the structure and the outside appearance. I am in no way a chef or profess to be any thing but a recipe follower. Duncan Heinz and Betty Crocker are good friends of mine. Which is one of the reasons I am here is to learn more of the cake side of this art.
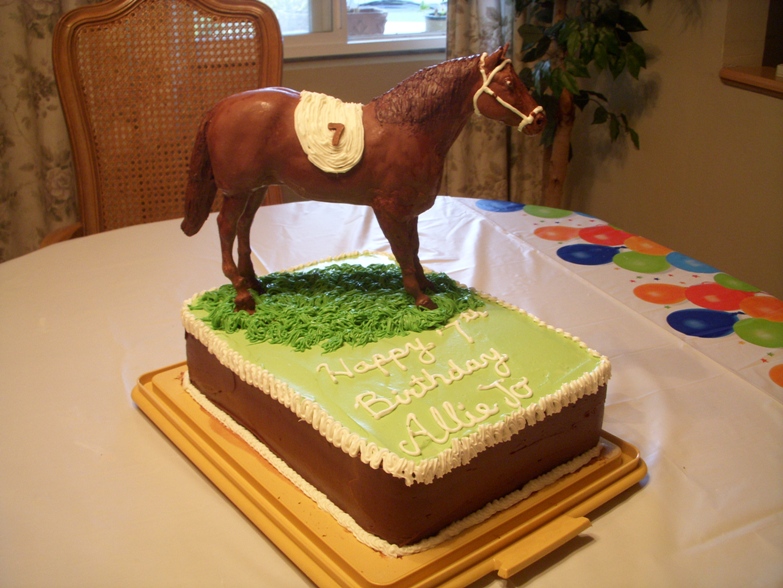
The horse was a challenge but one that I felt that I could pull off because I had done molds before just not with chocolate.
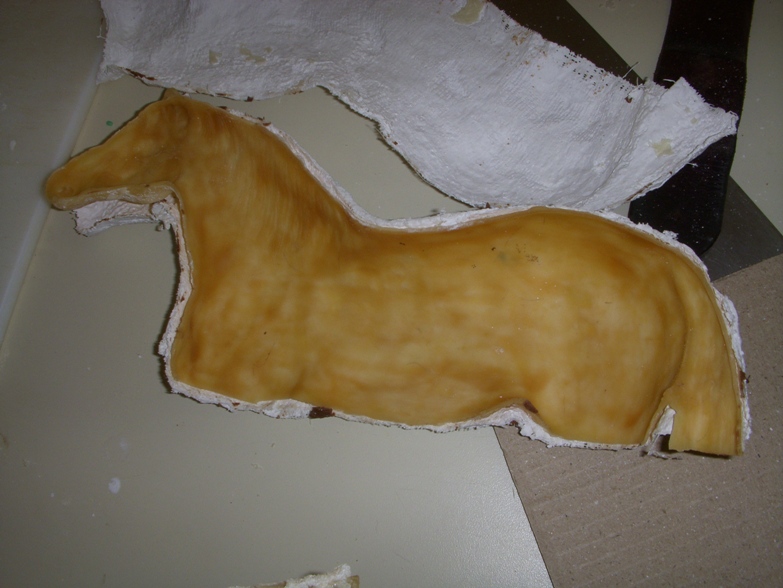
First you need to get a good latex mold making media usually art stores have this as a standard item. The trick is building up thin layers for the first three or four coats then you can start putting thicker coats on. I did eight or ten I cannot remember now but it was nice and thick.
The reason being is that it has to be able to withstand the removal process as well as supporting itself without the horse in it. To remove complex shapes you must cut the latex, in this case I had to cut the mold in six pieces, four legs and two halves of the body.
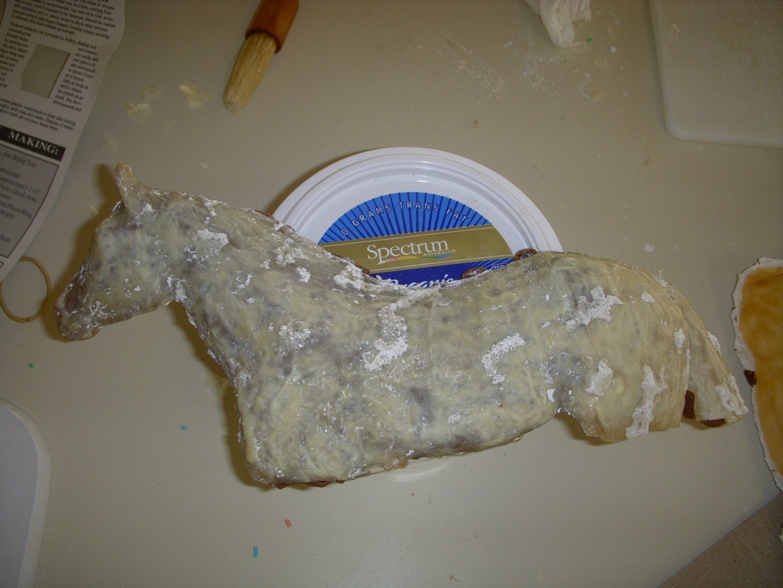
The other reason that cutting is necessary is because you have to wrap the mold in plaster to support the weight of the chocolate, and plaster doesn't bend like latex does. As you can see from the pictures the latex is for the detailed shape and the plaster is for the strength.
I used the plaster strips that kids use to make molds of their face in Jr High, and put about three layers on each half of the horse. You must make sure that there are no angles that are going to lock your mold on the object. If there are then it is best to cut that part of the mold and cast it separately.
In my case the legs had too many bumps and thick/thin areas that cutting them off and welding them back on later was the way to go. The latex was thick enough on the legs that no plaster was needed and they could support themselves.
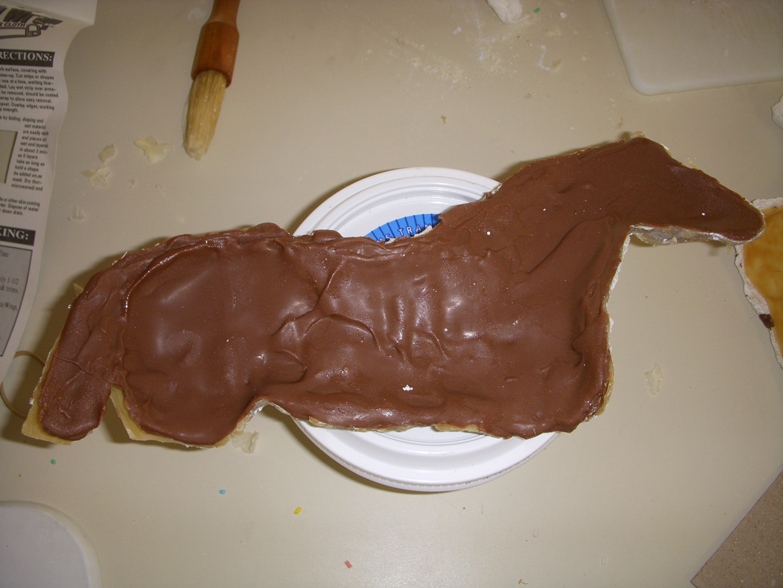
I used a double boiler and a chocolate wafer called "appeals" available at the local health food store. Not sure if this is a common form but it sure melts a lot easier than a big hunk.
I cleared out a nice flat area in the freezer and got the mold halves already. I did kind of the candle method since there were some vertical walls on the mold halves.
I would pour enough in the half to coat the whole piece turning and rocking back ad fourth letting the chocolate cool. when it was stiff enough it was in the freezer for a couple of minutes only just so I could do the other half. Several coats until I felt the sides would take the welding process and not fall apart.
The legs just got chocolate poured in them until they were full then set aside to cool. Once cool the mold was cut along the back of the leg so it would peel off very easily. The halves would just pop out when cool. With the latex mold there was excellent definition in the chocolate down to the smallest detail.
The welding process went as follows; The chocolate was cut right on the latex line and not allowed to be over the top of the mold. Then I warmed a pan big enough to accommodate both halves of the horse, on the stove to just warm to the touch. Laid the two halves on the pan until I saw the edges were starting to melt, picked them up stuck them together and in the freezer for a minute. Legs were the same way. if there was a hole or something chocolate would just be used to fill the gap then trimmed to shape later, but there wasn't much of that over all.
Dark chocolate was melted and painted on the mane and tail. Piped frosting bridal. The whole horse was then welded to an upside down Hershey bar. Then covered with grass using the "hair tip" I call it.
Every thing else is self explanatory about the cake.
Sorry I don't have pics of the actual assembly process that went rather quick.
I am not sure i have the picture upload thing quite nailed down on this forum. It seems to be loading a second text file of each image. Sorry i will work on that.

I am not sure i have the picture upload thing quite nailed down on this forum. It seems to be loading a second text file of each image. Sorry i will work on that.
You're doing it right, that's just how they come out.
Thanks for the tutorial, it's awesome.
That horse if fabulous! As a newbie myself I always appreciate it when someone shares tips step by step. Thanks!

That is really amazing! You are very talented! How long did it take to make the mold? Is it reusable? (I hope so, after all that work!)
Probably would have been if I hadn't thrown it away, Didn't plan on making anymore horse cakes at the time so out it went. I've got a really cool guitar sub frame if anyone is interested, other wise it's going out too.
Quote by @%username% on %date%
%body%