


How-To : 2-D Gumpaste Character Topper
Decorating By CakeMommyTX Updated 11 Dec 2011 , 4:05pm by decie

Below are the steps I used to make the Mario topper ,however this method will work for almost anything (trees,flowers,animals etc.)
I have also attached the actual Mario picture I used .
Hopes this helps.
If you have questions just ask.
Thanx,
Jessica
2-D Character Cake Topper
1. Print up character of your choice in size needed. Cut out character.
2. Roll out gum paste or mmf with tylose about 1/8 thick. Grease top with shortening (so paper doesnt stick)
3. Place paper cut-out on top of gum paste and smooth out.
4.Using a X-acto knife (or other sharp knife) cut character shape out, remove excess gum paste .
5. With a straight pin poke holes and trace inner lines of character, these are your guidelines where to put your gum paste later.
6. Remove paper.
7. Now using the same paper you traced the lines with cut each section out as if it where a puzzle.
8. Use each of these pieces to trace and cut out the colored gum paste.
9. Place colored gum paste onto white gum paste just like puzzle pieces, some pieces will go on top of others (Marios side burns and overall straps went on top)
10. Using a clay tool, toothpick or back of a butter knife mark add definition, details and indentions.
11. Lastly add any top pieces (nose, buttons, eyes, etc.)
12. Let dry and attach toothpicks or skewer to back with candy melts.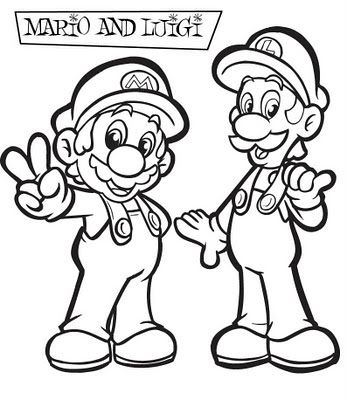


wow thank you so much for sharing your knowledge!!! saving!!!!

Thank you so much for sharing. I can't wait to give it a try.

Thanks for sharing, my boys love Mario. I have to try making it...


I tried your method and love it! Thank you very much for the tutorial! ![]()
Here's the topper I made
http://cakecentral.com/modules.php?name=gallery&file=displayimage&pid=1631066
Thanks again CakeMommyTX!!!!!

Quote by @%username% on %date%
%body%