

First Wedding Cake In A Month, No Experience, Haaallllp!!
Decorating By kiwigal81 Updated 22 Jan 2010 , 7:17pm by kiwigal81
Hi all,
I've been lurking, and posted a couple of pics, but have just started this fun hobby. I have always baked, I have a great fruitcake recipe, and some good mudcake recipes. Got the ingredients to try fondant next week. My friend knows that I like baking so asked whether I can do her wedding cake. Next month. For between 100 and 120 people. In February. Which is the height of summer here. For an outdoor wedding. Half an hour away. Through a winding road.
Of course, for one of my dearest friends, I said "Yes! (insert squeal at surprise wedding) Sure!"
So I'm thinking round easier than square, two tiers with an extra cake (I can't get the stacking system, will have to use dowel, so not confident to do a 3 tier). 8, 10, 12, cut in the 'IndyDeb' way? Fondant due to the heat?
That is as far as I've got.
Good thing is, she has no preference for colour or style or size or decoration. Anything is good. She likes orange.
Does this sound like I'm on the right track?
I'd appreciate any advice![]()

It definately sounds like a good plan so far!
I'm doing my first wedding cake in a month too - I have made stacked cakes but only for birthdays so far so I'm quite nervous...
I'm thinking a lot like you:
Round cakes - easier to cover with fondant
3 tiers that I assemle at the wedding location. I only use straws and card board as support.
What cake and filling will you use?

My advice would be do something you are comfortable with. She has not given you any preferences so its all up to you. Therefore go with something you know you can do well, that way it will look far better than a cake that you have really had to stretch yourself.
Also remember less can be more, you dont have to go mad with a huge tiered cake with oodles of decoration, simple and stylish is good, I am sure the bride will appreciate that more.
Good luck and dont forget to post pictures.

The good thing is you are planning for it. ![]() I must applaude you because a month is going to fly by now and the better you are prepared, the better this is going to be.
I must applaude you because a month is going to fly by now and the better you are prepared, the better this is going to be.
I say if you are comfortable with it, make your 2 tiers for a 3 tier cake and assemble the 3rd at the wedding... like egensinnig suggested. That way there is no stress about the winding road and the dowels should be plenty enough.
Marshmellow fondant should be able to withstand the summer heat, I think its humidity that would do you in. What is the humidity like?
Just don't go too crazy and you should be just fine. We're rooting for you! Good Luck!

Sounds like a plan so far! As far as design goes, I'd probably go for something simple, but not too plain. If you've never used fondant before, I'd suggest having a few paractice attempts waaay ahead of time, just so you know what you're dealing with and you can practice your technique.
Some suggestions re decorations: ribbon might look nice around the bases, and is really simple and cheap and can withstand heat/movement/whatever. If you're having any issues with your fondant (smoothness, cracks, stretching, etc) randomly places objects are a lifesaver! Flowers, leaves, vines, etc might be worth incorporating into your design.
Have a great time with it ![]()
I'd go for fresh flowers. Orange tiger lilies and berries. There is such a variety that you can use. Easy just to put them in a flower pick and insert in the fondant. You could keep them in water till you get to the location. Good luck your planning sounds great.

If I were you, I'd buy ready to roll fondant. Why stress yourself over getting the recipe right on MMF (especially if you've never made it before) if you can buy it? Is the bride paying you for everything? I'm an Aussie girl and as your neighbour I hear you on the humidity at the moment. Haha.
DEFINITELY do round cakes. And If you're not comfortable covering the cake perfectly seamless with fondant. Maybe you could do a 'stenciled' look over the entire cake. If you check out my pics. 'My first wedding cake' (with the purple swirls). The second tier I used stencilling because my fondant covering was shonky and i had to cover it. It turned out looking perfect and people were none the wiser. It covers EVERY mistake you'll make... Good luck ![]()

I did my first wedding cake in the middle of summer. We were having our hottest summer that I can remember and I think on the day I delivered the cake it was 100 F outside. I did a few trial runs first, put a cake in the car and drove it around to see what would happen. From that I figured out that the only way a cake would survive the car trip intact was to run the air conditioning in the car. For a 30 minute trip without air conditioning but making sure the cake was not in direct sunlight, the MMF held up well to the heat and humidity but the buttercream underneath fell down the sides of the cake, resulting in large bulges around the base. It was the all-crisco buttercream too, more heat resistant than the other kind.
I don't know if it gets as hot there in the summer as it does here, but I wouldn't make a cake for an outdoor event in the summertime here, just wouldn't do it, because I don't have any recipes that would stand our heat and humidity long enough for the couple to get through the vows, much less survive a couple hours while the meal is served.
My advice to you is to use a very stable buttercream. Something like a crusting buttercream would be good for the summer, or wiltons buttercream recipe works very well. You dont want a swissbuttercream, although delicious, because they dont hold up as well! Also, I dont necessarily think fondant is the most stable during summer, although it is beautiful. But if that is what you decide on definately buy premade fondant! Satin ice is absolutely delicious, great to work with and ive yet to make fondant that I thought was better! Good luck im very excited for you 
sounds like your of to a good start. If you are going to try this fondant reciept please make sure it is a marshmellow fondant. you should really try this fondant many times. I only work in MMF and i swear although very easy it is different every time. you may want to buy Satin Ice fondant if you can't pratice with yours a few times before the wedding.
For some reason, my email didn't update me on the replies so I thought it was just a slow thread ![]()
The humidity depends on the day. Hopefully it'll be a dry summer by then! Fillingwise, I was thinking BC because I know I can do it well. We don't have premade fillings here. Otherwise a thick ganache but I wasn't sure about the heat.
I hadn't thought of assembling there. That's a great idea. Also, it will only have to withstand the ceremony. They have moved house to the other end of the country so are broke, just coming back for the wedding during their church camp, so no meal. Just cake (pressure!!lol).
I was making it all because we only have a couple of brands of fondant available and I'm paying for it all as my gift to them, they are great people, but it's after christmas just now, you know how it is with post christmas bills.
I'll see how much flowers are here, and love the idea of bits to dot around to cover flaws, and will go for the ribbon.
Awesome! Thanks for all your help, I really appreciate it. I've got my cake stuff, have tried a gumpaste rose (fun!!) and am going to do a trial pound cake in the next couple of days.
Will post my progress towards THE cake ![]()
Hoookay, time to update. I called her last night to confirm the date and time of the wedding. I'm also meant to be a bridesmaid, and be able to set up very early in the morn (cake included).
And it's now for 200 people.
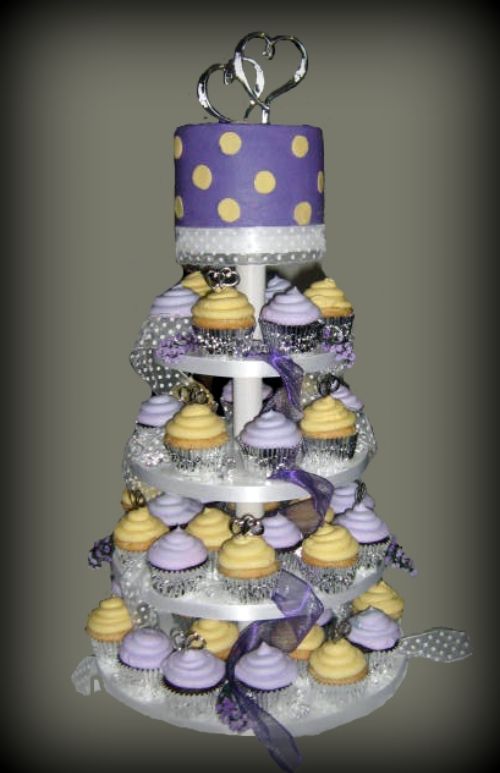
I'm doing cupcakes with a tier to cut. I'd rather stuff around gluing on little flowers than attempt a cake that big at this stage! Off to look at making a stand today.

here is some instructions on how to make this stand that I have made...very nice and sturdy and reuseable and you can change the look of it with the ribbons:
I bought MDF wood (medium density fiberboard) you could use plywood or anything else you wanted to use. MDF is very heavy, I bought 1/2" thick, but again any thickness you want is fine (I got 1/2" thick so I could use ribbon around the edges). I used my cardboard cake boards as a template to trace an outline onto the wood. Then using a jigsaw, I cut them all out, cutting just on the outside of my outline.
Once they were all cut out I used an electric sander to sand the edges up to my outline, making sure they were nice and smooth and that the whole thing was evenly round.
Then I used a drill and drilled a hole into the center of each round I had cut out (the hole needs to be just slightly bigger than the size of your center rod, my center rod was 3/8").
Then I bought a length of dowel that was 2" in diameter (I think it was a 2 or 3 ft. section), and cut it into 4" length and some into 6" length (for when I need more space between the layers of the stand). i drilled a hold through the center of each of the sections of dowel (it's easiest if you start on one end and drill a hole to the center, then flip it over and drill from the other side to the center, until your holes meet), the hole doesn't have to be "perfect" but you should attempt to make it at straight as possible, you can adjust the dowels before tightening the stand if they're not perfectly straight.
I bought a 3/8" nut for the bottom of the stand and a 3/8" t-nut for the top of the stand (this is a nut that has a flat top with three teeth that you pound the nut down into the hole and the teeth grab into the wood making it a permanent fixture with the wood, since my top is almost always the 6" board I just put the t-nut into that board and it allows a cake to be placed on top without interfering).
Then it was just a matter of screwing the center threaded metal rod (mine was 3/8" in diameter) into the bottom tier of the stand with the regular nut going underneath the bottom board (the nut will still stick out so I cut an extra 8" round and cut a large hole in the center to use as "feet" for my stand to sit on to alleviate the fact that the nut sticks out of the bottom, or you could just glue on some permanent feet, but I wanted to be able to change up what size the bottom layer would be depending on the numer of cupcakes i was using the stand for.)
Then just slide on one of your dowels onto the metal rod, then slide down the next sized board, another dowel, etc. until you've reached the desired height of your stand. Once you have the top board on (you'll have to thread it down because of the t-nut) and everything is nice and tight, then take a marker and mark the top of the top tier on the metal rod (there is no measurements for the metal rod because it all depends on how thick your wood is and how tall you make your dowels)...then remove the boards and dowel and cut the metal rod with a hacksaw a couple threads below your mark. You don't want the metal rod to stick up but you want enough that it can screw into your t-nut on top.
Then you can prime and paint the stand, I use spray paint and spray primer, for paint I use a semi-gloss so it's easy to wipe clean once it's been used. It's best to do several coats so if you get a scratch on the stand it won't show as much. In order to attach the ribbon to the edges (double sided tape won't stick to mdf) I use a hot glue gun, or extra strength glue dots for a more shear ribbon (note, when I use a sheer ribbon, I put a white satin ribbon on first, then the sheer ribbon because the edge of the mdf board doesn't take the paint as well as the rest of it)
Hopefully these instructions are clear enough, if you have any questions feel free to pm me or email.
Good Luck,
Tina
Quote by @%username% on %date%
%body%