


I thought I'd seen that before. Here's the link to Wiltons drections on how to do this.
http://www.wilton.com/decorating/basic/crownborder.cfm
I would say to just practice practice practice! Lay down a piece or wax or parchment paper and crown border until your arm falls off. Then scoop all the icing bag into your bag and do it again until you get it right.
Make sure your icing is stiff, as suggested, and that your hand isn't melting the frosting. I have hot hands and I find that if I have 2 bags with the same frosting in it and a coupler, to switch out tips, I can switch bags. That way, I can decorate with one and have the other in the fridge, firming back up. HTH!!!

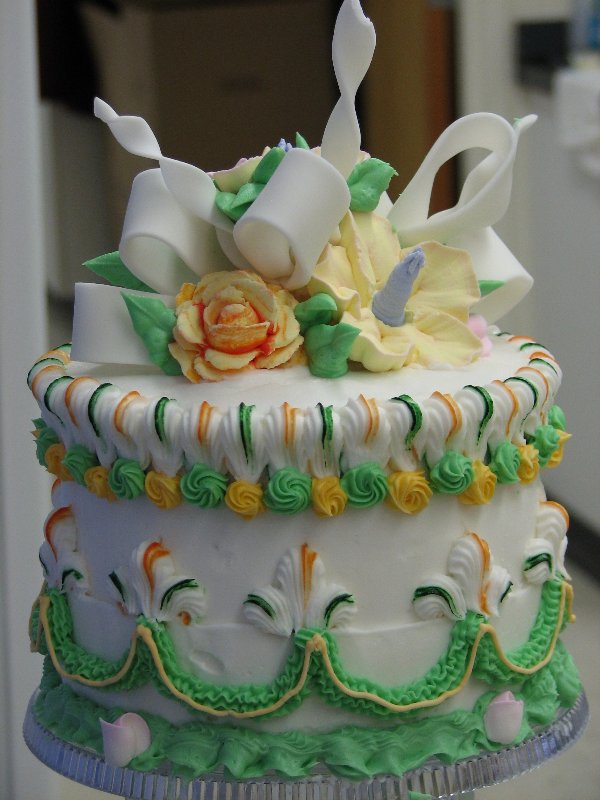
I'm posting a photo of the crown border on the top of a cake I did at classes at Wilton.
It's a bit tricky to get the shell all the same height and length, so yep, practice is the key. That said, the best way to practice is to set up a vertical surface and to do the shells so that they extend above the top of it. Practicing them on a flat/countertop surface is pretty futile because it's easy to make them all line up top to bottom--not so when you're doing it on the vertical.
Have fun--it's really pretty when it's done on a classic cake.
Rae

Wow That is really affective! Just givin me some ideas hahahaha
That cake is beautiful. Throw in some purple, and it would be perfect for Mardi Gras!
Theresa ![]()

I talk to myself when I do shells. I say squeeze squeeze stop. Than my shells are the same size cuz I am doing something consistant.
Tell me I'm not the only one who talks to her shells.
Rachel

rae, how did you get that extra color in the middle? i love it!
Hi, Jessica.
Well, the color came from doing a "no-no"--I striped a disposable plastic bag with 2 colors--orange and green (not really supposed to do that technique with disposables ![]() ).
).
I striped the seams of the Wilton disposable plastic bag with Wilton colors-- green and orange--and then turned the bag to the alternating color for each shell. For being a no-no, I think it turned out pretty well ![]()
Rae
Hi, Jessica.
Well, the color came from doing a "no-no"--I striped a disposable plastic bag with 2 colors--orange and green (not really supposed to do that technique with disposables
I striped the seams of the Wilton disposable plastic bag with Wilton colors-- green and orange--and then turned the bag to the alternating color for each shell. For being a no-no, I think it turned out pretty well
Rae
it's gorgeous! don't worry, i won't tell! lol

I talk to myself when I do shells. I say squeeze squeeze stop. Than my shells are the same size cuz I am doing something consistant.
Tell me I'm not the only one who talks to her shells.
Rachel
![]()
![]() Are you kidding I even talk to & rub my KA
Are you kidding I even talk to & rub my KA ![]() You are NOT alone.
You are NOT alone.
You know your addicted to cake when you talk to it ![]()

The gel colors, in particular, don't adhere to the sides of the bag very well. They tend to form lines of bubbles, not even lines. It can lead to streaky or spotty results.
You're really supposed to use parchment (non-silicone coated, if available) or featherweight bags. The lines on those are more even.
I was in a hurry to finish on time, so I just made a couple of swipes of color pretty thick and it worked--may have just been luck, so I want others to know the "right" way.
Truthfully, I'd do it again because it was easy and the clean-up was quick. ![]()
Rae
Quote by @%username% on %date%
%body%