


(my cake pops as well)
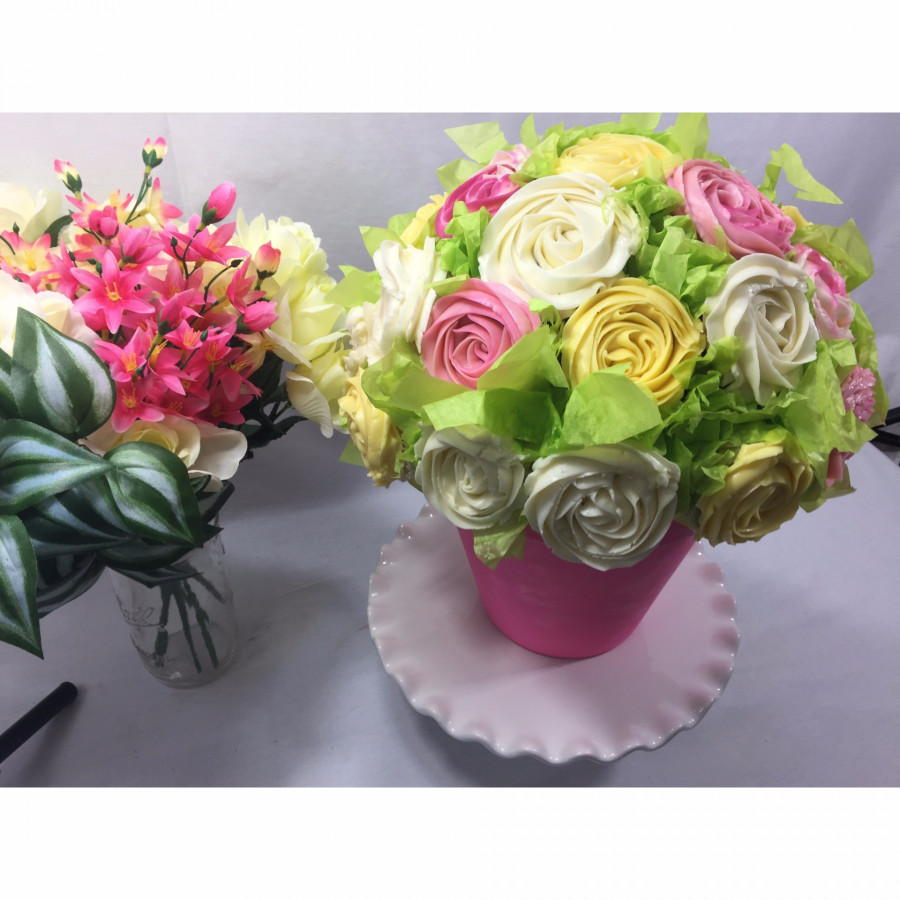
Recently started messing around with cupcake bouquets, I get a ton of interest whenever I bring them to a party but the few paid offers I’ve received were close by friends / relatives / my daughters teacher and I delivered them personally by having my mother or assistant drive and I sat with the bouquet in my lap making sure it didn’t tip or smudge at all. I need to be able to deliver this solo if I want to offer it on my website or really promote it but I cant for the life of me figure out a good packaging solution that wont allow this to tip or be bumped or smudged up against the side of the box. I don’t and wont use crusting buttercream by the way. The bouquets are typically sat inside of a terracotta pot with a weight in the base to keep it standing up right.
No one offers these locally so I cant take a look at their packaging, they aren’t packaged In the few online examples Ive found
Has anyone produced or seen anything similar and can offer some advice?

I make something similar, out of curiosity how much are you charging for them? I priced mine at $40 but haven't had any orders besides friends that I only charged $20. Its not worth the cost and effort for $20.
I put mine in a box without the lid than put skewers in the corners. I than wrapped plastic wrap around the outside. I didn't tape the bouquet to the box though so I ended up stopping to quick and it tipped over. So next time I will tape it down. Hope that helps a little!
I charged $55 for the blush pink multi flower. Didn't charge for the pink terra-cotta pot with the roses so unsure what I would have charged . the easter one mini cupcakes was a crap ton of cupcakes for a church event that I charged $75 for but honestly that was discounted because it was for church that many mini cupcakes + box, pot, time painting pot, tissue paper, bouquet bag, toothpicks, styrofoam ball and the time to secure them all. Other bouquets have been between $45 and $120 (that one used jumbo cupcakes and a 8" styrofoam ball)
I also have designed some smaller more budget friendly bouquets using small porcelain pots / Pails / tins from the dollar store and 5" styrofoam spheres, those are only $30.00
People pay a LOT for floral bouquets so I don't feel remotely bad for charging enough for a bouquet that is not only beautiful but edible.
The box is a good idea! I carry three sizes of cupcake bouquets so I guess I'll have to go box shopping. Im definitly going tape it down, a tiny smudge really ruined the whole thing.
I get most of my pots from 99 cent stores or dollar trees, styrofoam balls I get online for super cheap compared to stores. If you can't charge a little more really try and cut down your cost and time but I would never sell these for $25, I think I'm undercharging but I'm unsure

The only real safe way is a box with a "frame" on the inside.
Start with a box. Then place in a cardboard that is a "U" shape and fits halfway down into the "outside" box. The "sides" of the "U" slide inside the box, and become the "legs". The legs need to be tall enough so your pot/bouquet sits just below the "rim" of the pot and doesn't tough the cuppies. Cut a hole in the center of the "U" to just fit the pot into it.
The overall box should be tall enough to enclose the whole bouquet and you can cover it anyway you want.
Thank you! that makes a lot of sense. I'm guessing I should glue the U cardboard form into place before I skip the base of the pot down ? Or maybe put paper or something underneath it to make sure it stays at the height that por up
I'm going to go to the box store tomorrow and get supplies to make it as you suggested, drive around and see if it holds up then report back. Hopefully save someone else some trouble and smushed cuopcakes
SET UP BOX BEFORE YOU MAKE BOUQUET. It is easy to mess with an empty pot...no so much when it is assembled.
Measure (estimate) how tall the bouquet is. Use this as a guide to pick the size of the "outside" box.
Measure up the pot to see exact how tall the "legs" need to be. That is....where you want to support the pot. So, if the outside box is 12x12, and you want to support the pot at 4" from the bottom, you want a piece of cardboard that is 12 by 20 (12 wide plus 2 legs of 4" each). Fold down the "legs" and test it in the box. You don't need to glue it in. It just holds in place. Cut carefully so everything is tight----no wiggle room.
Pull "U" back out. Now cut a hole in the center of your "U" piece for the pot. TIGHT. You should almost have to jam it in. Test it in box--- the "U" cardboard and the pot. Snug?
Assemble and pack. The box can be covered with wrap as the box itself is a "tent" and keeps the plastic/cover off the bouquet.
REMOVAL. I instruct recipient to cut down two sides of the box, top to bottom to open a "flap" to pull out the "U" and bouquet. Push down "U" to remove pot and handle bouquet by the pot/bottom.
spammers...<sigh>
I forgot to add, ANY pot/ box/ pail for the bouquet will work. Just make the "U" legs up as high as possible without touching cuppies and low enough to have the bouquet actually resting on the box. That is, it should NOT be suspended. The bottom of the bouquet should touch the "outside" box once you force the pot through the hole you cut in the middle of the "U" frame.
AND if you feel that it is still "top
heavy" you can add a brick or rock under the "U" frame. Just tape it
down so it doesn't slide into the pot and break it. You should have some
open, dead space under that "U".
Quote by @%username% on %date%
%body%