




here is a link for doing Frozen Buttercream Transfer. It is the same technique for chocolate transfer except you use chocolate.
http://www.cakecentral.com/article12-How-To-Create-a-Frozen-Buttercream-Transfer.html

I think I know the answer but if I'm wrong, someone correct me. You start out by outlining the picture with the black icing. After that, you've got to work from the foreground to the background so to speak. You're still on the front of the waxed paper. After all areas are colored in, you smear the whole picture with your icing that's the color of the top of your cake. Then you put it in the freezer for 90 minutes and continue from those directions.
It seems to me that you'd need to freeze the paper after you completed all the areas before spreading the icing color over the whole thing. That way you'd avoid smearing the colors together. I hope this helps!


 Thanks for the info forthwife!!
Also, see the whimsical bakehouse website for tips, some templates and directions on chocolate transfers. There are a few other tutorials on the web too, if you go a google search on chocolate transfers. I have done several choc transfer cakes (almost every cake I've decorated so far--my 3 yo son thinks all birthday cakes have to have 'chocolate cookies' on top  ) and the choc transfer technique is very easy. You can use wax paper if you like, although plastic wrap will make it a more shiny finish (doesn't need to be acetate sheets or whatever........you only need to make sure there are no wrinkles!) I find it MUCH easier than frozen buttercream transfers, b/c you can get much more detail and because you don't have to freeze it at all, and/or worry about it thawing.
Anyway, most of my cakes have choc transfers on them....take a look if you like, or not...... I would be happy to help you with any other specific questions too. Good luck and have fun!

Scrapbook sleeves are fine to do the chocolate transfers on. They're chemically identical to acetate. They're foodsafe, but NOT meant to be eaten. Regarding how I do the transfer. NEVER add water to your chocolate, it will seize up and be ruined. Melt your chocolate (candy melts work too) in the microwave (or a double boiler) add your colors (oil based candy colors) and a small amount of shortening. You'll want it *slightly* thinner but not watery. It's like a reverse painting. Outline first, color details then fill in the body. To do the "Big Bird" in my pics I actually used a coloring book image. Outlined the black, filled in the pupils of the eyes, the tongue, eyelids, then the whites of the eyes, and lastly dumped a bunch of yellow for his body. Do let your chocolate dry between stages (10ish minutes). Once you're done, pop it in the freezer for 5ish minutes and Violla! Oh, as a side note I tape my image inside the sleeve so it doesn't move. Then I tape the sleeve to a large glass cutting board so it can be moved from counter to freezer easily without bending it. Good luck!!! (PM or post back if you have any other questions.)
Arainna Forth
The freezing step is optional for chocolate transfers. I never freeze mine.
And you can use any basic graphic you can find on the web too. Coloring pages, outlines, whatever. The sky is the limit.
Also, if you use Merckens wafers, you may not need to add any shortening at all. With Wilton's, you generally do. Wilton's wafers do not melt as consistently and sometimes remain slightly thick and glumpy (haha....I know it's not a real word, but it's oddly appropriate here.)
I hope you will at least wash the scrapbook sheets before use. Scrap aluminum at Lowe's is chemically identical to reynolds aluminum foil, but I wouldn't be using it as food-safe product.

You can find many outlines/drawings online also. One thing to be aware of is that you may need to reverse the image if doing a face of some sort. I use only Wilton candy melts and have never had to thin them at all. I melt them in the microwave and stir them until smooth. I actually like using the Wilton melts because I can combine colors to get what I need or use the candy colorings.
Something else that can be used as a surface for your CT is a report cover or what I use is plexiglass. I will put the transfer in the fridge for a few minutes to speed up the process, but if your house is cool it will work just fine at room temp.
Also, just a quick tip, when I'm doing a transfer and have multiple colors set up, I use a heating pad on low to keep the chocolate at a workable temp. When you're working with as many as 10 different colors this really helps!
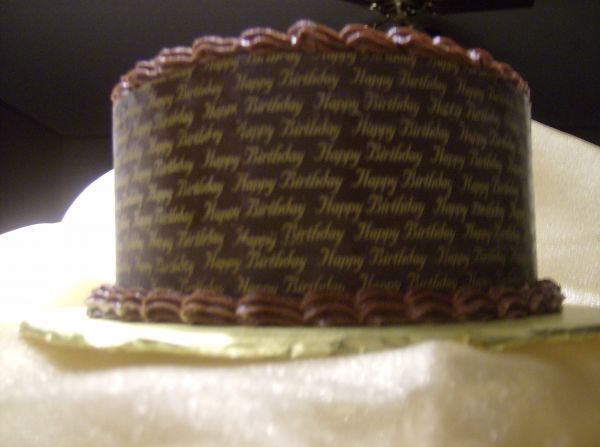
I did a chocolate transfer onto a cake and it turned out fabulous!!!!
I ordered from Country Kitchen SweetArt. They have the sheets already prepared and include easy to follow instructions. Here's the example of what I did on a six inch chocolate cake.
Good Luck,
cakeymom
Aside from just cutting a teeny, tiny hole in the end of your bag....... at just let the littlest bit of chocolate out.....it will spread a little when it hits.....
Actually, you have the most control if you make your own icing cones, but the parchment triangles that are usually used for this don't work so hot with the chocolate. Cellophane sheets work best and are available from several online decorating suppliers. But, I realize that doesn't help you at the moment.
You should be able to do it with diposable bags though. All the faces on my animal cake and pooh cake were done with just disposable bags. They are far from perfect, but I don't think they are "crazy" Try cutting a teeny hole....and you can also experiment with whether a small angled cut or a small straight cut will work best for you. I think most people will have better control with an angle, but sometimes that makes the hoel a little bigger than a straight cut would.
Sorry I can't help more.
Quote by @%username% on %date%
%body%