


A lot of people have been asking for the photos that I took of my hiking cake while it was in progress. I've been emailing them to people individually, but mellormom mentioned that I should post them in the forum and save myself some time.
So here are the photos with explanations on them. Sorry about the middle section where there aren't photos - I forgot to take pics in those stages. Let me know if you have any questions!
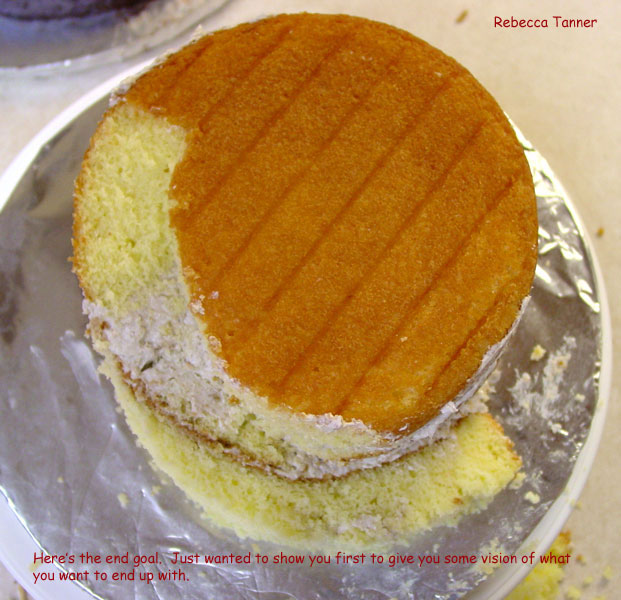
And don't forget to take a look at the finished cake in my photos!

 .......great pics/great explanation!!
Your cake is AMAZING, but i am having a brain block cause I just don't understand your instructions after you cut the first diagonal.
When you say take another layer of cake....what does that mean?
How many cake layers did you bake for this cake? I am sorry, your instructions seem very clear, it's just me and i am confused. LOL
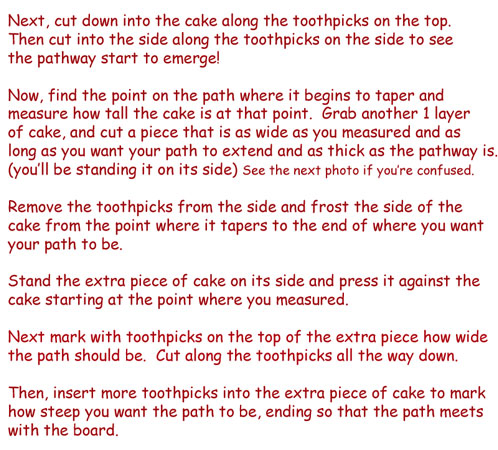
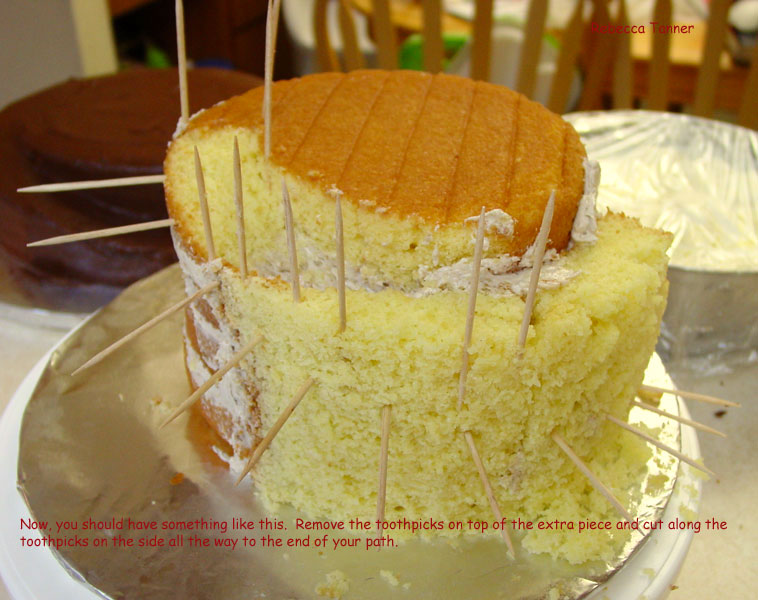
I just bake one extra layer for each tier that needs to be spiraled. I cut out a piece from the middle of the layer that is as wide as the cake is tall (so I can set it on its side). Then I carve it down to match the height of the spiral as it goes down. Please let me know if that's not clear. I'd love to help more. ![]()


Missmersh,
Well, not exactly. I don't cut it like I'm leveling it. I just cut straight down into the layer to get a chunk of cake that is as long as the cake is (for example, an 8" cake would make the chunk 8" long) and cut it as wide as the ramp is tall (if the ramp was 4 inches tall where it started to become thinner, then I would cut the chunk 4" wide - the chunk would end up being 4"x8"). I turn the chunk on its side and wrap it around the cake. Then I use the toothpicks as guides to taper the height of the path and the width of the path.
Hope that helps!
Thank you so much for taking your time and explaining your technique further!!! I am still having a blockage...must be age. But I think if I am actually in the midst of it, I might can figure it out.
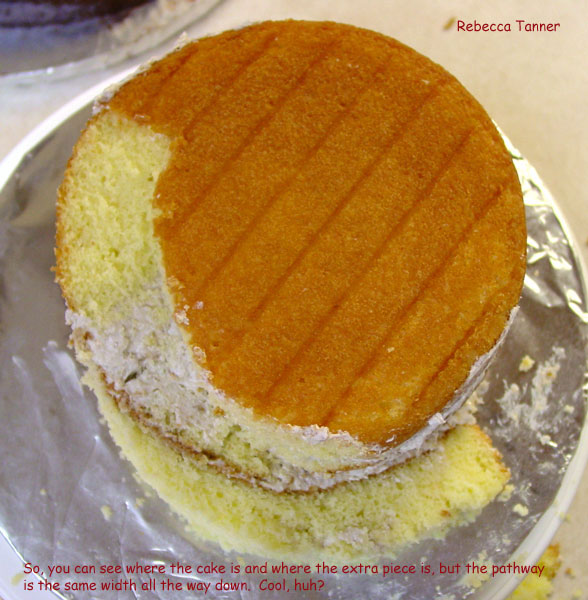
I keep studying your pictures, but I keep thinking there must be an extra step cause if you look at picture #4, the added cake tapers off to the left. It doesn't look like the step I am picturing in my mind. You probably are thinking....dumbo, just figure it out for your self! LOL
Again, I truly appreciate you breaking it down further. I am sorry I am so dense. ![]()
Your cake is precious!!!
Thanks again!!! ![]()
Missmersh,
No, I don't think you're dumb at all! ![]() It's just one of those things that would be so easy to show you, but it's hard to explain!
It's just one of those things that would be so easy to show you, but it's hard to explain!
So, most likely, it would make more sense if you're in there trying it out - let me know how it goes, and I'll do my best to communicate well!

This cake is fantastic! I have read and re-read your instructions, and I think I've got it. I'm going to try doing something like it this weekend. Only one thing I'm not clear on: the picture of the finished cake looks like it has more layers (and thus a longer path) than in the instructions. On the finished cake, did you add more layers and do the same process again to make it taller than the one in the instructions. If not, then maybe I don't have it figured out!
Thank you so much for posting your instructions! Your cake is just adorable!
Jackie

Hi, I am having such a hard time with this ![]() , and yet your instructions and pics are sooo clear.
, and yet your instructions and pics are sooo clear.
Would you please tell me how many layers of cake you baked to begin with? ![]() And they are all the same size, right?
And they are all the same size, right?
Thanks so much for taking the time to share!
Quote by @%username% on %date%
%body%