

57 Chevy Cake Hints (Kinda Like Instructions But Not Quite)
Decorating By meancat Updated 14 Mar 2011 , 9:48pm by strawberrygirl
I had a ton of requests for instructions on the car after I uploaded it, so here they are... for the most part. To be honest I didn't really have a plan, I just did what I thought needed to be done to make it look right.
First I cut a platform out of thin Elmers foamboard to form a 'frame' for the car to sit on. The overall dimension will depend on how big your cake turns out AFTER you are done carving it. After the cake is all carved, hollow out the wheel wells with a spoon and cut the foamboard exposed underneath. Then I cut two smaller pieces of foamboard to make a pedestal for the 'frame' to sit on. I glue them together, then glue the frame to the pedestal. The two smaller pieces have to small enough to fit between the wheel wells, that way the tires can go on. 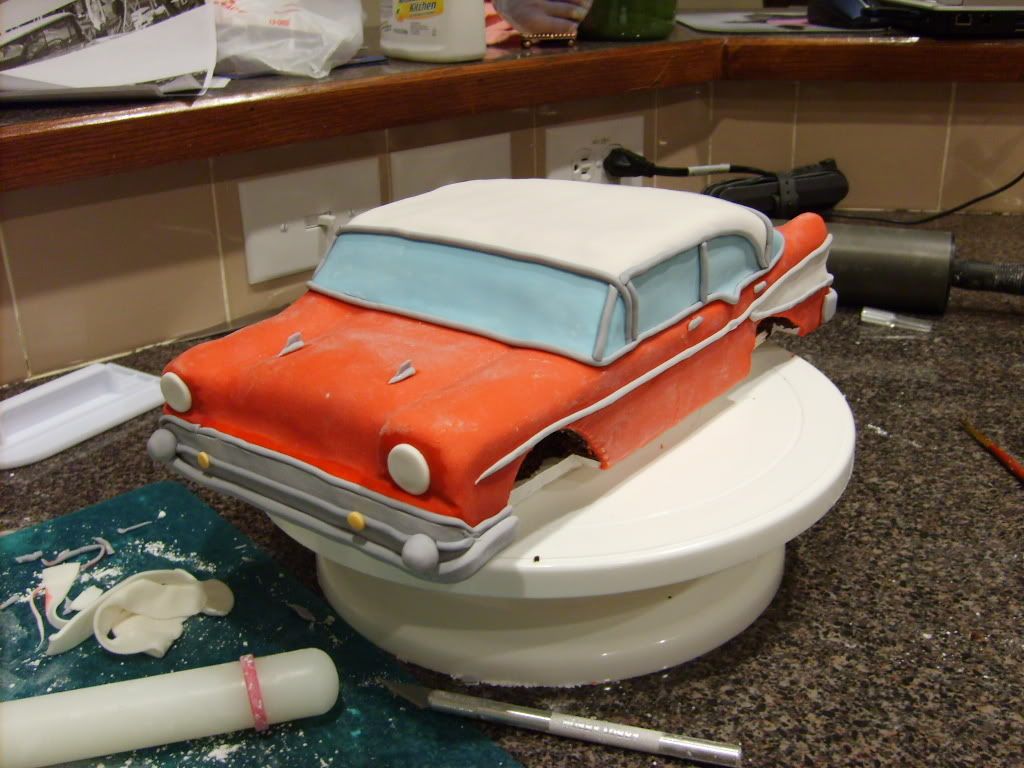
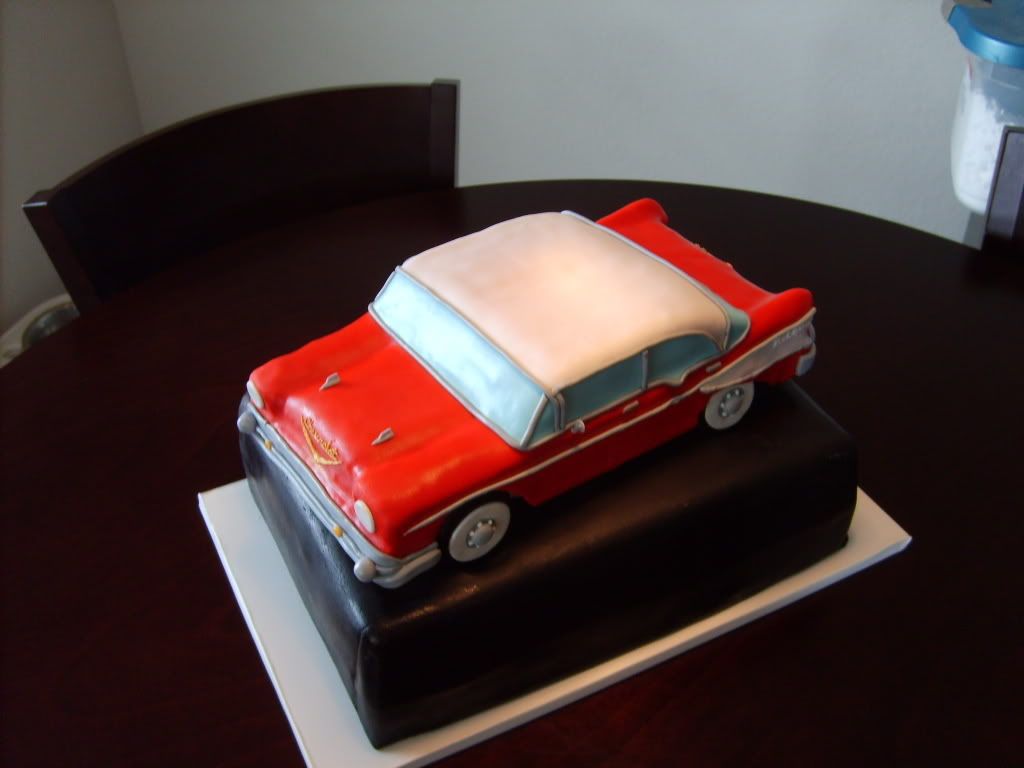
The tires are just generic duplex cookies (because they are bigger than oreos) covered in fondant.
I printed out a picture from the internet and carved it out after I stacked 3 13x9 cakes on top of each other. I wish there was more to it, but I just did it by eye, no pans or guides, just a ruler, an exacto knife (to get a guideline on where to cut, and a household carving knife.
Before I laid the red fondant over the car, I placed a strip of fondant on each of the back fins from front to back to ensure they didn't flatten with the weight of the fondant. The light blue windows are real thin rolled out fondant and the grey body lines and window trim is all softened fondant that was applied with a 'Makin's Clay' extruder http://www.makinsclay.com/US/eng/products/gun_extruder.htm (a must for any cake decorator). I find myself buying more products in the clay aisle at Hobby Lobby than any other equipment.
A lot of it is trial and error, and there is a small learning curve, but just start carving and remember to go slow, you can take more off but you will have a hard time putting it back on ![]() . I also suggest geeting a few "actual size" pictures of what you're making from the internet to have handy.
. I also suggest geeting a few "actual size" pictures of what you're making from the internet to have handy.
I hope this helps a little


This is awesome! I want to make a 56 Belair this summer, this is really helpful! Thanks for posting.

Quote by @%username% on %date%
%body%