Ombre Buttercream Ruffle Cake Tutorial
Printed From https://www.cakecentral.com/tutorial/39921/ombre-buttercream-ruffle-cake-tutorial 2024-04-26
Ombre is all over the cake world right now, so much so that we devoted an entire issue of Cake Central Magazine (Volume 4, Issue 4) to the eye-catching trend! Follow this detailed tutorial from seb1079 to learn to make your own ombre buttercream ruffle cake, complete with tips and tricks for making your color brighter and your ruffles straighter. 


Materials
*Cake Your favorite, pipe-able buttercream 4 or 5 Piping Bags Couplers (optional) Petal Tip (I used Wilton 104) Food Coloring Turntable Three 8-inch round cake pans
Instructions


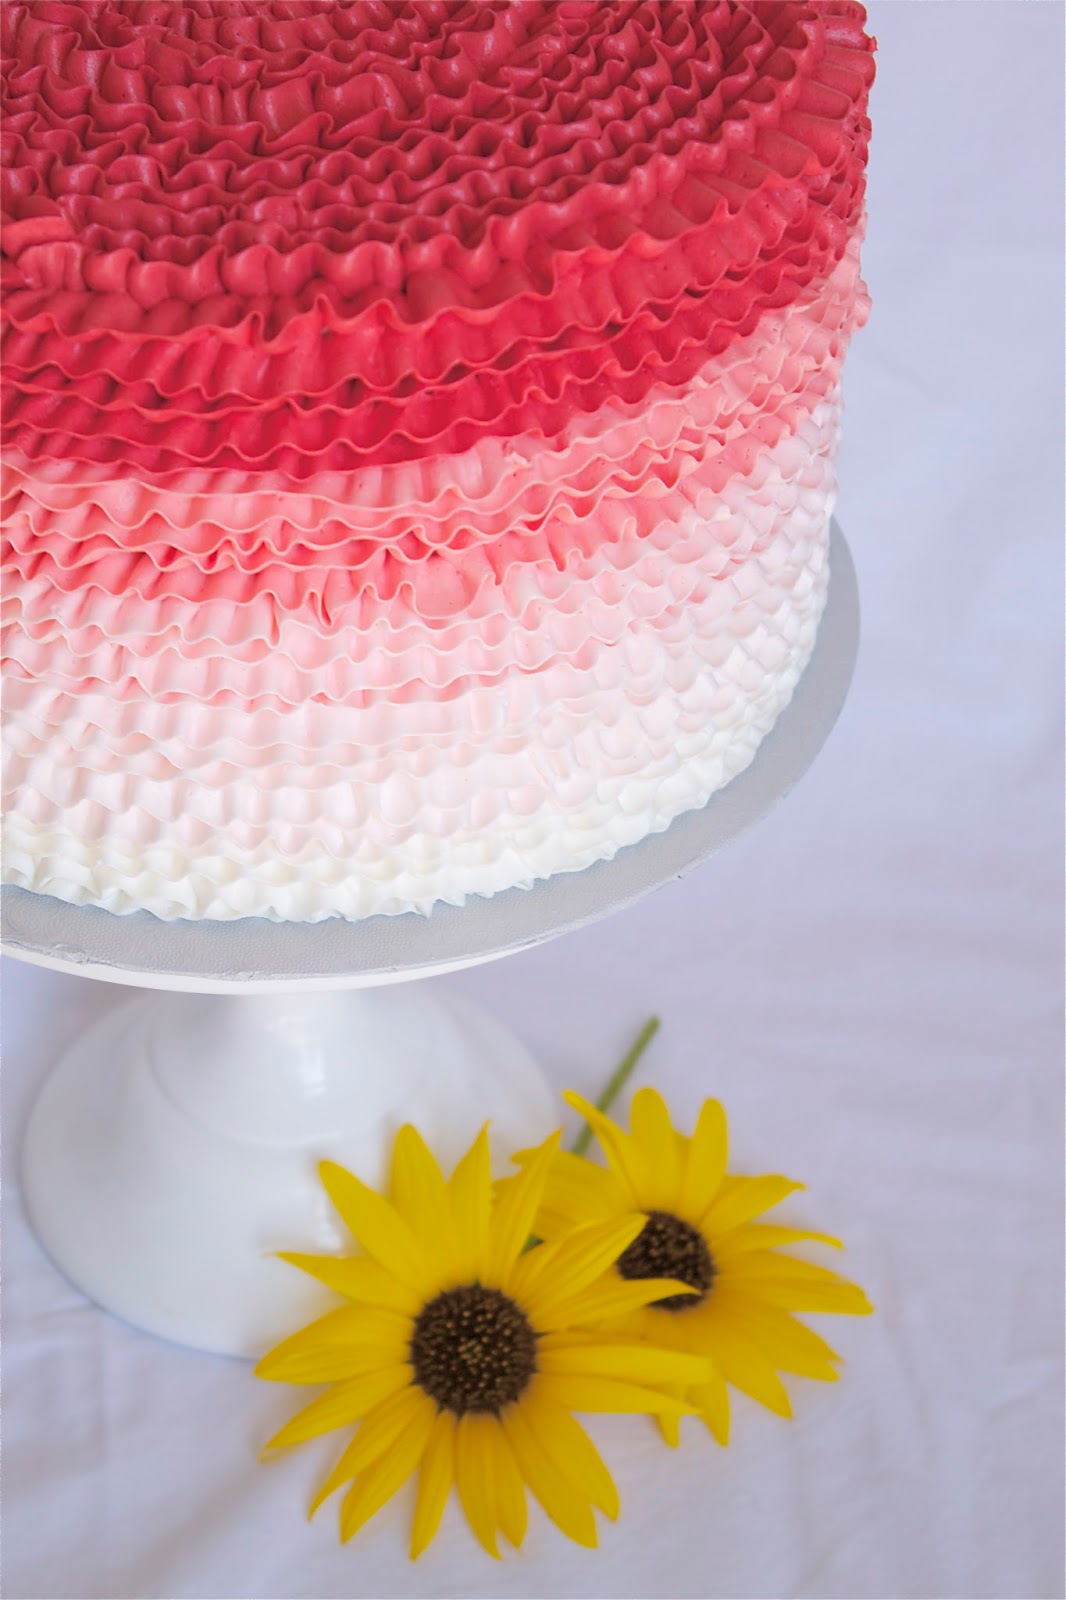
Crumb-coats: not pretty, but essential for a smooth, crumb-free frosted cake! Next comes the fun part: let the frosting begin! I opted for an American Buttercream (versus a Meringue-based Buttercream), incorporating both butter and shortening. Butter adds flavor, while the shortening adds a better medium for decorating (piping). The shortening in the frosting also keeps the frosting nearly white, better for coloring. The shortening also will help your piping hold up longer on warmer days, whereas an all-butter frosting will quickly . . . well, melt like butter.  Top frosting: recipe ratios involve 1/3 butter, 2/3 crisco [w/ 1 t. pure vanilla, 1 t. clear vanilla] Bottom frosting: All butter Buttercream [1 T. pure vanilla] The pure vanilla added even more color to this one, which is already off-white due to the butter color. I used about 6 cups of frosting for a base coat (over the crumb-coat) and for the piped ruffles on this cake:
 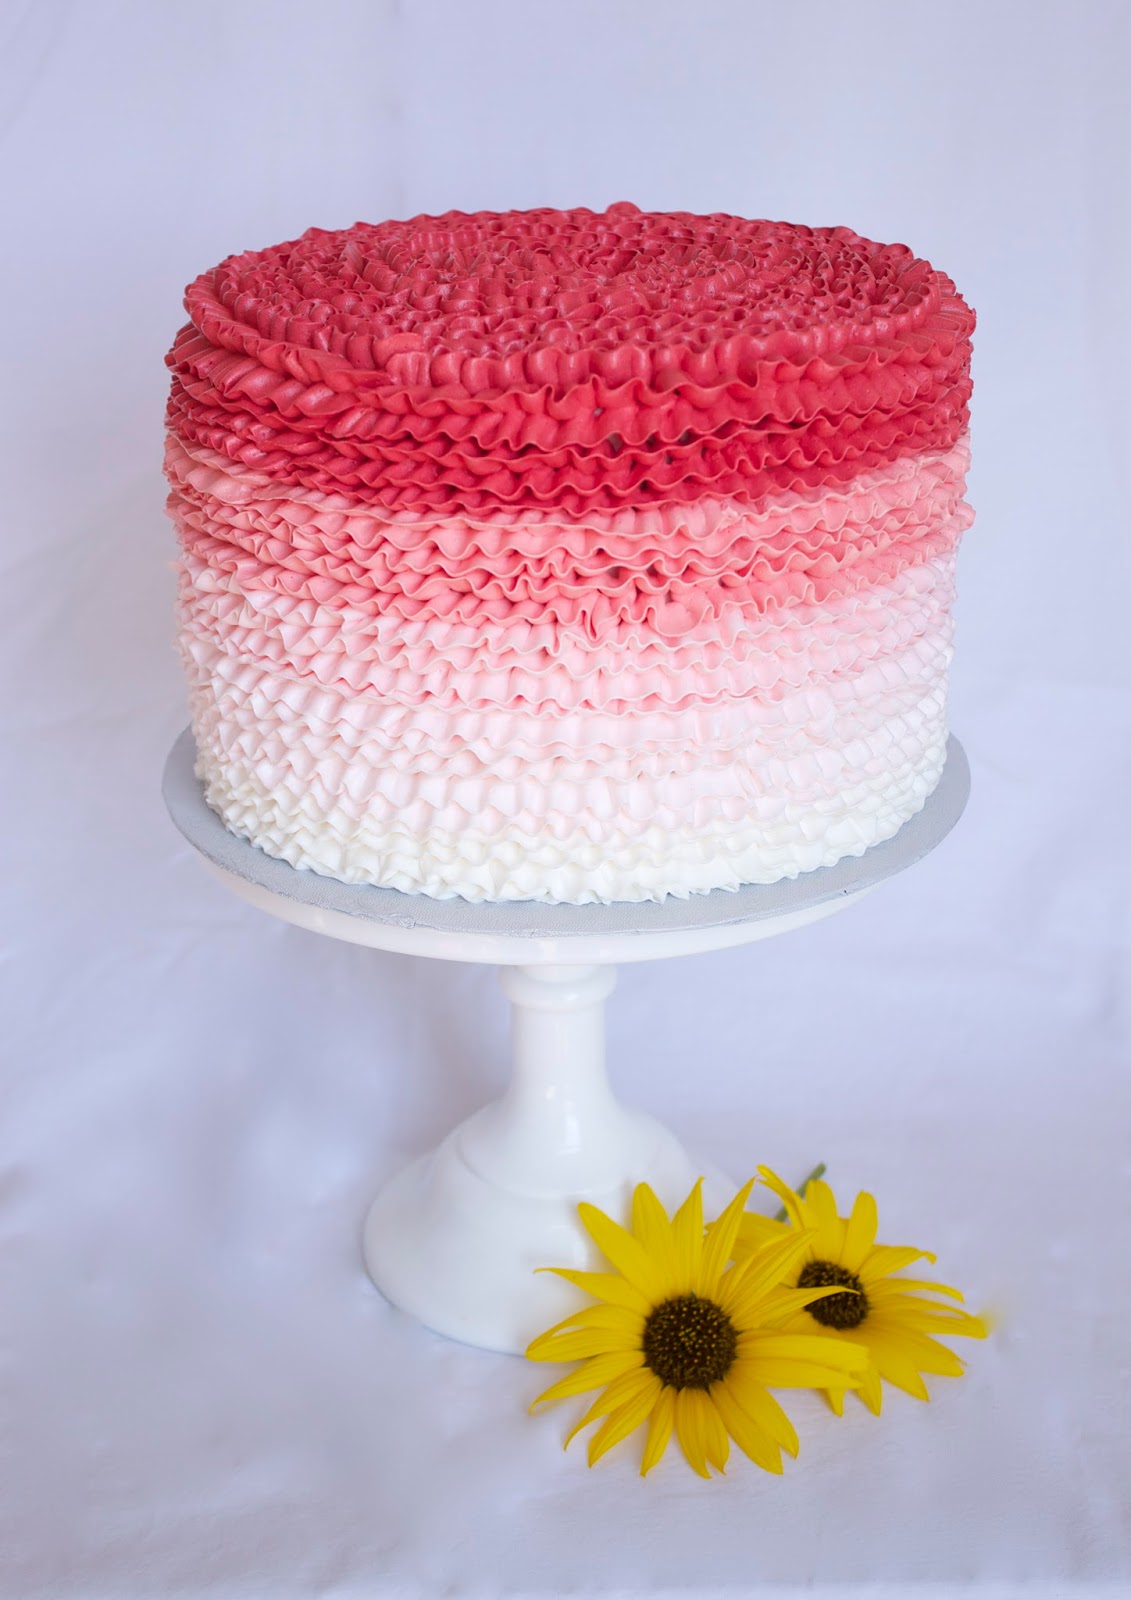 Back to decorating the cake! First, cover your cake with another layer of frosting (I colored mine light pink–it was a good medium to test my shade of red–Americolor Super Red, with a touch of Americolor Soft Pink in the darker shades), over the chilled, firm, crumb-coat. This gives a nice, soft, smooth, level base for the ruffles to adhere to.
  TIP: To make this ombre effect easier to do: prepare as many piping bags as you need, one for each color of frosting you will use in your ombre cake. Disposable, re-usable, parchment, any. If you don’t use parchment, this is where couplers come in handy, so that rather than having 5 petal tips on 5 bags, or having to dig out your piping tip from a frosting-covered bag to put it in the next, or worse yet, emptying and WASHING the bag in b/w colors, instead you can simply unscrew the coupler, remove the tip, rinse the tip, place it on the coupler that is already in the next bag, done. BIG time saver. You can even find the 4 packs at most Walmarts, along with pastry bags. Inexpensive but crucial tools for this cake: it makes the difference between feeling almost effortless or nearly impossible. I used a medium petal tip, Wilton 104. First I lightly marked some horizontal guide marks in my frosted cake with a toothpick, then starting at the bottom and placing the wider end of the tip lightly against the cake, I piped my ruffles in a smooth, slight up and down motion to achieve the frills, while turning my cake turntable slowly and steadily with my left hand.
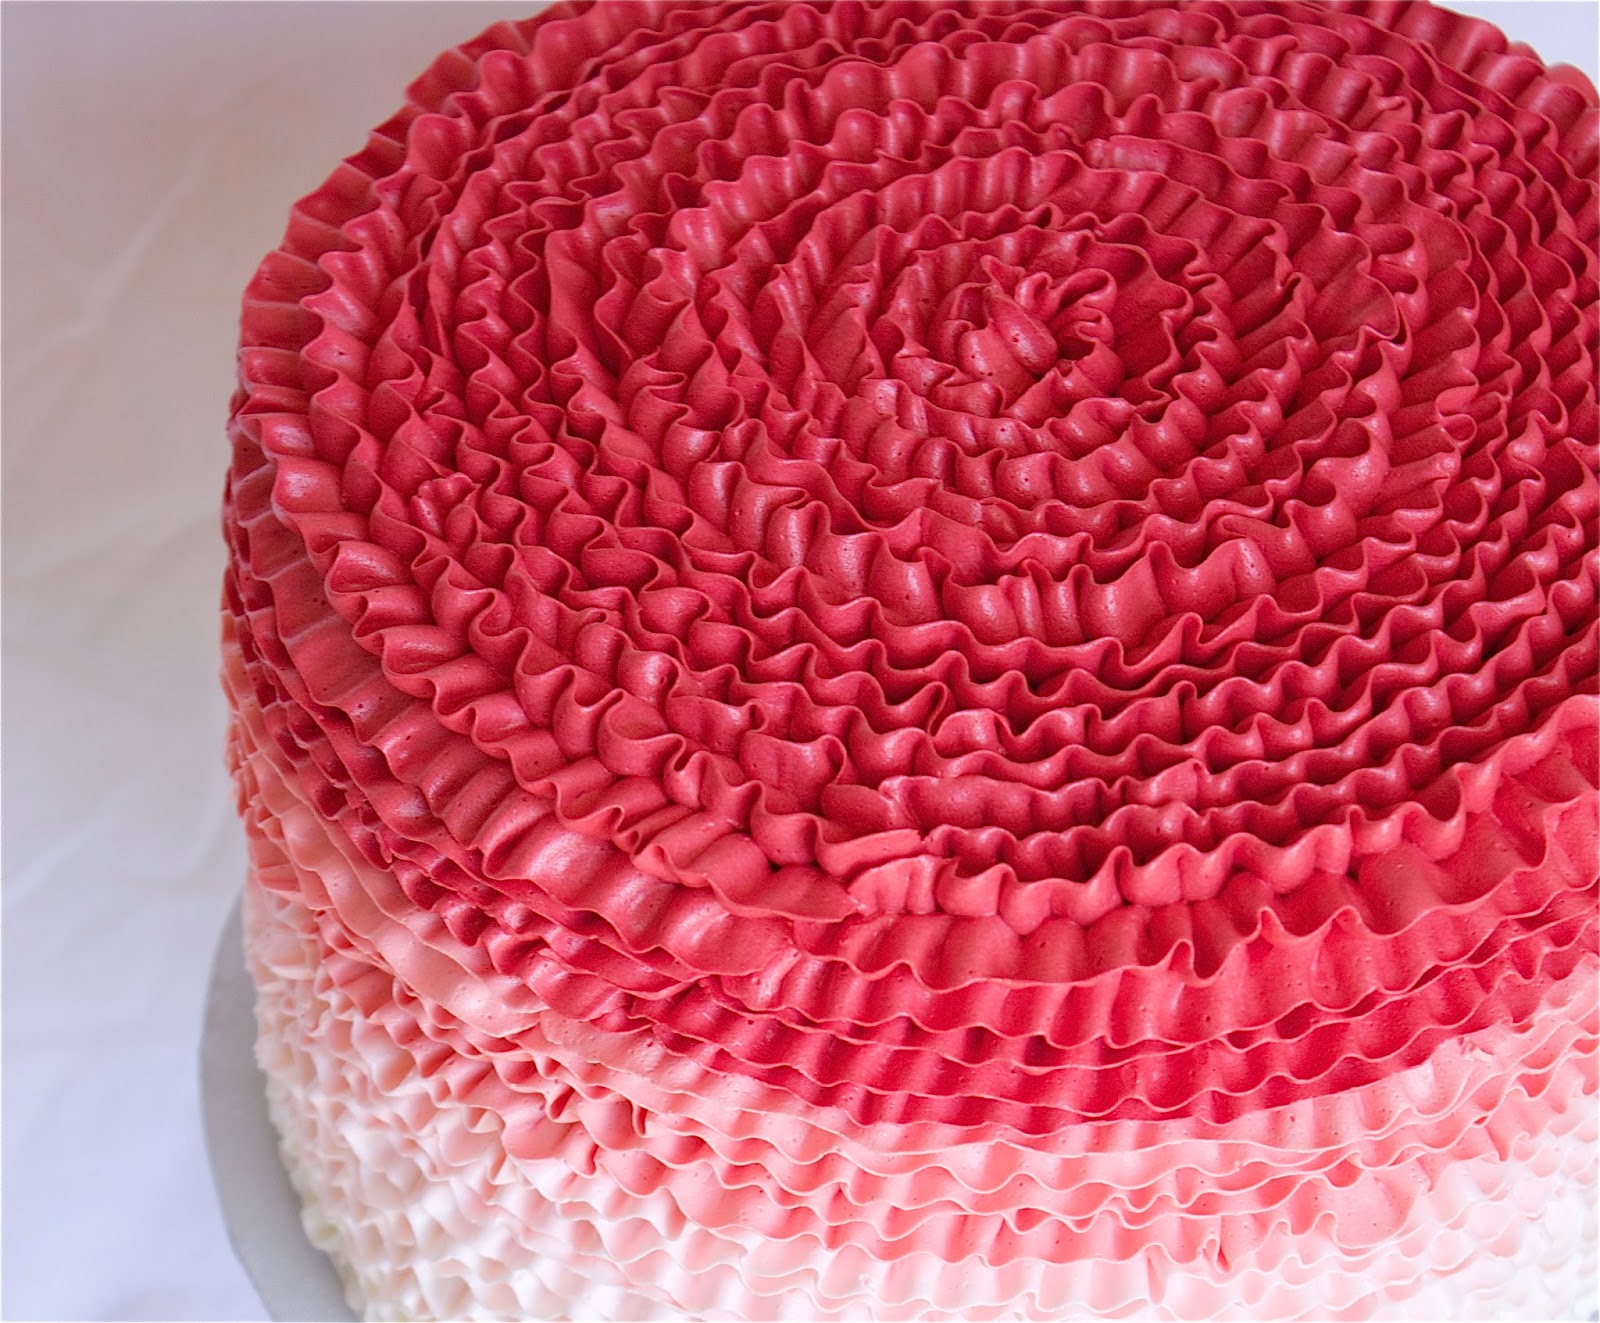
 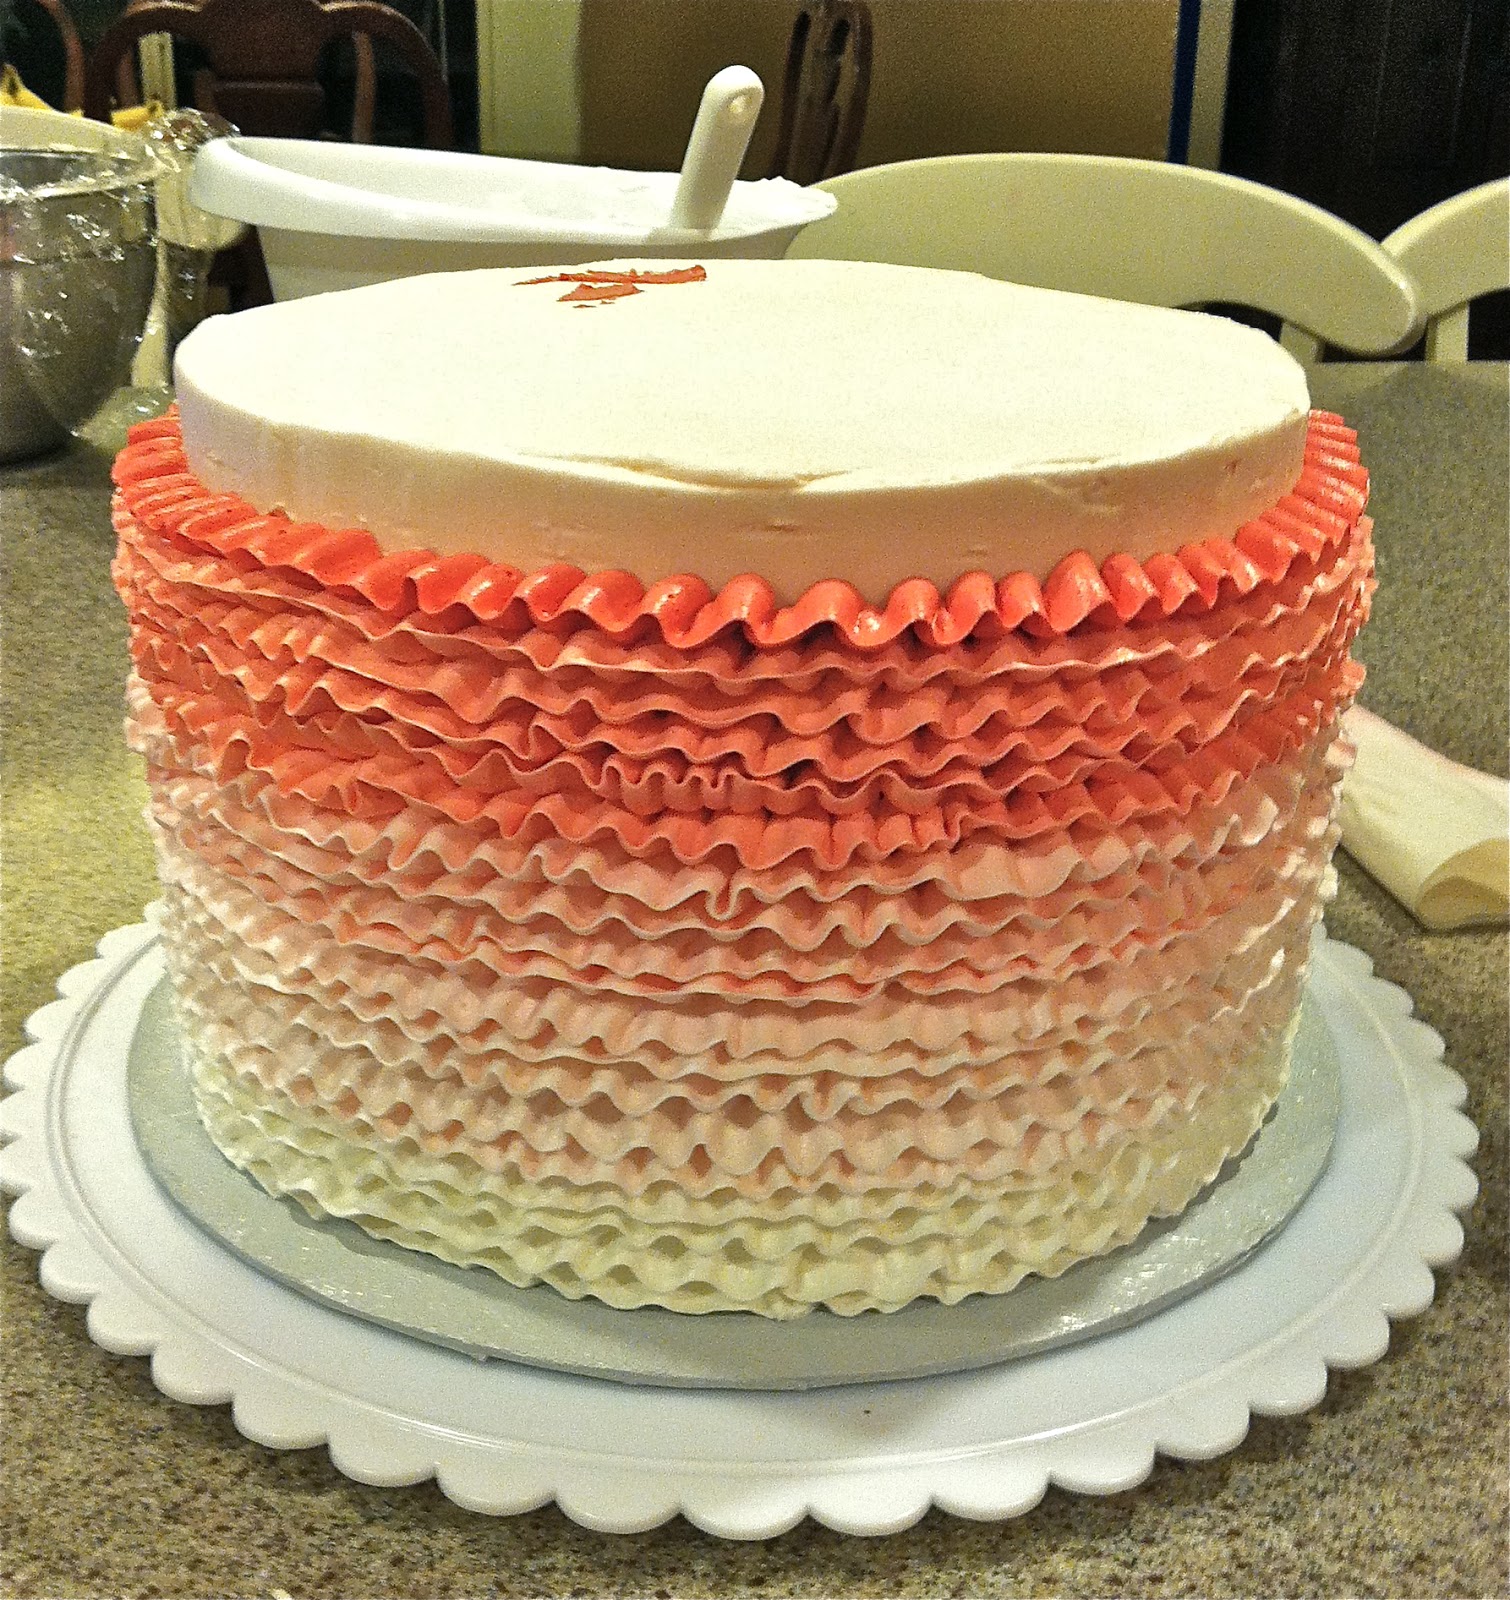 TIP 2: If this is a new technique to you, practice on wax paper first! You can always re-use the frosting. If you do goof, these are ruffles are surprisingly forgiving. Smooth your goof, or scrape it off, and carefully continue over it as if nothing happened. YouTube videos are great for watching piping techniques. I tend to be a perfectionist, but since I wanted a more natural, free-flowing look, I intentionally tried to pipe imperfect ruffle patterns and vary my angles a bit. After 3-5 rows, add a couple (or 20) drops of food coloring to your batch of frosting till desired color increase is achieved, then mix well. I ended up using more than half of a (small) bottle of the Super Red coloring for the whole cake. It takes a lot to achieve the darker shades! Fill the next piping bag, and continue to pipe your ruffles. Stop after a few rows, and repeat with a darker color. I used the top of my cake to test my final color. Follow these steps till you reach the top, and done!
Now comes the hardest part of making cakes for others. Not eating it.