


Hi everyone,
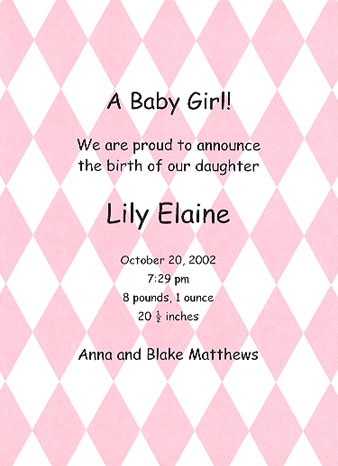
I have a request for a 1st birthday cake. The invitations are just a white and pink diamond pattern. The mom is going with pink and purple for the decorations. The cake will need to feed about 25 people. I was thinking of a rectangle cake frosted with white buttercream with the pink diamond pattern on the top using fondant. Then a purple border and the writing in purple.
My questions are:
1. Does anyone have tips on how to best measure and cut the diamonds?
2. Do I start placing the diamonds from the edge of the cake or do I start in the middle and work my way out?
3. Any other decorating ideas for the cake?
Thanks in advance.
Cindy

If you can get hold of patchwork cutters there is a diamond shaped one the would emboss the fondant beautifully

How do you figure what size cutter for the circumference of the cake if you don't have a mat?


How to do it without cutter, with a cutting wheel (pizza wheel) only:
Borrow an idea from patchwork sewing, prepare the diamond pattern off the cake and cover it with it as whole. On the cake you have to remember to turn it for the right diamond pattern. This can be difficult to imagine.
How to do it:
Cut stripes of your white and pink fondant. Put alternating pink and white fondant next to each other on a piece of vinyl mat/baking paper/parchment. Roll lightly over your stripped piece to fuse it together, careful not to disturb the pattern.
Cut across your piece - see attached drawing. You get strip with alternating pink and white color. Either move every other strip one color off, or if you have even number of color strips, you can do a turn of 180°. This you can do on the cake or off it, again rolling slightly over the whole piece.
If you start on clear vinyl or parchment paper, you can than flip the whole over your cake. Vinyl has the advantage that you can see what you are doing.
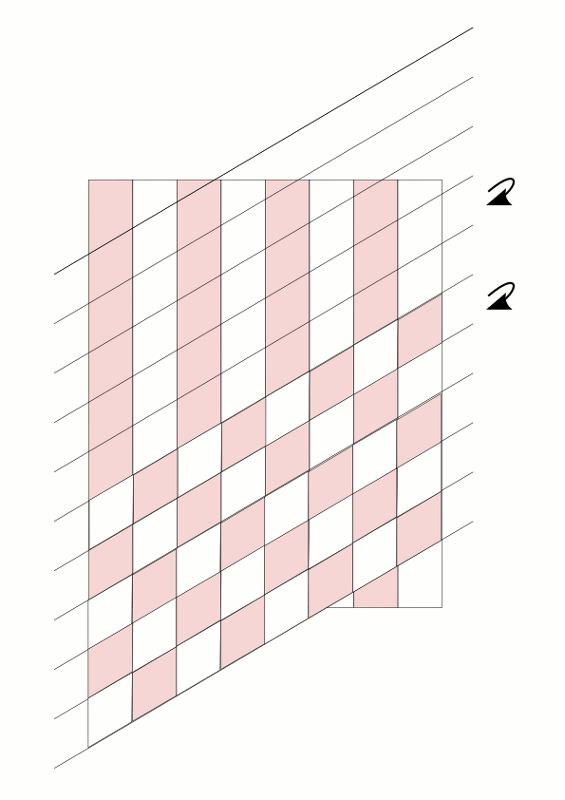

For the angles - simply draw one diamond on a paper and cut it out. Set it on the stripped fondant, align one side with the strip pattern and score the first line.
The angle is the "V" on the bottom of the diamond - depending on what you want to get it can go from about 15 degrees for a very narrow diamonds up to 90 degrees (right angle) for checkered pattern.
One tip more - you could lay thin layer of white (or base colored) fondant on top of your finished pattern. This helps to hold it together. When you flip it over, the diamond (or checkered) pattern will show.
Another tip - let the fondant harden before you manipulate the strips. Depending on your recipe, you could even put it for about 15 min. in the freezer - roll it on top of a cookie sheet, cover it with baking parchment or vinyl (as you see, my favorite) and put it in the freezer just before you need to move the strips. It gets hard and it is easier to move the strips without disturbing the pattern. But it can be done without it...
Quote by @%username% on %date%
%body%