

I made my very first cupcake bouquet yesterday for mothers day, very proud, I think it's so pretty! However on the journey over, three of them lost their icing.... oh no! The first one went 'plop' onto my wrist. Because I couldn't let go with both hands, my husband (who was driving) had to lick it off my wrist like a vampire..lol When the next two fell I just thought what the heck, they can stay there until we reach the destination.
It was just for family, so not a total disaster, but can anyone tell me how other people manage to stop theirs from sliding off in transit? I did try to tilt the bottom row upwards just a little bit, have I not tilted them enough? Are there any other tricks for keeping the icing on?
This is it:
http://cakecentral.com/gallery/2027962
T.I.A.!
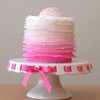
by the way, if anyone has any advice on how to make the tips coloured correctly, I'd be very happy to hear them! I was aiming for this effect:
http://www.flickr.com/photos/25655125@N04/3566458383/in/pool-23812557@N00/
But it didn't quite work out that way for me. It still looks nice, but I didn't quite hit the mark!

http://www.wilton.com/decorating/icing/coloring-icing.cfm
This page shows you how to stripe an icing bag.
I hope this helps.
I just made 3 cupcake bouquets (for the first time also) this weekend and I too was worried about the icing coming off because it was a very soft (cream cheese) frosting and a very moist cupcake and well, gravity. I am happy to report the icing did NOT fall off. I actually wiped the top of the cupcakes off because they were so moist and refrigerated the cupcakes after icing so that the icing would firm up and I did NOT put the cupcakes in the bouquet until I was heading out the door. Actually, on one of them I brought the cupcakes and the bouquet separately and when I arrived at my destination. I put the cupcakes in the bouquet in the car! They stayed in the center of the table while I was there for about an hour and no slipping. I don't know if this is any help at all...sounds like ther was moisture between the cupcake and icing or the icing was too thin.
I just made 3 cupcake bouquets (for the first time also) this weekend and I too was worried about the icing coming off because it was a very soft (cream cheese) frosting and a very moist cupcake and well, gravity. I am happy to report the icing did NOT fall off. I actually wiped the top of the cupcakes off because they were so moist and refrigerated the cupcakes after icing so that the icing would firm up and I did NOT put the cupcakes in the bouquet until I was heading out the door. Actually, on one of them I brought the cupcakes and the bouquet separately and when I arrived at my destination. I put the cupcakes in the bouquet in the car! They stayed in the center of the table while I was there for about an hour and no slipping. I don't know if this is any help at all...sounds like ther was moisture between the cupcake and icing or the icing was too thin.
First I think your coloring is prettier![]() it looks more natural. I just usually load a smaller amount of one color down one side and more of the other color on top of it. Also I place my icing on a piece of Saran wrap so I can control placement and portions of each color then roll up the Saran long ways and pop it into my piping bag. This is called the plug method I believe.
it looks more natural. I just usually load a smaller amount of one color down one side and more of the other color on top of it. Also I place my icing on a piece of Saran wrap so I can control placement and portions of each color then roll up the Saran long ways and pop it into my piping bag. This is called the plug method I believe.
In to the icing falling off![]() one recommendation I read was to tap the cupcake onto the counter after it's iced. I do thus but mostly I make sure when I start making my rosettes that my initial contact with the cupcake has some pressure so the frosting isn't floating on the cupcake. I do have trouble if it's hot outside but I generally don't fight gravity and set mine to sit reasonable face up along the bottom
one recommendation I read was to tap the cupcake onto the counter after it's iced. I do thus but mostly I make sure when I start making my rosettes that my initial contact with the cupcake has some pressure so the frosting isn't floating on the cupcake. I do have trouble if it's hot outside but I generally don't fight gravity and set mine to sit reasonable face up along the bottom![]() I hope that helps a little.
I hope that helps a little.
I just remembered another trick. If the cupcakes are really moist, you can put a small smear of buttercream on the cupcake and then pipe the flower. BC seems to stick better to BC.

by the way, if anyone has any advice on how to make the tips coloured correctly, I'd be very happy to hear them! I was aiming for this effect:
http://www.flickr.com/photos/25655125@N04/3566458383/in/pool-23812557@N00/
But it didn't quite work out that way for me. It still looks nice, but I didn't quite hit the mark!
In that specific picture the tops are lightly airbrushed.
nnnoooooo....... really? Oh I'm so disappointed!
by the way, if anyone has any advice on how to make the tips coloured correctly, I'd be very happy to hear them! I was aiming for this effect:
http://www.flickr.com/photos/25655125@N04/3566458383/in/pool-23812557@N00/
But it didn't quite work out that way for me. It still looks nice, but I didn't quite hit the mark!
In that specific picture the tops are lightly airbrushed.
You can still stripe to make it look like that...Someone posted a link to wiltons site and another mentioned the plug method. The plug method works pretty well to do two toned.
I think your roses look wonderful, though, as they are. Very pretty.

Don't be disappointed! ![]()
Read the comments section (towards the end) and you will see that Amanda describes how she paints the inside of the piping bag! ![]()
I think your flowers are much prettier than the air brushed ones. Yours look natural and the air brushed ones look fake. You did a beautiful job.
Quote by @%username% on %date%
%body%