


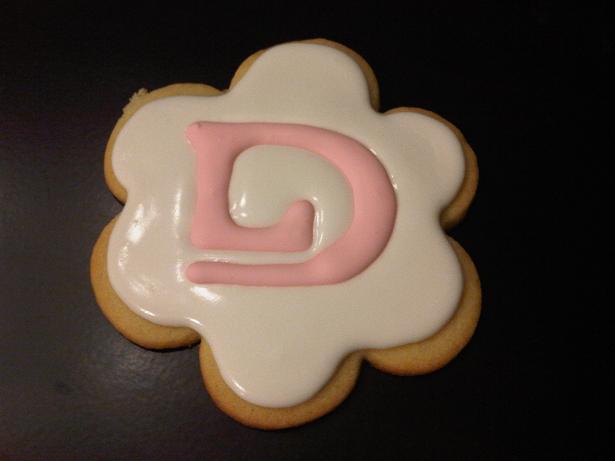
I made royal icing the first time today - and I finally got it to the right consistency that everyone suggests (when the ribbon that falls back into the bowl takes a few seconds to disappear). However, the consistency seems too "airy"...too light to actually dry. Does this make sense? I've attached a pic because god knows this was a lot of work and I really don't feel like doing it again. Can anyone give me any pointers? Does it always look/feel that way before it dries? Any advice would be a huge help. ![]()
You can see in the second pic how many air bubbles there seems to be. Who knows. TIA.
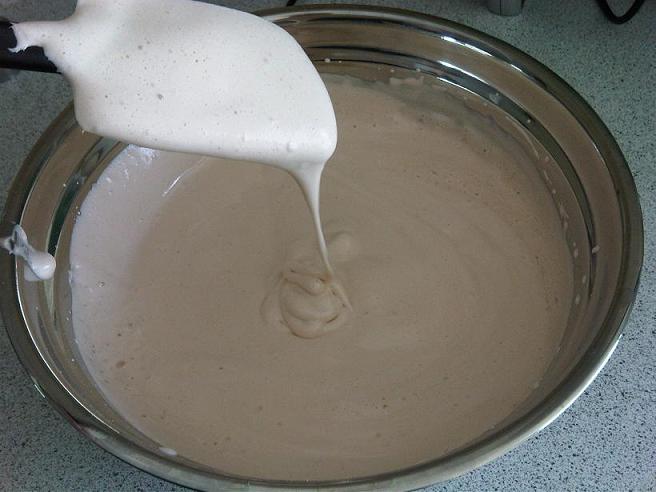


Did you use the whisk or the paddle attachment to make this? It appears to be that you used the whisk (which incorporates air into the mixture) and the paddle is definitely better for royal. Your items will dry, but any air bubbles in them are going to cause weak spots and they may crack and break before you get them in place int he cake (or wherever they are going).
I was going to say the same thing, it looks overwhipped to me, I always use the paddle attachment on low to med-low. The whisk and high speed will just nmake air bubbles and yes, they will all rise to the top of your piped decorations and you'll have to pop them and you still might wind up with a bunch of little wholes. Try antonia74 royal recipe and she has a tutorial as well.
I just checked them and they aren't remotely drying - another thing I notice is that there is a layer of color at the bottom of the designs. Could this be the food coloring that was added settling to the bottom?
*Sigh* So much work...
These were just supposed to be designs that were going to be set onto a sugar cookie, and flooded around...do you think they'll eventually hold or is this like, a full re-do situation?
Can you link me to the antonia recipe? Additionally, just to make sure (because I'm new here) - the wisk attachment is the one with the thin metal strips, and the paddle would be the thicker ones right?
*Edit* - Found the recipe from Antonia. I'll have to find some cream of tartar; not sure my little town will have it. For those in Canada, would Independent have it?
I dont know what the color could be. Did you use real egg whites or meringue powder? Yes the thin metal one is the whisk. I'm terible with technology let me see if I can get you the link. If not its easy to find, just go to recipes and search royal icing user name antonia74.
try this http://cakecentral.com/recipes/1983/antonia74-royal-icing
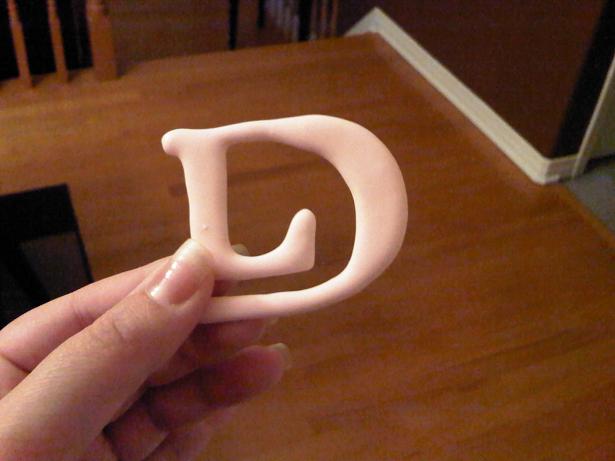
So I remade the entire thing, and redid the logos all again - MUCH better result this time. What's the approximate drying time until I can peel off the wax paper without an issue? I'm worried a bit about getting them off clean if you know what I mean...
It depends on lots of factors like room temp, humidity etc. I would have said at least 6-8 hours for something like that to dry all the way through. You'll have to test one to check. Ensure it's not just the outer crust that's dry. Looks like a really nice project - let us see when they're done?
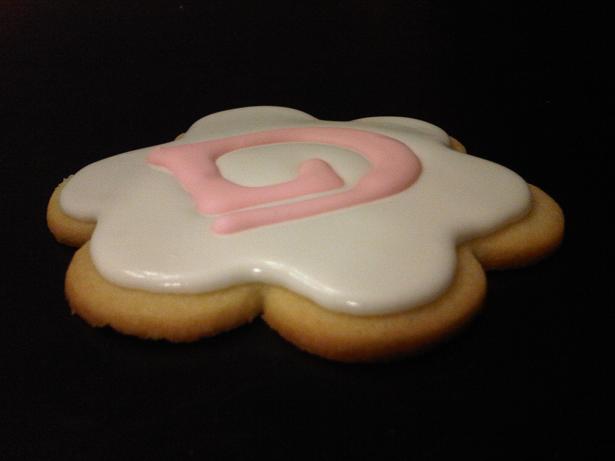
Yeah I'm hoping it turns out well! We shall see though. I've posted an updated pic of my second attempt here. I think they look better overall. I picked up one and it held for a sec (until I squeezed it). The outer shell looks like it's coated and hardened really nicely; the inner is still wet. We'll see how they look tomorrow. I'm pumped. ![]()

Yeah I went with straight pink this time. The first batch I attempted to get brown and ended up with a pinky beige thing going on. There must be a trick to getting darker colored royal icings because I must've used at least 20 drops of green/yellow/red and still got nowhere near something dark. And yeah, I'm relieved I already did it this afternoon even though it seemed to take me forever.
I have a question though - I was going to drop those logos onto the NFSC recipe, and then flood the rest of the cookie with white or something. Will this still be edible by Sunday? Like, I would like the girls at the meeting to be able to enjoy them but never actually dealt with Royal Icing before. I'm afraid I didn't leave myself enough time for everything to dry between now and Sunday at 2:00PM when I need to leave. Anyways we'll see - any info or advice is always appreciated!!
What you can do is flood first let dry then put the logo and the logo will be raised, or you can flood(dont go too thick) and drop the logo on while wet it will give you the same look as putting the logo on then flooding around and be MUCH quicker. Again drying time will vary but in my experience they will definitely be ready by Sunday, probably earlier, they d's should be dry by morning, so you can flood and top then and by late tomorrow night they should be dry enough to package. Again if I'm in a hurry I do put them in the oven with the light on, it really does help.
If a dried royal icing decoration is dropped onto wet royal icing, won't the decoration melt into the liquid? I'm confused about this.
Thanks.
So the logos dried BEAUTIFULLY!!!!!! I am SO pleased!
Next question - how should I go about attaching them to the cookies...flood then place? Won't the flooded part run over the sides? Or place the logo, and then flood around it? But if I do that, how will I attach the logo? A few dots of royal icing?
Lemme know - I'm psyched about the finished product...I sooo hope this batch of NFSC turns out.... ![]()
I guess it depends on the look you want, if you want the logo raised uo, then flood first, let dry and attach with a couple drops of royal. If you want the background to fill in and the logo embedded into the background-flood, then lightly lay the logo on top and it will sink in. Dont over flood your background, just a nice thin layer and you shouldnt have any run off the sides.
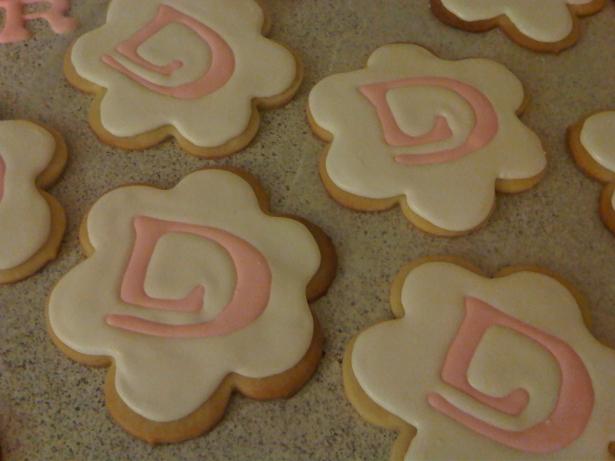
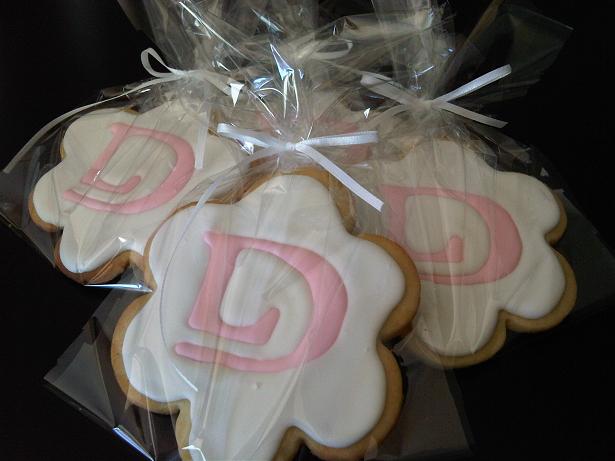
Well, that was a job and a half but I'm all done. And for the record, I should've flooded and then put the logo on. So I did like 19/20 cookies, then on the last one tried the other technique and it looks so much better. Lesson learned - I'm going to do another project this coming Wednesday with cookies so we'll see how that goes. All sorts of experimenting lately.
I've attached pictures here. An honest critique would be really nice. The only thing I had a problem with was getting the flood perfectly even on every single one.
*PS: If someone would like to move this to the cookie forum that would be ok. It started more as a royal icing issue but this is the finished product so it's all good.


I am learning something from this thread but am also so impressed by the helpful tips that are being given....makes me proud to belong
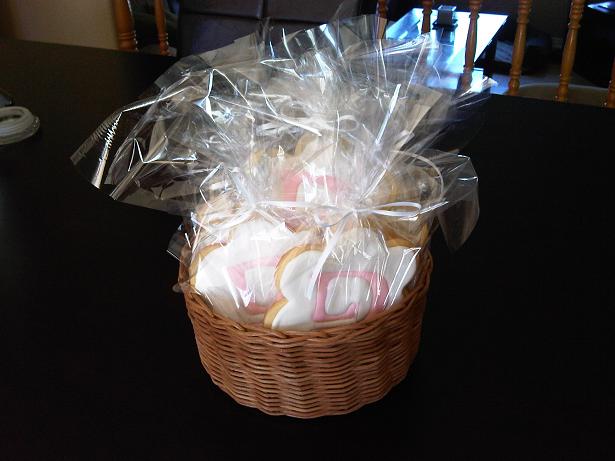
Ok so this is the final post in this series, then I'll move onto a new project. Here are the photos of the finished product and how I delivered them to the girls at the store. The cellophane and white ribbon was just an awesome added touch.
Here's the thing... THE NFSC RECIPE IS FREAKIN UNBELIEVABLE. What an AWESOME recipe. I am so impressed with this recipe that I highly doubt I will use anything else this Christmas for gifts. Additionally, in combination with the royal icing recipe I used, the taste combination is absolutely fantastic. The girls raved about how good they were and begged me to bring in more. The timing was perfect too - I did the royal icing Friday, the logos on Friday, the flooding yesterday, and delivered today. The baking was all done yesterday as well. The timing was perfect and they were delish - super fresh.
The only other piece of advice I have for anyone who is interested is I found that between the time I put the final flood on and when I went to package them about 12 hours later when they were dry, there was a tiny bit of dust on them (you know those teensy little fibres in the air?). I'm anal about cleanliness, so obviously I noticed. I could brush 99% of it off, but perhaps during drying time there is a way to prevent this? Suggestions are welcome.
Thanks all for enjoying my first cookie journey... going to get creative on the next one. These are the perfect gift. People told me I should ship some to head office; I was so flattered... ![]() Another baking success!
Another baking success!
One last thing for those curious - I was worried about the royal icing "D" and how it would actually taste right (obviously because it sat the longest). Because the flooding was done yesterday along with the baking, and then the logo inset, you could barely even tell that the D was created and dried a day before. So from a taste/experience standpoint there were no issues.
Hint: When peeling off the monograms from the wax paper, just be careful handling - I let mine dry 12 hours and they were perfect, however if you drop them or handle them the wrong way they'll snap. I made 30 just in case, and broke about 4 in the process (whether it was from pushing down a bit too hard when placing it on the cookie [which you wouldn't have that issue if you did it the best way, which is to flood and then just set the logo on top to dry], or because I dropped it ![]() ).
).


When peeling off the monograms from the wax paper, just be careful handling - I let mine dry 12 hours and they were perfect, however if you drop them or handle them the wrong way they'll snap. I made 30 just in case, and broke about 4 in the process (whether it was from pushing down a bit too hard when placing it on the cookie [which you wouldn't have that issue if you did it the best way, which is to flood and then just set the logo on top to dry], or because I dropped it
Parchment paper is better for releasing them/drying time. WAY faster than waxed paper. 
Your cookies are so great, nice job on them.
Parchment paper is better for releasing them/drying time. WAY faster than waxed paper.
What am I doing wrong? Every time I have tried parchment the RI plaque dries with wrinkles! I pipe them on a flat, sturdy surface, but when they are dry, they are not completely flat.
Quote by @%username% on %date%
%body%