

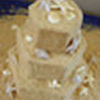
How Do I Make This Cake Shape Or Is It Just The Photograph?
Decorating By Cake-Girl1968 Updated 12 Sep 2009 , 2:30pm by dstbni
Take a look:
http://cakecentral.com/modules.php?name=gallery&file=displayimage&pid=852393
It looks like the cake layers taper in. Or do you think it's just the angle of the photograph?

I do not know how it was done...but is beautiful and I would like to know too....
No, it looks like they sculpted the cakes to make them tapered. Easy to do ~ just use a sharp knife and run it along the top at an inward angle towards the bottom of the cake. The tricky part is making it even all around, but the slight angle doesn't affect the stabillity of the cake. Good luck!

Most likely it was carved down to make look like that...so make like 6 in rounds (or whatever size you are making) for your regular amount of cake. Stcak and ice them. Refrigerate for a few hours. Then carve it down.

Here are my instructions for tapering cakes. Please let me know if you have any questions.
Start with two same-size cake layers, say, 10-inch round.
Place a 10-inch round cake circle on one end, and an 8-inch circle on the other end.
Working inside a large pan or baking sheet to confine the mess, elevate the cake a few inches on something narrower than the cake, like a 6 or 7 inch cake pan.
The 8-inch board side should be up. Put non-skid mat between the cake and it's elevator so it doesn't slip off.
Now, take a long, serrated knife and, using the cake boards as guides, carve away the sides of the cake. Flip the cake over, place on it's permanent board and away you go!
If you plan to fill the layers with something other than buttercream, place a couple of small cardboard cake circles between your layers before carving.
After carving, take the two layers apart, remove the cake circles, pipe your dam, add filling and replace the layers. Trim, if necessary.
If you're going to fill with buttercream, you can do that before carving.


Thanks for the information. I was wondering how to do the same thing.
Quote by @%username% on %date%
%body%