


So, did you post a picture? We wanna see!
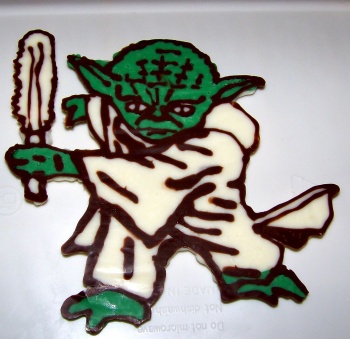
These are my fourth attempts. I'm pretty happy with them - I was going to post before and after pictures but when I woke up this morning, the kids had ate the 'mistakes'
Does anyone have any idea how to avoid the "holes" that show up? I tried dragging a toothpick through the chocolate while it was still warm, using a paintbrush and lightly tapping the transfer but nothing completely removed them.
Thanks again for helping me figure this out. It was fun after I took your advice and the transfers stopped looking like a blurred vision and like real characters ![]()


You did an excellent job. Especially considering this wasn't something you knew how to do a few days ago! The "holes" are bubbles. The can be eliminated by slightly thinning your chocolate with shortening (if it's a bit more runny, it tends to fill/flood better). Also, If you're using a cutting board as a base try giving it a few light taps immediately after you flood your primary color. I use a clear glass cutting board as a base because I can lift if up, and see from the underside where I've got bubbles and can correct them before they set. Great work, you should feel very proud of yourself! Oh yeah, I also like to add lollypop sticks to mine so I can stand them up on the cake. ![]()

Those are really great for your first figures!
If you don't want visible sticks attached to the back you can also either a) make extra long tabs of choclate on the feet of your characters which can then stick into the cake or b) make mirror image chocolate figures and attach them back to back on either side of the sticks. I have used both methods for figures that will be on the top level of the cake, so that it will look good from the back as well as the front.
The sticks have the added bonus of being convenient holders for kids to hold their "chocolate cookies". ![]()
Glad you had success and hopefully a little fun too!


Quote by @%username% on %date%
%body%