


Can someone explain to me how to accomplish this look? The cake was posted on here by roseyrider. I think she did a beautiful job! I have sent her a message, but have not heard back yet. I just did this yesterday so chances are she has not had a chance to respond, it's just that I would like to do it on a cake this weekend. I apologize for being so impatient. Thanks for any ideas or advice.
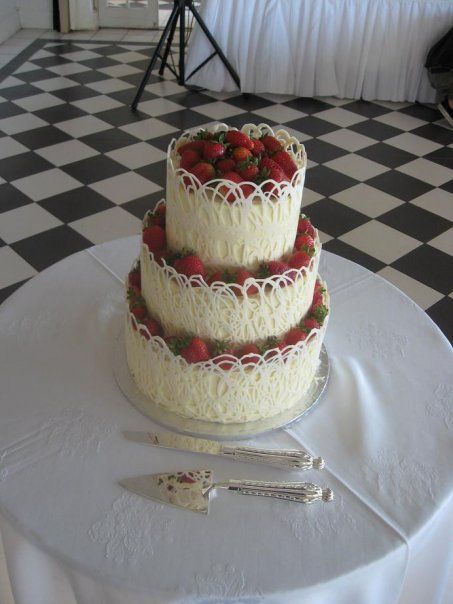
I think I'd attempt to tackle this job by
1) Frosting the cake
2) Measure the distance around each round and cut a piece of contact paper, acetate or flexible plastic to size. Don't forget to measure the height too. Looks like the height was extended a bit, so take that into consideration.
3a) It kinda looks like there might be a band of chocolate in the middle. Melt some white chocolate and spread it down the center (lengthwise) of your acetate.
3b) Drizzle or pipe more chocolate onto the contact paper, in a looping motion (to achieve this particular look)
4) Let the chocolate set for a minute then wrap it around the cake, securing with tape. Place in the fridge to firm.
5) Repeat 1-4 for each layer
6) Remove cake from fridge and gently peel back the plastic.
7) Stack layers and add strawberries.

It's not difficult. I've done this and demonstrated this many times. If you have a copy of The Cake Bible, it's in there. Although it doesn't look to me like there is a solid strip on the bottom and middle layer. I believe it's just the loops overlapping. Make sure to over lap enough to give the chocolate a solid structure. And be patient as Scooby said when you peel back the acetate once the chocolate is set.
Quote by @%username% on %date%
%body%