

All Ruffled Up - How to make a ruffle cake
Find more on our blog! http://caketalkblogger.blogspot.com/
Ruffles are in and oh so stylish!
I am so excited to be bring you this new post after my long hiatus. It has been a busy few months of birthdays, holidays, and wedding shows - not to mention some studying for my grad school application! But here we meet again sharing more fun cake tricks.
It was during the preparation of the wedding show at Simple Country Weddings in Elk Grove that I began experimenting with fondant ruffles. The results were chic, stylish, and well received by many brides. This post is all about how to get that ruffle look on your fondant cake.
I prefer to work with homemade marshmallow fondant. Like I have written in my previous posts, I am a big, big, BIG fan of marshmallow fondant. It is relatively quick, simple (once you get the routine down - see my step by step method on my blog - scroll to bottom for steps!!), and less expensive compared to the national fondant brand. And - oh yeah - and it tastes great too!
The cake ruffle technique I actually derived from the same technique used to create a flower ruffle. With a little bit of practice you will too be able to make your own stylish piece. Let's get start with the ruffle flower.
The Ruffle Flower
Materials List:
Fondant Roller
Powdered Sugar
Flower Drying Cups
Wilton ball fondant tool (optional)
Steps:
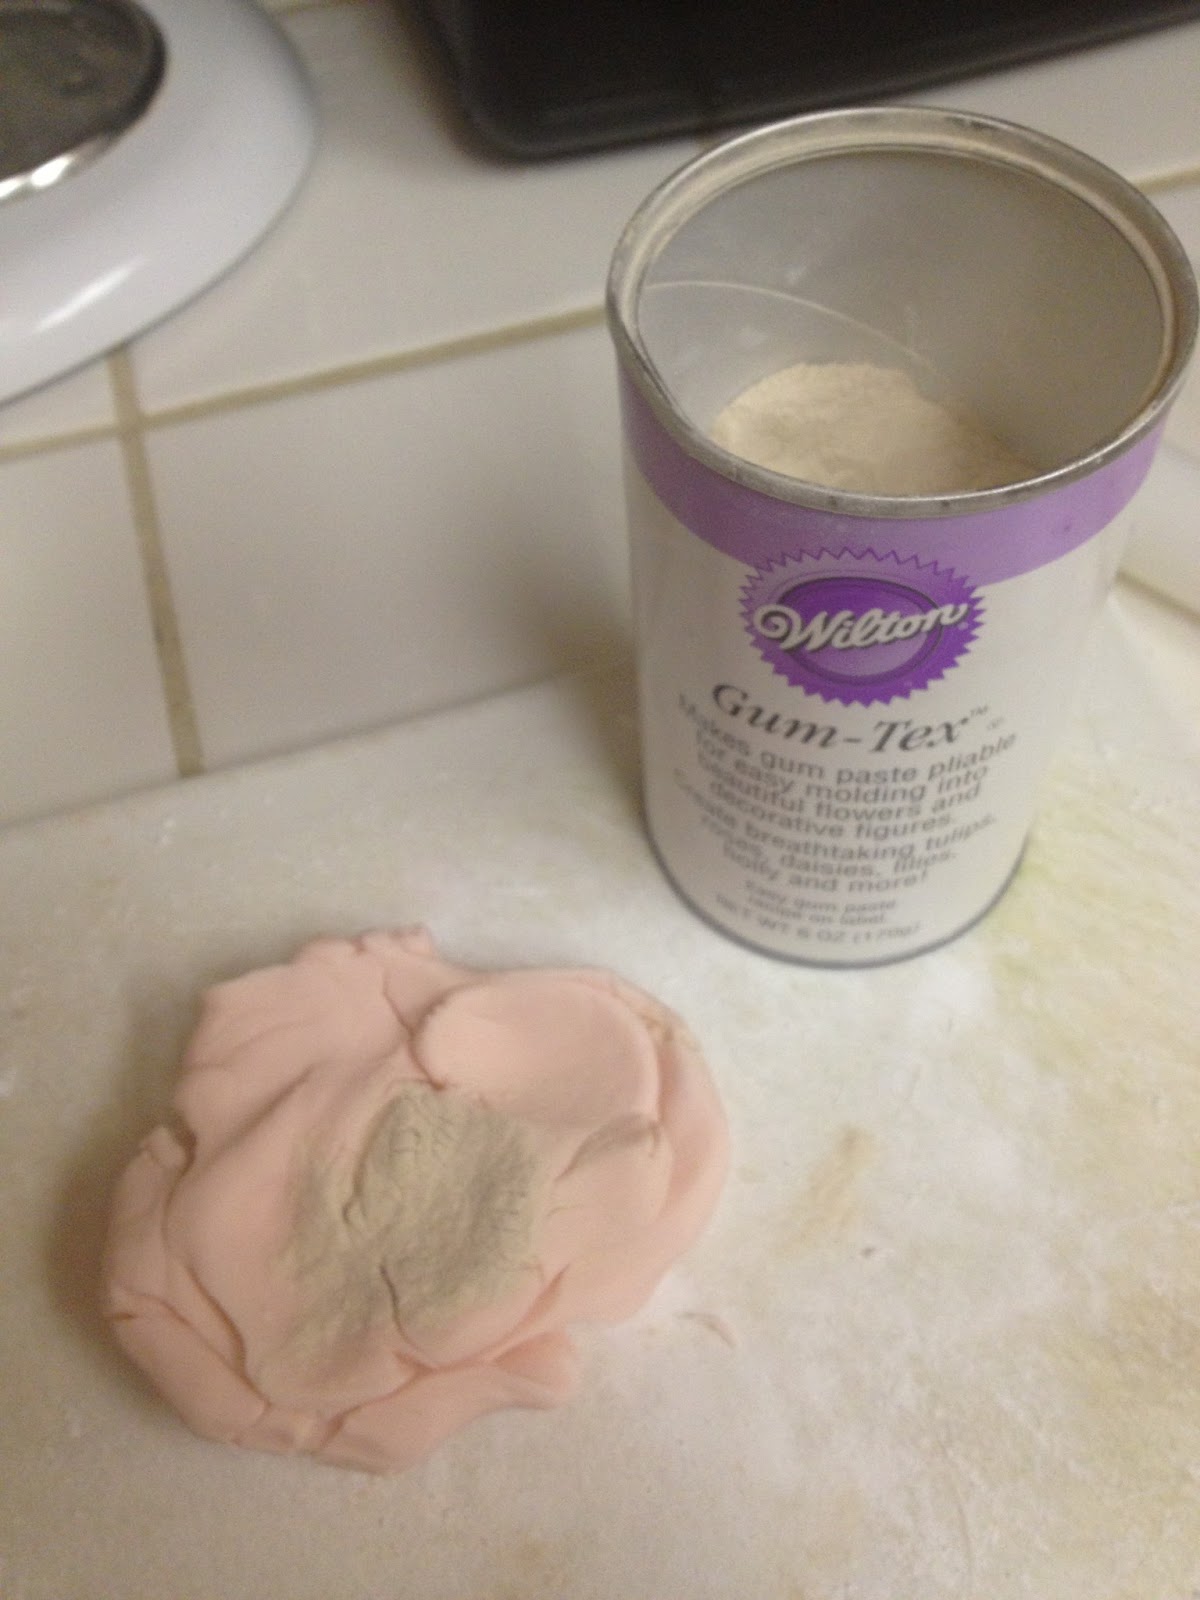 1. Optional - Add Gum Tex to your fondant. This will allow your ruffle flower to dry much faster (1 day versus about 3 days without Gum Tex). You can purchase Gum Tex at Every Baking Moment in Dixon (a cake decorator's candy store!)
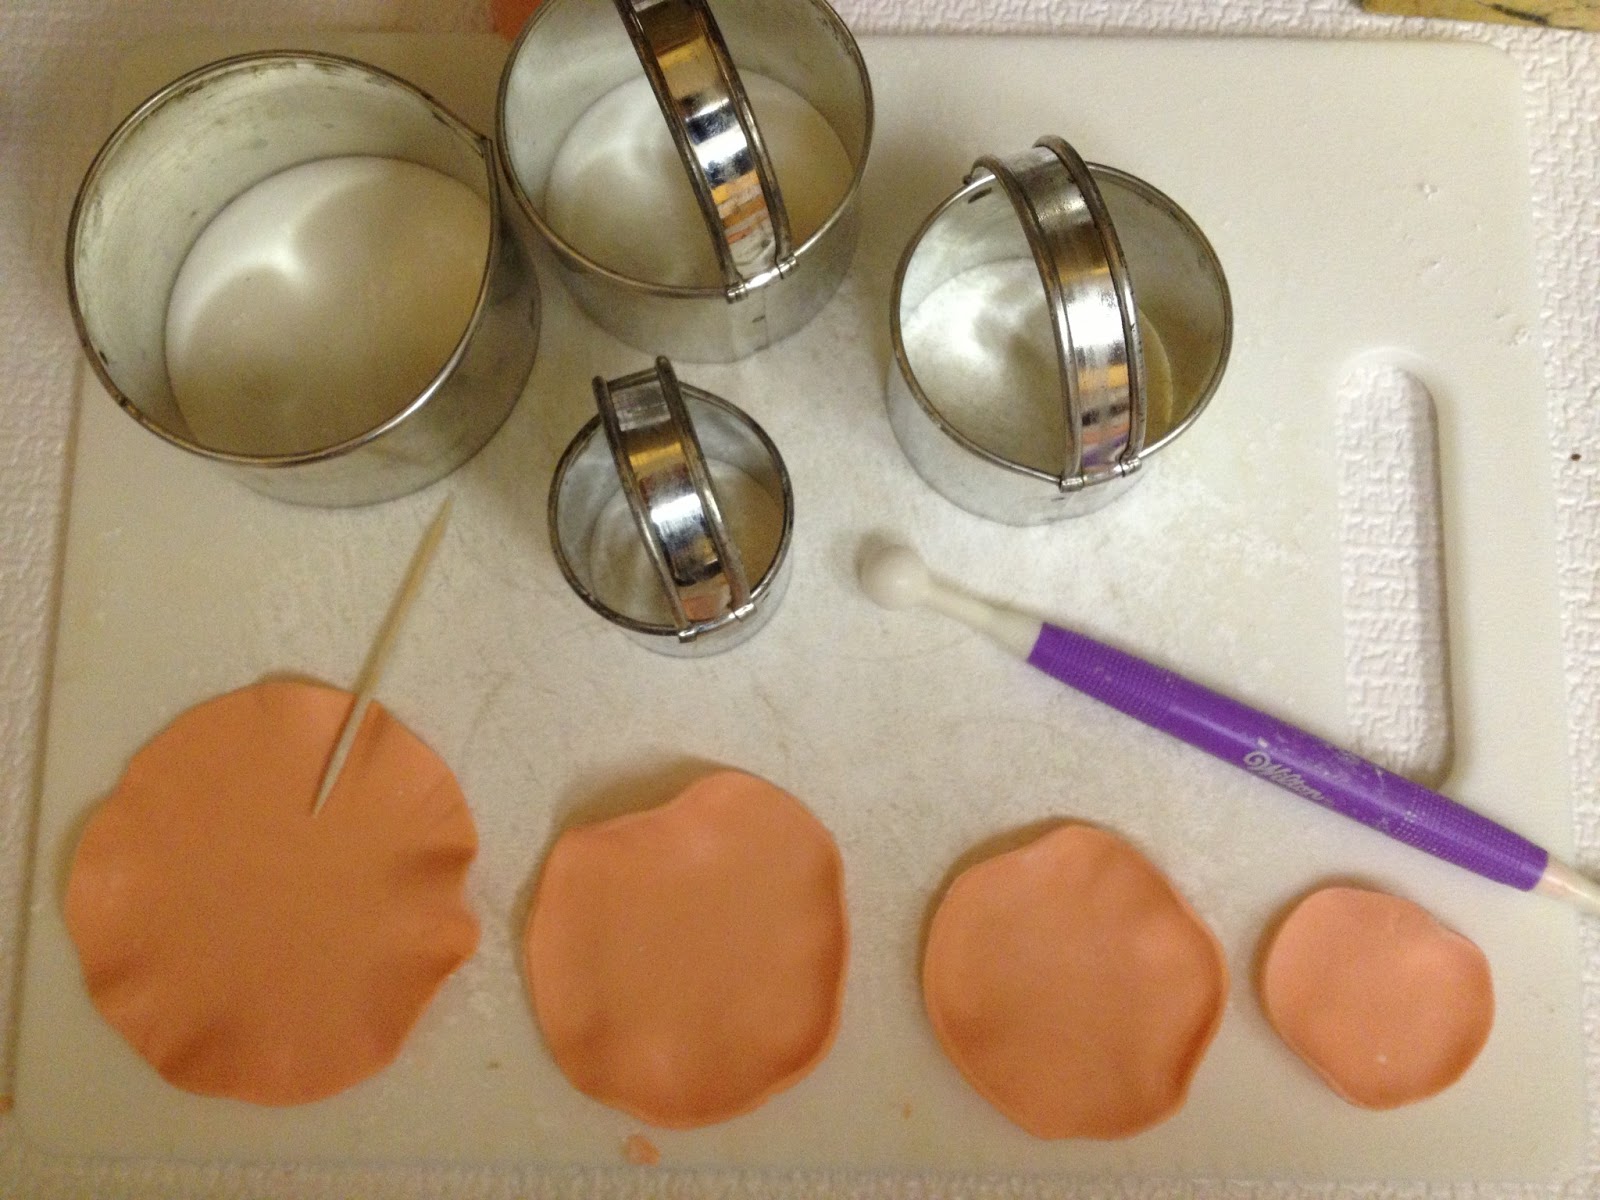
2. Dust your work surface with powdered sugar. Roll fondant out very thin (less than 1/8 in - just a little thicker than cardstock thin)
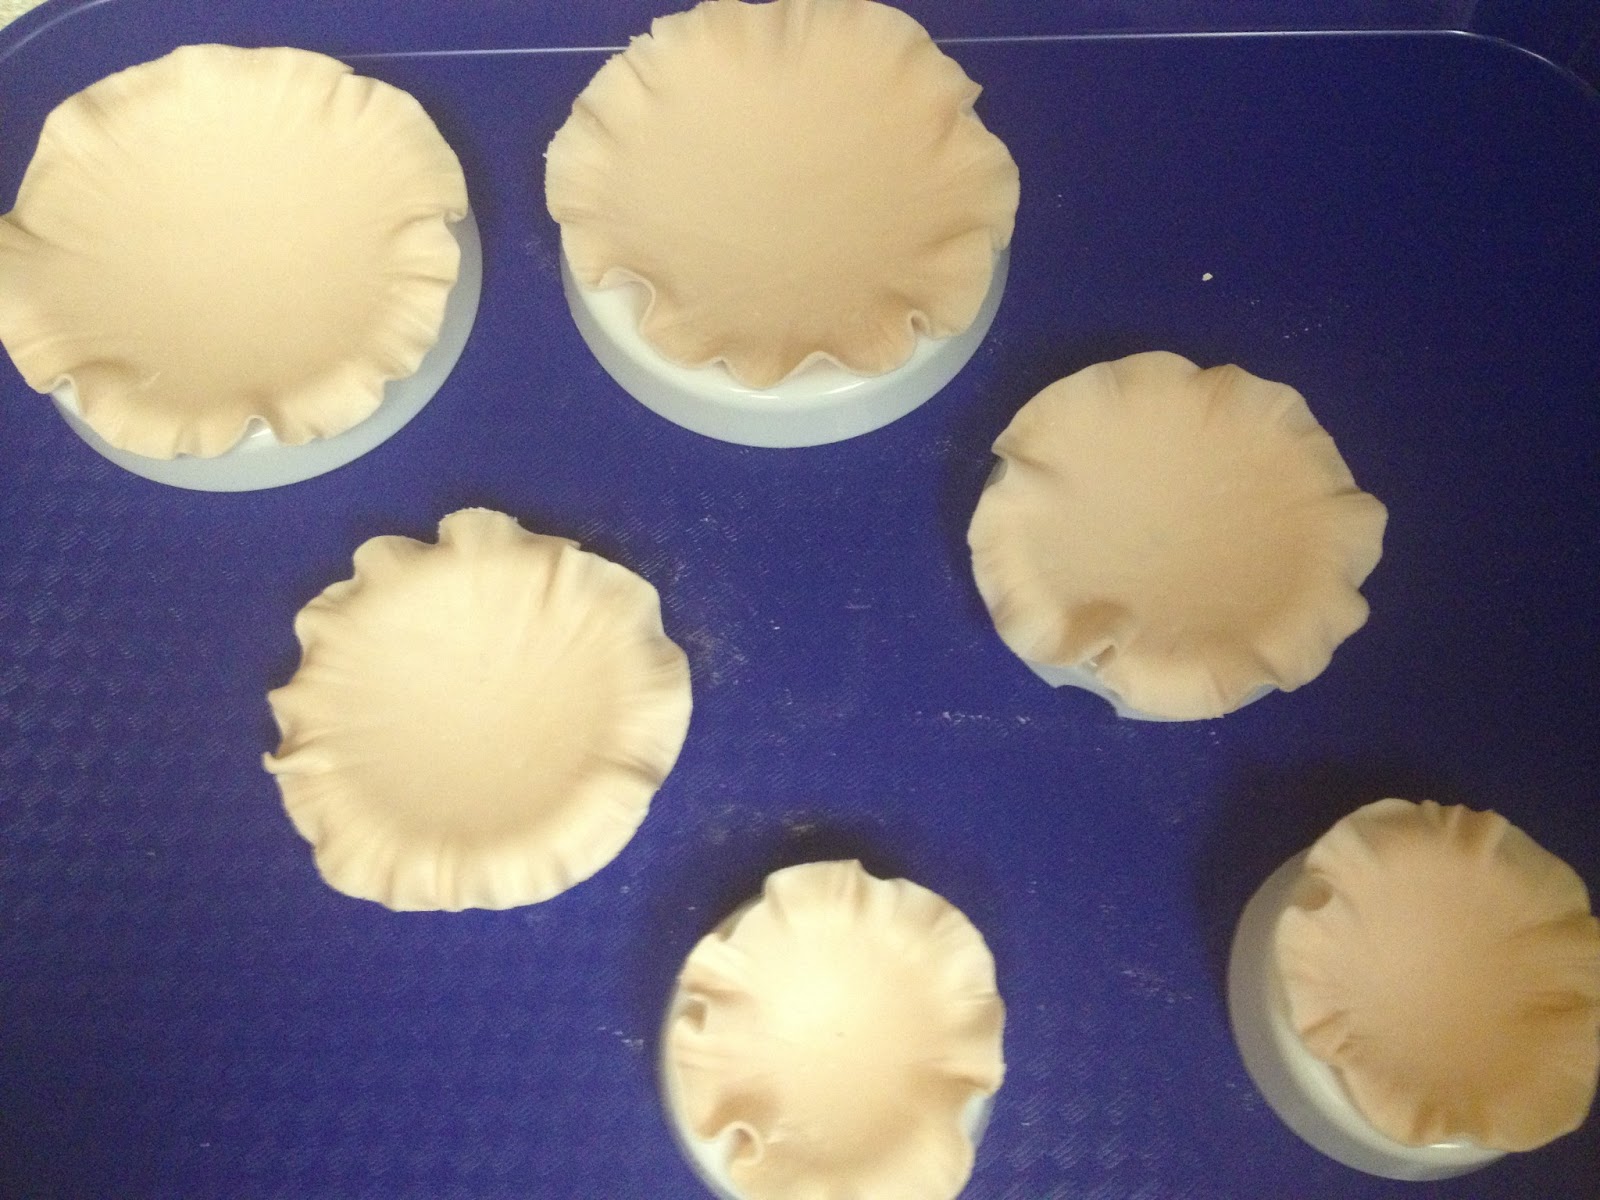
3. Cut out fondant rounds.
4. Optional - For an added realistic look use the ball tool around the edge to soften the fondant rounds.
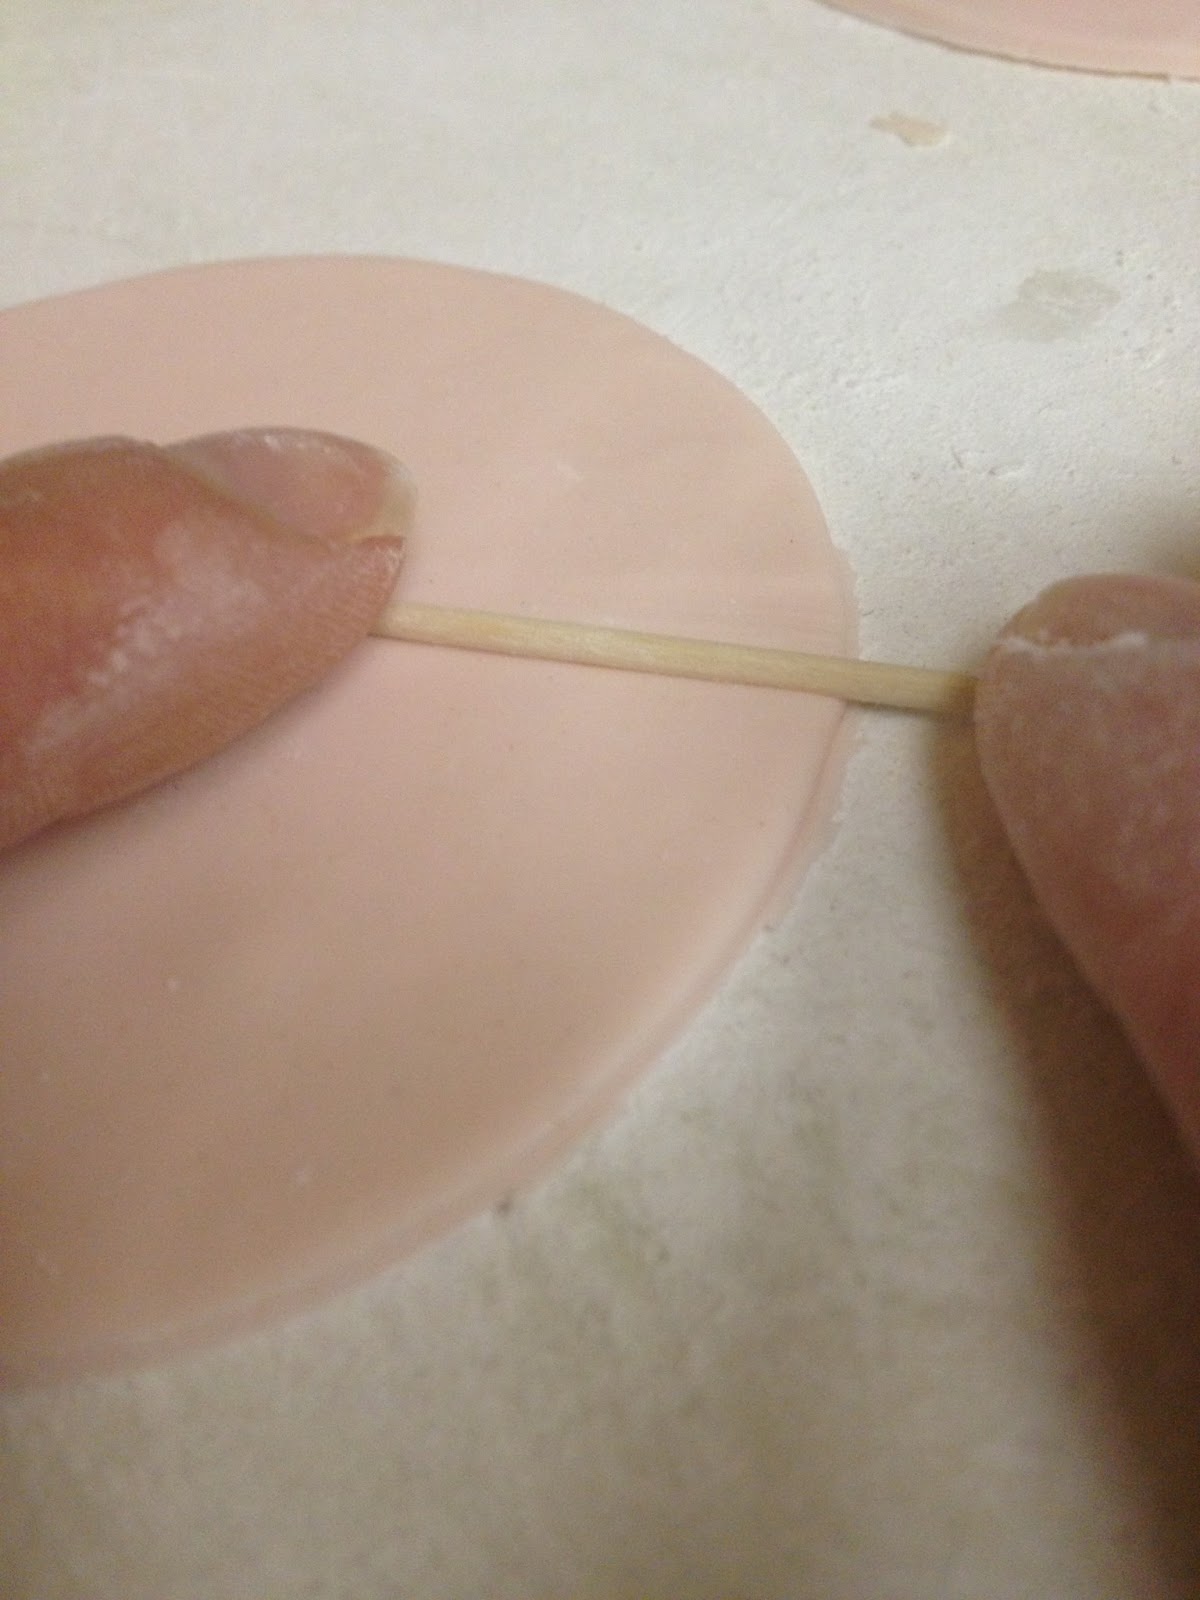
5. Use your toothpick as show below. Apply slight pressure and roll the toothpick around the entire edge. You will see a ruffle effect starting to take shape. You can also see that here I did not use the ball tool.
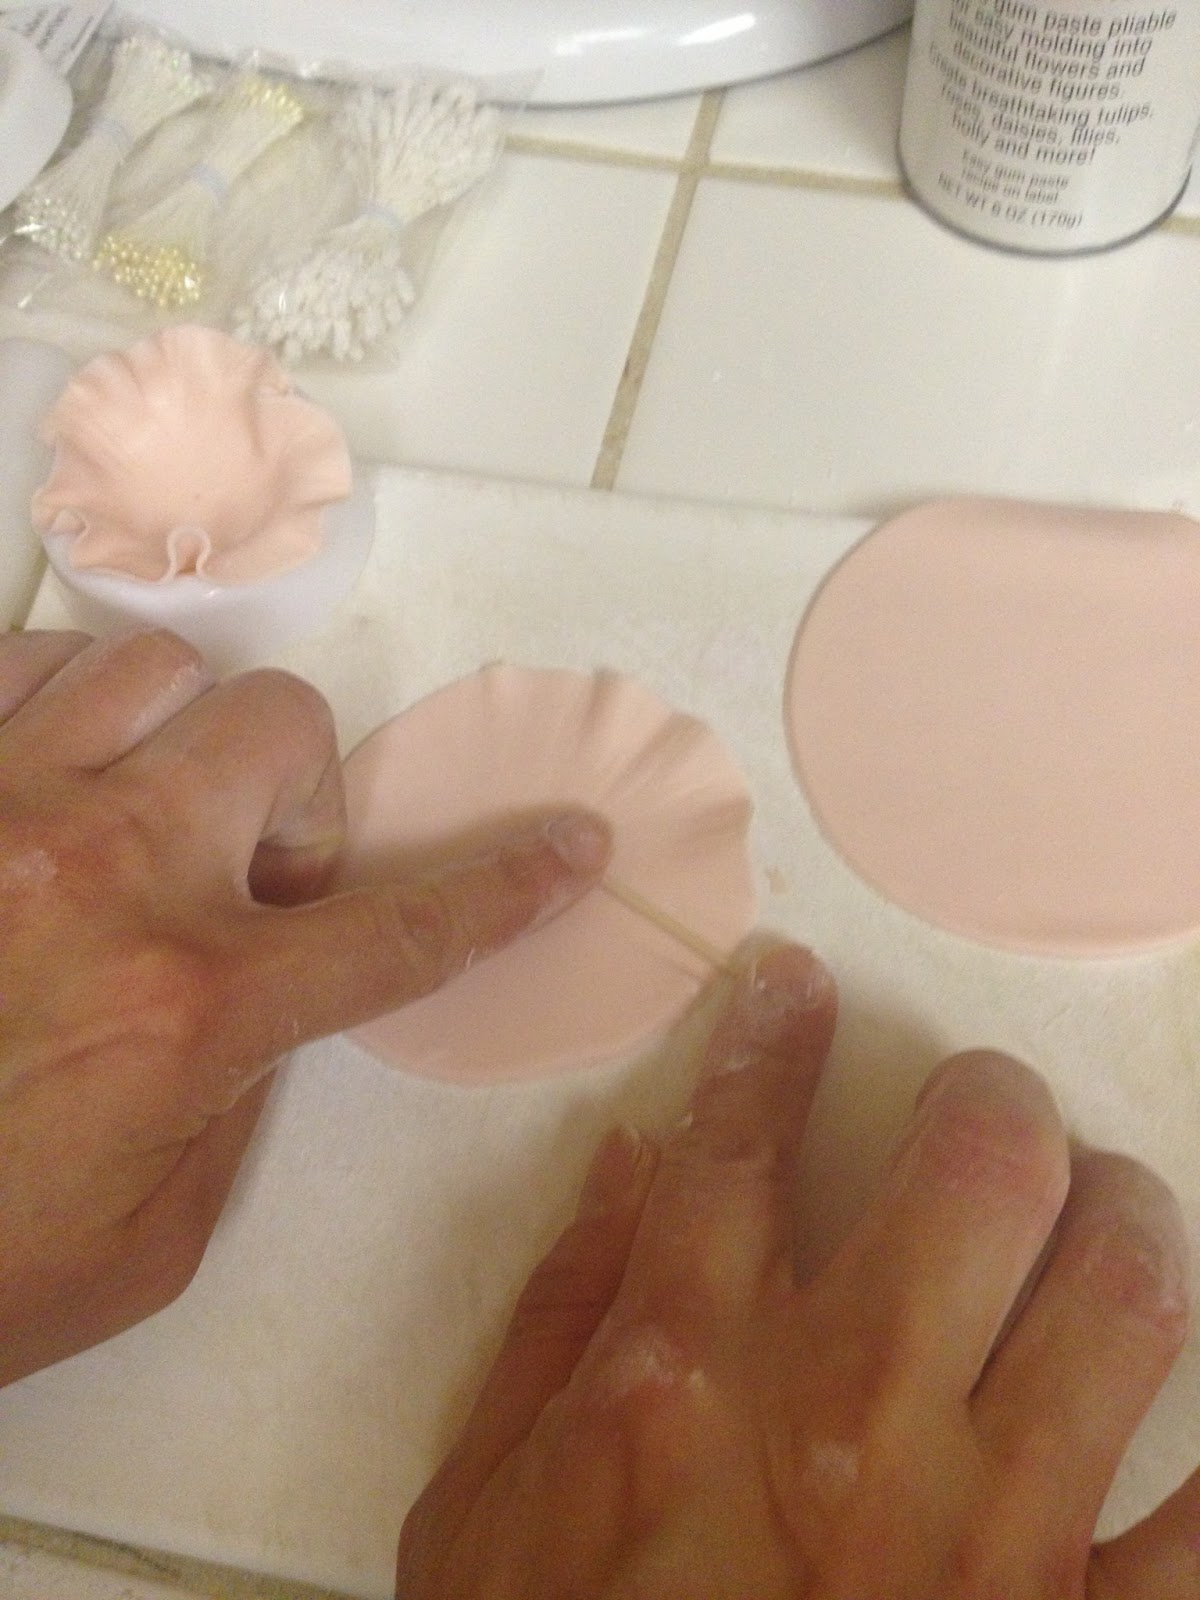
7. Dab a little bit of water and on the back of each round and place them on top of each other accordingly.
8. Dab a little water at the flower center and place cute silver pearls (also know as dragees - and these are also available at Every Baking Moment in Dixon). Wait for the pearls to adhere before placing flower on the cake.


And now for the Ruffles*
Materials
1 fondant covered cake1 ball of fondant
Fondant Roller
Powdered sugar
Paintbrush & cup of water
Rotary Cutter for Fondant
Toothpick
* Sorry for the lack of pictures here. I will update this post with pictures when I make another one.
Steps
1. Dust your work surface with powdered sugar. Roll out fondant thin similar to the ruffle flower.2. Cut out a 1 inch strip about 8 inches or so... no need to be exact.
3. Roll the fondant strip further until it is paper thin. You will actually be able to start seeing through it. Trim edges straight.
4. Using a toothpick use the same ruffling technique as with the ruffle flower along one edge of the strip.
5. Work quickly and 'paint' your fondant covered cake along the top 1 inch of cake with water. Do not overdo the water; keep your cake free from water drips along the side.
6. Carefully and gently pick up fondant strip. Place the fondant strip along the water painted area with about 1/2 of the strip sticking up past the cake height. Press strip along cake side and repeat another strip to complete entire cake round.
7. Continue to work quickly as thin fondant can quickly dry out. using your fingers and/or a toothpick bend edges in the direction you like.
8. Repeat these steps for the entire cake working down toward the bottom. I like to use about 6 'ruffle' strips per 4" cake height.
Thanks for checking out this blog and I hope you have fun creating your ruffle cake! As usual here is our Marshmallow fondant recipe below and this time with pictures! For actual hands on lessons and cake classes check out Every Baking Moment in Dixon.
Check us out on our website: www.cakecouturedesigner.com and for all our latest cakes Like us on Facebook atwww.facebook.com/cakecouturedesigner.
Happy Baking!
Christie