

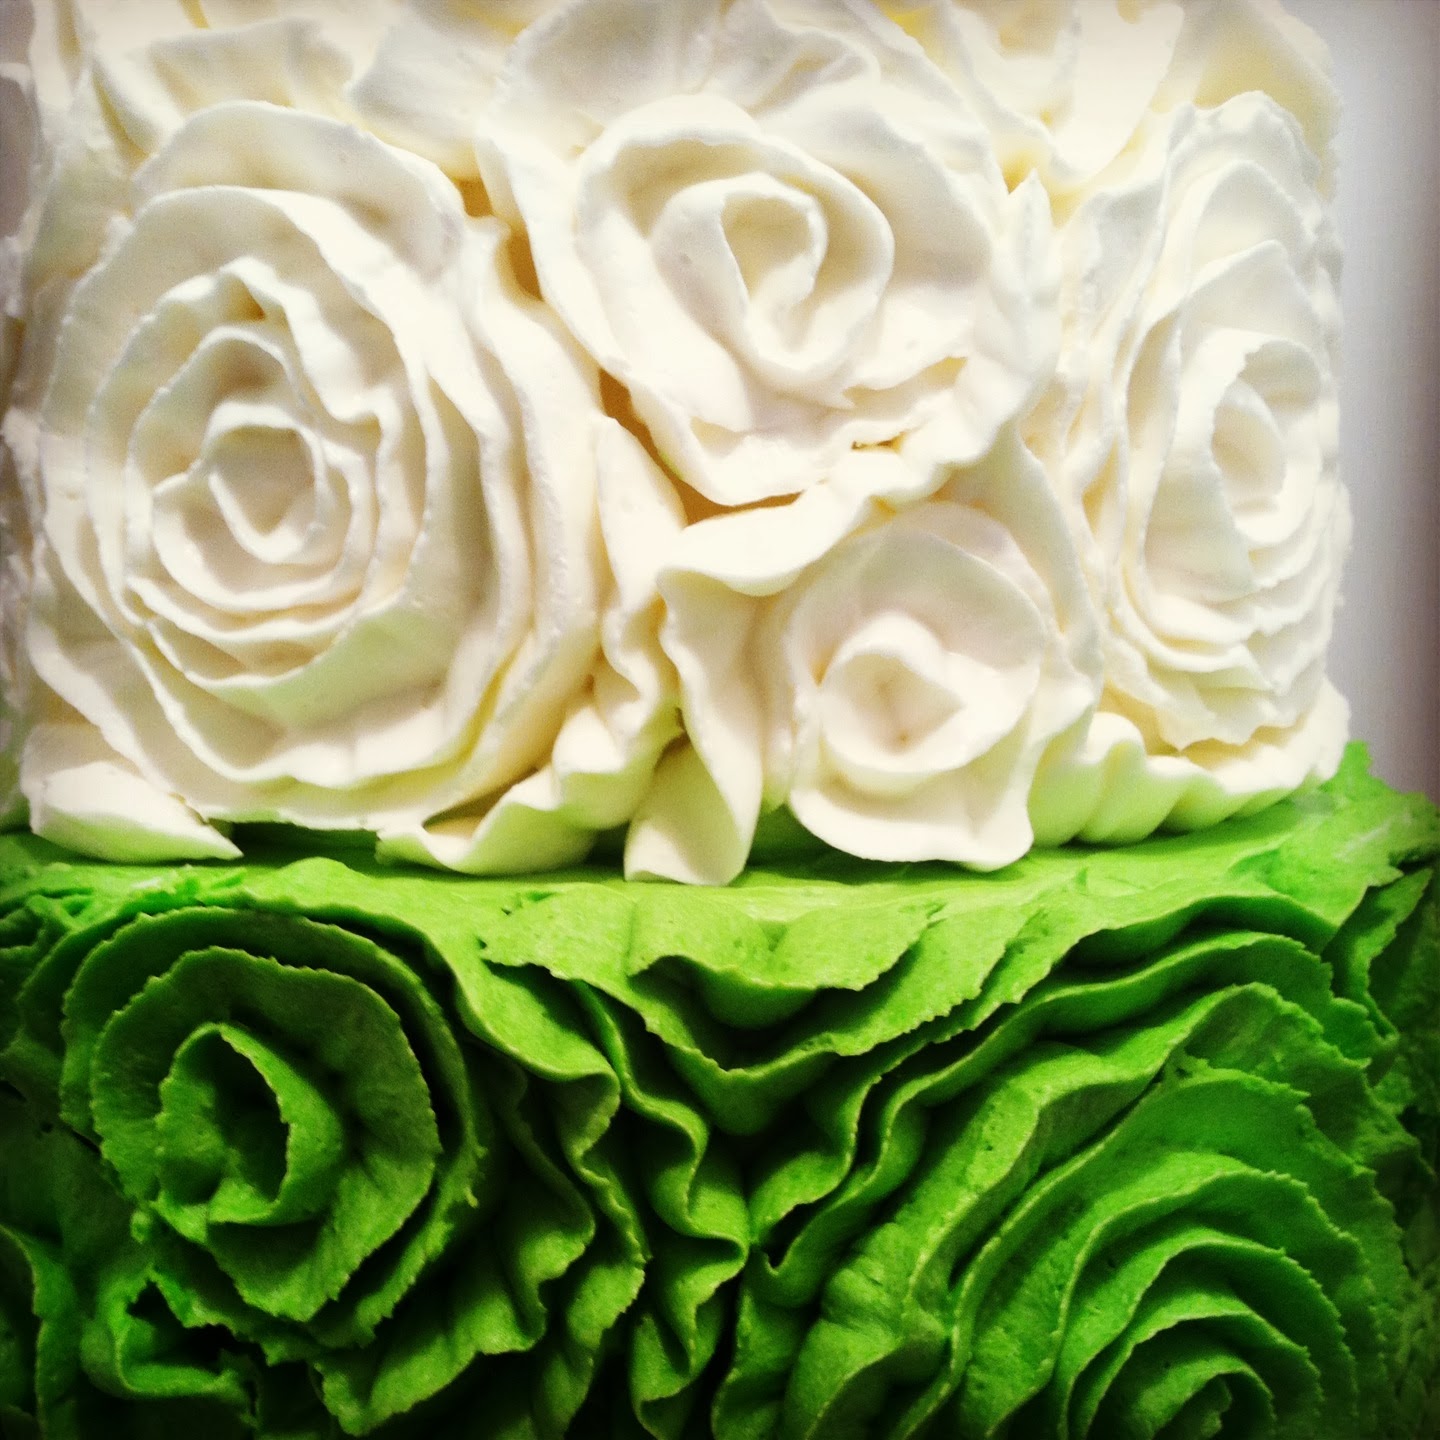
Buttercream Ruffle Rosette Tutorial

Rosettes are always so gorgeous on a cake! This style is typically reserved for Fondant, but when a customer requested it in buttercream, I couldn’t resist the challenge! Unsure how it would play out, I was delighted with the final result. Especially since, at one point during the decorating, I came SO very close to scrapping the whole design.
I haven’t seen this design done much in buttercream, and as I was searching online for some direction and sign that this could be done with good results, the only tutorial I found was one you had to pay for. So, dear reader, I hope this is helpful!
Material List:
- Buttercream
- Pre-made, frosted, and stacked (if doing a tiered cake) cakes
- Piping bag, 1 for each color you choose to use
- Petal Tip (Wilton 125 was my choice in size)
- Wax or Parchment Paper, cut into 3″ or 4″ rounds
- Cake Forms or Styrofoam Dummies
- Straight Pins
- Turntable
- Rubber Shelf Liner (to help grip your paper rounds)
- Easily accessible freezer with lots of room for your rounds!
To do this design, I used the basic technique of using a petal tip, piping a buttercream design on wax paper, freezing it, then quickly “glueing” it to your frosted cake with a blob of buttercream. I then piped more ruffles in the gaps.
Before beginning, have your chilled and stacked cakes prepared. Each should be frosted with a base coat in the final color that your rosettes will be, so that if there are any small gaps, it will blend.
First step: Cut out several 3″ – 4″ or so rounds of wax paper. I placed a scrap of carpet liner on my well-worn Wilton turntable (that I’m dying to upgrade) to hold the paper in place, as I used a small Wilton Petal Tip to pipe a rosette. I did varying sizes: 3″, 1″ etc. Make sure the fat end of your petal tip is down touching the board, and that the ruffles press up against each other to form one solid piece when frozen.
 Wilton Large Petal Tip 125
2nd Step: The flowers need to be frozen on a curve in order to fit the curve of the cake. You can find round cake dummies at Michaels, etc. Ideally, they would be cut in half so as to have a round top but flat base to sit on. Instead, I propped mine up in a strainer. Using quilting pins, I pinned the edges of the wax paper to the round, fitting about 3 on. This paper was messy, as I’d used it several times already.


Step 3: Place the rounds in the freezer for 10-20 minutes. Then, using your piping bag, squirt a blob of frosting onto your cake where you want the rosette to go, quickly peel your frozen rosette off the paper, and apply to the cake, with as little handling as possible. It will begin to thaw in your fingers right away! Next time, I would use rubber gloves to give me a few more seconds.
Step 4: Continue to do this: Pipe, Freeze, Grab frozen ones and Apply while waiting for others to freeze. I placed mine sporadically, wanting a variety of sizes and some space in between for piping ruffles to achieve larger-looking rosettes. It took a LOT of rosettes, and a good amount of time. The more rounds, the bigger your freezer, the faster this will go. I did not freeze mine in advance. 20 minutes was as long as they got in the freezer!
Step 5: Pipe rosettes directly on the top of the cake. Then, using your piping bag and same petal tip, fill in all blank areas with more ruffles. It can be hard to squeeze the tip in there, but persist! It’s more forgiving than you may think.
*Note: While doing this technique, your cake may look splotchy, unattractive and doomed to be scraped clean for a fresh start. Mine did. Hence no photos. My frosting was too soft to work with easily, some rosettes slipped off; I really didn’t know if it would work, and I was sure I was going to be scraping it off and piping some other design! Keep going! It will look like a dog with mange, until it’s all complete. Then . . . magic.

This lovely table and the silver 8 cake topper were created and provided by Shari Schempp, of Over the Top Events by Shari. Don’t you love this table? She made my cake look even better. A party planner located in Saratoga Springs, UT, Shari is wonderful!

Buttercream Rosettes for everyone! Good luck! Let me know if you try this. ![]()


love this thank you ; )
This is great...I must try it. Thank you.
I'm so happy you posted this today! I have been looking for the last 3 or 4 days for information on how to do the rosette cakes. Beautiful!
Great job :) I have made this style of cake several times most recently a three tier ombré cake in purples for a wedding, your right they always look messy as you go but look fabulous when finished. I pipe the buttercream roses directly onto the cake which is a lot easier and faster, now you have done one give it a go next time I think you would be surprised how easy it makes it. The table looks great! :)
This technique is BRILLIANT!! I can't wait to try this. So simple, but produces magnificent results! Great job!
Wow, what a cake! and the whole event table is nice.
I did one of these cakes with buttercream for delivery the next day, boxed and by the next morning, rosettes were falling off the cake. Any suggestions? Thanks.
Your rosesettes are beautiful, I do them in butter cream learned on my cake school by doing smaller centers than adding to the cake to finish larger one. I put the roses on the cake on icing to attach they seam to hold great. again yours is truly beautiful, love the 2 colors
l lv dis buttercream ruffle rosette cake.i will try and do it today
Beautiful!!!!!!!!
Thanks for the kind feedback, everyone! @sweetobsession -- I would love to know how to pipe these ruffles right on the cake! How do you do that? You'd have to be able to hold the cake up in the air in order to turn it to keep the ruffles pointed the right way, wouldn't you? In my head, that's very scary! I'd love to see some pics of you doing it your way. It certainly sounds easier!
I would love to know how to pipe these ruffles right on the cake! How do you do that? It seems like you’d have to be able to hold the cake up in the air in order to turn it while you're piping in order to keep the ruffles pointed the right way, wouldn’t you? In my head, that’s very scary! I’d love to see some pics of you doing it your way. It certainly sounds easier!
I was concerned about that happening, too. As mentioned, I did squirt a small blob of frosting onto the cake and then put the frozen buttercream rosette onto that, pushing down. That acts as a sort of glue. I took the cake in and out of my fridge as I was working on it, to make sure nothing slipped. Once I was done, having all the ruffles in place acted as a support to the rosettes, so they really couldn't go anywhere, plus, I stored the cake in the fridge, and instructed my client to keep the cake chilled as long as possible, right up till display and serving-time. It worked! Whew!
Beautiful! Anytime ruffles are involved, I'm so there!!
I keep looking at this! And I gotta tell ya, that this cake is the cleanest looking, least messy looking, with the most definition, of any Buttercream Ruffle Rosette cake I have yet seen. And I will probably keep right on coming back here to look at it... Until you get up close, it looks like a ribbon or quilling effect, rather than the usual thick/heavy buttercream flowers. IMO Can't do it, but LUV IT!
OMG, you saved my butt on this one. Just took a wedding cake order for November and the bride wants the rosette done like this. I have been looking at other cakes that have this effect and trying to figure out how you do that then i stumbled across this. THANK YOU SO MUCH works great. Sam V.
I'm so glad it worked for you, Sam! Thanks for the kind feedback. :)
ROFL! "It will look like a dog with mange, until it’s all complete"... I about spit out my tea reading that. I'll try this, thanks so much!
YOu really did a very good work. Easy to adopt. Thanks for sharing.