

Chocolate Molds: How To Make A Butterfly Chocolate Mold
Decorating By MYOM-Dominic Updated 26 May 2010 , 9:15pm by MAK
Here I am, sorry for the delay!
Since Chef Dominic introduced me to the different methods of mold making I look at things different. Moldables, non-moldables! ![]() ) (2 new words for you).
) (2 new words for you).
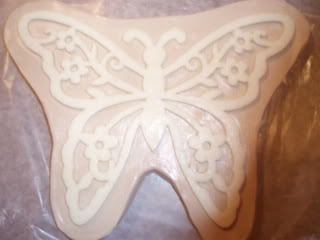
Somebody gave me this very pretty window ornament, with different sizes of lace winged butterflies on a ribbon and I immediately thought, how pretty this would look on a cake. In white on a dark cake, or in a shimmery look on a white cake.... don't you think? Stick around I am adding all the pics to show you how it became my butterfly chocolate mold in a next minutes.
My main issue was that the butterfly is a thin, very spongy, textile like material, and I was just hoping it would mold well.
With the Chef's instructions I pulled it off! ![]()
I took my butterfly off the ribbon, see how thin?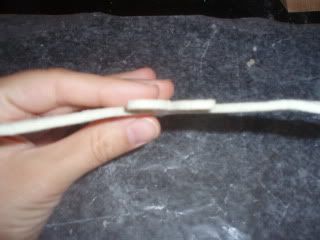
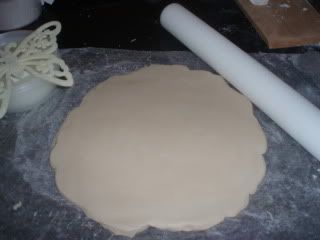
Rolled out some Safe-D-Clay... hhahah I actually love this clay because it's so smooth, easy to work with. However this was the first time that I didn't build the clay bed around my object, but I had to roll it out. It was an excellent workout. I was sweating by the time I was done. Then my Dear Mentor told me I could just warm it a little for easier rolling. So, make note, warm your clay in the microwave for a few seconds if your kitchen is cold. ![]() )
)
Then I took my fly and a medium brush and brushed every single detail inside and out with Seal-Dit. Making sure, the dit is not making details disappear by adding too much, just brush it very lightly. This is to keep the silicon out of the spongy material. Closing pores up. I really took my time on this to get a clean mold.
Then brushed the clay bed with a thin layer of Release-Dit, just enough to make it shiny. This is to ensure that when your mold is cured, everything comes right off of it smoothly.
Pressing the fly into the clay bed, just enough to make it stay down, not too deep, so I will have some depth to the mold. I ran through it lightly with a ball point tool, to make it sit in there evenly. If it's sticking up somewhere the silicon will go right under it!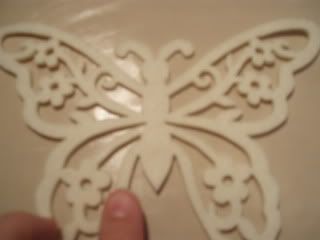
Adding about an inch to the contour I cut around the butterfly. Cut it so will save us some silicon. 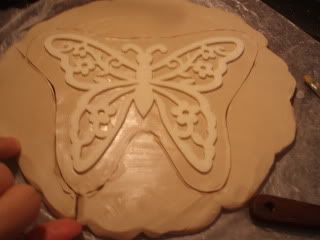
I made a clay ribbon, and attached it to the clay bed. With a clay tool and even with the tip of my fingers I had to smooth all corners away, where the bed and the wall attached, so there were no creases and holes, where the silicon could escape!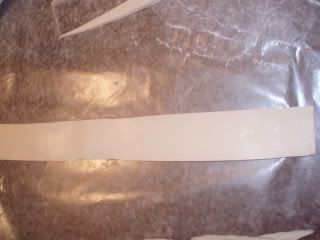

So now it looks like a butterfly in a box.
Brushed some of the Release-Dit on the inside of the wall too, and measured 1" up from the top of the butterfly, made a mark. That's how I know when to stop pouring my silicon.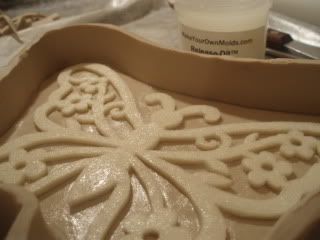
After this is pouring time. I used a pourable silicon called CopyFlex. Mixed the two parts of exact equal amount totally. And started pouring in one spot slowly, trying to prevent bubbles. Once it's up to the mark, it's done. Curing time is about 4 hrs, I usually let it sit over night. Next morning I am always a little scared when using a new method to see the results! Here is my butterfly chocolate mold!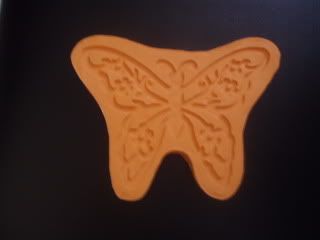
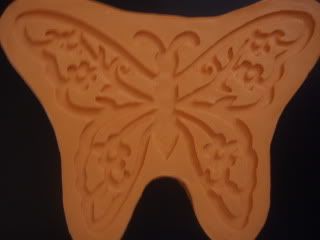
Chef what did I forget? I am adding my chocolate butterfly too in a minute! ![]()
And here is the edible butterfly I pictured when I saw the window ornament. I used white modeling chocolate! I hope you like! ![]() TFL!
TFL!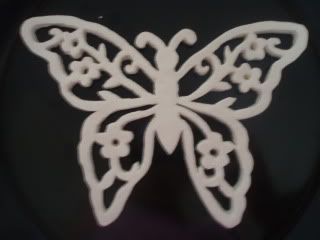
Jade - You definitely have the eye for moldables (love that word!). Having worked with you on this project, I know what is coming and just want to say that I think this mold is quite clever and shows how anyone can make a mold of a filigree styled object that can look great on a cake.
I hope you remember that I warned you about what mold making can do to you....here a dear friend gives you a gift....a charming window ornament to beautify your home and what did you do with it?
You made it into a mold!
As one who is stricken just a badly as you with this compulsion, I just want to say that I am proud of you.
Dominic ![]()
marzipandoll, you have again, done a wonderful job. I read the thread 2-3 times. Then i take notes on it. that's how i get it in my mind. Hoping to have my cake friends here soon and play with all that i have seen you do. we got together one time. and did what i saw on dominic's site. again, you are very good at this.
Thank you!!! ![]()
Dominic you can't tell my Godmother about her ornament! She doesn't speak any English ![]()
Chef Dominic. Does the ReleaseDit compromise the integrity of the Safe D Clay over time? The clay is re-usable, just wondering if mixing the two components changes the Safe D Clay in any way.
Also, what kind of objects would be considered non-moldable? It seems like you could mold just about anything.
Thanks ![]()
Hi Mak - Release-Dit does not compromise the integrity of Safe-D-Clay. The two materials are very compatible. Any of the dits can be kneaded right into Safe-D-Clay. Of course if you incorporate large amounts of Dit into Safe-D-Clay, you will change the consistency of the clay making it softer and more sticky. Small amounts will not have this effect.
Objects That Are Non-Moldable - Anything made of natural rubber and certain soft vinyls will inhibit the cure of Food Grade Silicone. This is the result of sulfur present in natural rubber and amines present in some vinyls. In general you are correct - you can make a mold of almost anything. If the object is porous like plaster, wood, fabric and paper - you need to seal the surface with Seal-Dit. Non-Porous materials like plastic and metals do not need to sealed and usually work very well.
Hope This Helps,
Dominic ![]()
Quote by @%username% on %date%
%body%