

Buttercream Rose Disaster
Decorating By MeghanKelly Updated 14 Sep 2013 , 11:44pm by TheOriginalCakeDiva
AI'm somewhat new to this, but I can't get my buttercream roses to work. I make a base using tip 12, and switch to tip 104, but when I start the first petal, the base flops over. Is there something I'm missing? Thanks :)

AIts probably not stiff enough, just add some (sifted?) Powdered sugar, a little at a time to your bowl and keep practicing. If your sugar is lumpy, it will clog the small side of your tip.
FYI, I just use the 104, not the 12, to make the base. You learn that in the grocery store;-) you just hold your tip right to your nail, and squeeze like the Dickens, pulling up and letting pressure go. You can make a perfectly good cone without switching tips, that way.
AWatch a bunch of YouTube videos until you see how to do it that way. I make gorgeous roses, about 30 in ten minutes, my husband says I'm a rose making fool, lol, I wish I could post a video for you. But I definitely know what I am talking about :-)
If you learn to make roses on a stick, you'd eliminate the blob base which saves time.
You can watch my video (and read the text at the bottom) to learn how to make 96 roses in 10 minutes (link in signature below).
Please share your video.

I also make the cones with the same tip as the petals.
I make a twirl with the base siting on the nail and the tip vertical, 3x around a circle. Then another twirl on top, about 2x around. Then start with 3 petals.
It takes a minute once you understand how to point the tip. Seriously. When you go SSLLOOWWLLYY you give the flower more chance to fall over in the first two stages.
And your first few "ugly" roses can always be scraped back into the bag and re-piped. But if you want to avoid uglies, then start with a small single cone to make rosebuds.

I learned to make mine on a stick. I went to walmart and bought a small container of cheap (yucky) icing, got a stick and sat in front of a you tube video. I am left handed to it took me twice as long to figure it all out.
You might want to stock up on the left handed flower petal tubes, Wilton has been pruning their list of tips.
Unlimited, How did you get your roses off the stick? I learned to use a scissors to pull it off and place it but that requires more hand movements than what you do.
Ahhhh, the secret lies in the text. (That's why I wrote "and read the text at the bottom".) The answer is typed at the bottom of the video which includes a link to another visual.

You have not the right consistency of your buttercream. When I make buttercream flowers I use the Cake Boss recipe Decorator's Buttercream and it is fantastic !
AThanks everyone. I have all weekend with an empty house (yay!) and will be practicing all weekend :)
Irene...I've never heard of a left handed flower petal tube...what is that?
Look at tubes 59 and 97. Because they curl, they had to be designed right handed and (later) left handed.
There are tubes 97L and 116L so you can make the same fuller blown roses. Tubes 59L, 160(=60L), 161 (=61L) for other flowers with curved petals. Tubes 106L and 107L for drop flowers.
You might have to get some of these from www.goldaskitchen.com (search box "left tube") because they are both Wilton and Ateco numbers--but Wilton has reduced their offering.

The only way that I can make a passable buttercream rose is on a stick, so I can vouch for that being easier than flat. I stick to gumpaste, it's much easier to get a flower instead of a blob that way.
Ironically, I have no problems with Gumpaste roses. LOL. Go figure.
It would be useful to start by making flattish wild roses or pansies until you can make those well. You have to get the hang of moving both the nail and the tip of the bag at the same time.
Then instead of starting with a full sized rose, it might be easier to pipe sweetheart roses.
Tube 103: make one full circle on the nail with the tip vertical (wide end against nail) by rotating the NAIL with fingers, not the tube. Hold the bag with your piping hand and do NOT move it at all.
Then rotate piping hand so tube is at 45 degree angle from vertical. Then add 3 small petals, then 5 more under those. End of ordeal. Decent small rose to use wherever you need.
For each petal, you have to rotate nail at the same time you loop up/down with piping hand to shape petal. If you are watching a video, make sure you pay attention to these motions with both hands at the same time.
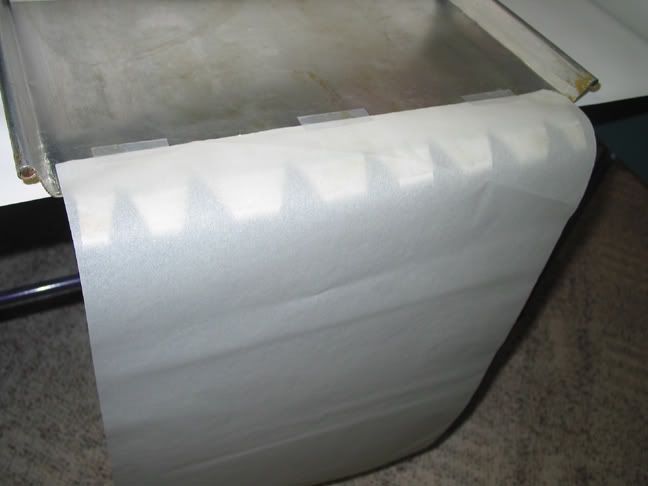
I keep a box full of parchment squares and a cookie sheet handy. Nail stays in off hand all the time. Piping hand slides edge of paper off and then picks bag up again. Dip nail into box for next flower.
Learn to make them right on to the cake!!! And yes, you need stiffer icing. Look at this stacking and fixing video in the second last half of video and it shows you how to make roses right on top of cake. Also if you are new check out all of her videos and you will learn so much more. Visual learning is always best for me!!! You can practice on top of cupcakes!! Just keep practicing and you will learn!!/Good luck
Making them right on the cake is not productive enough for me. At 93 seconds each on the cake (that's about 6.5 roses in 10 minutes), you need to twirl them on something a lot smaller/faster than a turntable. It's apparent they can be made more productively if you never need to let go of your tools in either hand just to pick them up again to continue, but piping directly on the cake would drive me crazy -- I've got too many things to do before I die! (Sorry, I'm repeating myself now -- need to find something more productive to do!)
It sure sounds like your icing is not stiff enough and/or you are making your center much too tall and thin. Some people suggest using a Hershey's kiss as the center mound but not all your customers will like having choco & it's an added expense! So what I taught was to have a Kiss in front of you can get the size and shape correct. Then make sure the icing is stiff enough but not so stiff it kills your hand to pipe it out :)
Unlimited, I just looked back at your videos again and just don't see where you explained it. I see a couple of comments from others but not yours.
I also can't view the text from my laptop (I don't know why), but I can from my desktop. Here's the text:
Unlimited, To each his own!! I do not work and am retired so I have plenty of time! You can do roses your way and I will do them my way. If I sold cakes for a living then maybe I would do the roses differently but for now I enjoy doing them on the cake.
Of course, I can continue piping roses my way (thankyouverymuch), and I can't stop you from making them your way (whichever way that may be). I didn't diss you for how you make them as I don't know your method (you didn't say you made them the same way as in the video you linked to).
I've got plenty of time too. I USED to work on an assembly line, and it ruins you for the rest of your life when it comes to idle time... you can't sit still without thinking of ways to multi-task, carry too many things (instead of making two trips), have restful sleep without dreaming about what needs to get done, etc.!
Sure you can. The sooner you make them, the longer they'll have to air dry which will make them easier to handle and place. Two days in advance might be long enough to handle gently, four days would be better, and a week or two earlier wouldn't hurt either!

Quote by @%username% on %date%
%body%