


Okay, I am playing around with my first 'person'
I made a head, and a shirt, and pants, I think they are drying in a sitting position (I hope)
I made arms, but dont think I like them.
How do you go about doing it and putting it all together, or do you make a 'body' and then 'dress' it? cause I'm not sure I can make myarms match the sleeves. I made it short sleeve. (duh)
I'm just not sure I did it right.
and do you go with a totaly round ball head and stick the nose on? paint on eyes etc.?
what about a neck, is tht part of the head, or do you put a neck on the shirt and then the head on it?
anyone ever took pics of doing it? not a youtube, I am on dial up and cant do video..
Thanks for any insite ![]() and any angles of your fiqures that you have pics of would be nice too. I've went through lots on here today, but literly have taken about 8 hours to see maybe 20 pictures. Yes, dial up sucks. LOL
and any angles of your fiqures that you have pics of would be nice too. I've went through lots on here today, but literly have taken about 8 hours to see maybe 20 pictures. Yes, dial up sucks. LOL


Debbie Brown's books have great step by step figure making, you give one of then a try.
Hi chellebyerly,
I just did my first people today. I wasn't able to find any tutorials on bodys, but I did find some one You Tube for faces. You mentioned you can't watch videos, so I took some pictures of my figures that are currently drying. As I said before, these are my first figures and I am far from a pro, but hopefully these will give you a starting point!
(I've never posted pics in the forum before, so if it doesn't work, send me a private message and I can email them to you)
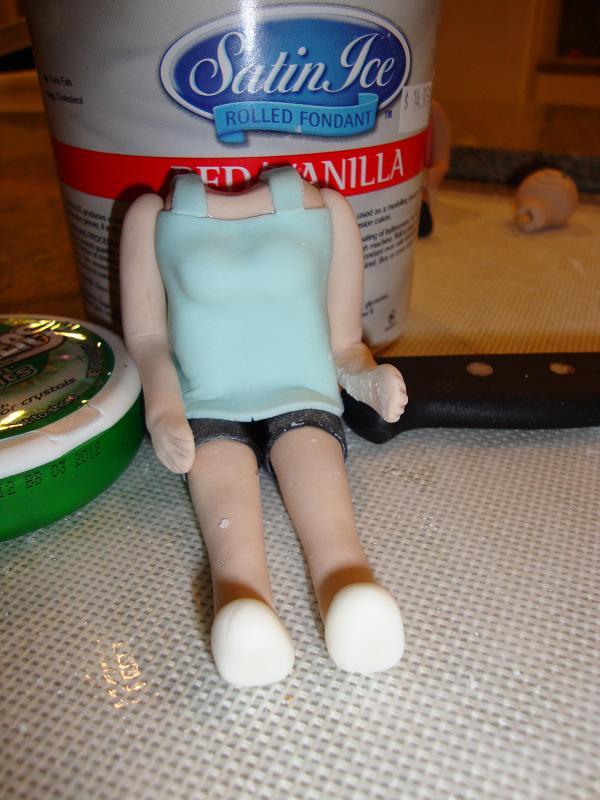
For the body, I made a torso and put boobies on it. Then I put a shirt on - glueing each piece with a little dab of water. My arms, head/neck and legs were all made separately, and then glued on, and held in place while drying.
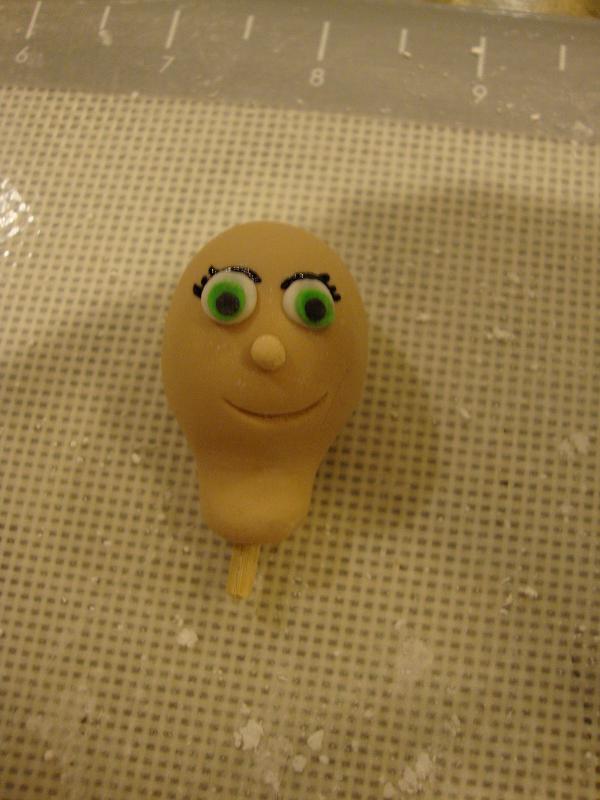
For the head, I saw a video, and they started with a ball of gumpaste and kind of pinched & rolled the neck, so it's all one piece. For the eyes, you poke holes where you want the eyes and roll a little bit of gum paste into a tear drop shape. Put the skinny end of the tear drop in the eye hole with a teeny dab of water, and then gently flatten it out with a ball tool. Same for the nose, but you don't need to flatten it. The mouth can be made with the large opening on a frosting tip. Then, I painted the eyelashes on with icing tint (I hope it dries!)
I put a toothpick in the neck so I can stick it in the torso and it's more stable. Once they dry a little I will add hair and put the head on the torso.
I hope this helps!! : )

Lorraine McKay does some great tutorials for modelling you can buy on line. I believe she is away training at the mo so in case thats not in time for you here are bits I picked up.
Yummy in my tummy is spot on with her pics but when you are making the head if you get a lump of paste wrapped in clingfilm the poke your knuckle into it you can place your head in there (well the models lol) whilst you are shaping the face, putting on eyes etc and it helps to keep the head round.
As for the body I tend to decide whether to make it dressed or not depending on what I am making but basically start with legs, dress them, add body, dress that, add arms, add sleeves, add head then leave this to dry till the next day before adding hair/hat.
Hope that helps a little bit
Yummy Thank you!! that is what I needed!! ![]() The pics came out great!! and I need YOUR arms. so I really needed the pic! Thanks so much!!
The pics came out great!! and I need YOUR arms. so I really needed the pic! Thanks so much!!
Thanks everyone!! ![]()
Jayne, great tip for the plastic wrap.
I think it will be mostly okay. I will just have an issue with the arms. I am going to redo the head with the neck on it. I let everything dry overnight and need to make shoes and redo thearms today.
I can usually copy something if I can hold it, touch it, and see it in 3-D- seeing it in pictures really screws with me.
I have to make a camera cake this week- and havent even touched a 'nice' pro camera in mylife... I am so scared! LOL
A little bit of melted chocolate or candy melts holds pieces together really well and sets up fast. You can also dissolve a bit of gumpaste in some water and use that as glue but I never seem to have enough time to hold things long enough for them to set up in place long enough that way, good luck!

I normally use tylose added to a little warm water for my edible glue. It works great of holding the pieces together. I feel that is easier to attach the pieces if they are still somewhat fresh and not completely dried. The head starts with a ball, but you want to shape it a little. Take a look at your own head and face in the mirror. Notice how your chin comes in and where your ears are in relation to your eyes and mouth. This will help you when making the head and facial features on you figure. Have fun with it!
Edited to add: I love Lorrain McKay's (Aine2)work. She has tutorials you can purchase and you should be able to view them on dialup much easier than trying to view a video.
Quote by @%username% on %date%
%body%