

Hello, I have a cake I'm doing for a Sweet 16 for saturday, 1/30. She wants musical bars and notes to go around each tier. Making it with better cream icing. Two questions? How do I stabilize the better cream and what could I use to make black musical notes (using a mold)? Thank you ![]()

I am not familiar with bettercreme - I didn't know it needed to be stabilized.
As far as the musical notes, you can either cut them out of fondant using a template or buy a stencil and stencil it on the cake with either royal icing or melted chocolate. I did one (it's in my pics) and I stenciled it on a piece of fondant/gumpaste and then put it on the cake.


When I made this piano cake, I just made the notes freehand with BC icing. Used a larger tip (#12?) then smoothed the notes down after it had crusted (only had to wait a minute or two).
http://cakecentral.com/modules.php?name=gallery&file=displayimage&pid=1168463

Hi, I have no experience with bc. But when I made this cake, I used Patchwork cutters to do the musical notes. I used gumpaste. And to do the board, I eyeballed and marked the white notes with a ruler and again with gumpaste cut the black notes and stick them in between the lines as a piano.
http://www.cakecentral.com/modules.php?name=gallery&file=displayimage&pid=1279606
HTH. ![]()
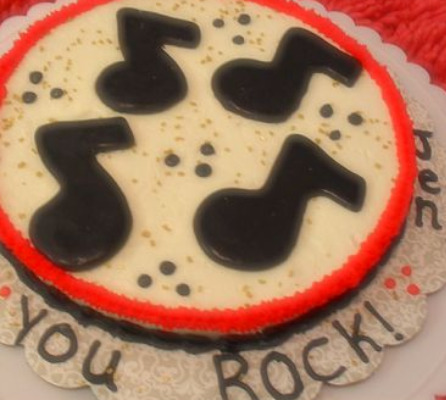
Hi, I wanted to share my favorite method for lettering, writing, shapes and symbols. I use melted chocolate (candy melts).
1. Find the image online that you want to make and save it to your computer. Adjust the size that you want it to be, reverse the image if necessary and print it out.
2. Tape the printed image on the back of a cookie sheet, lay a sheet of wax paper over it and tape if necessary.
3. Melt your chocolate and put it in a small piping bag with a fine tip. Outline the image or images and let it sit until hard, it happens very quickly. Then fill in the image. You can do several layers if you want a thick piece or just to the top of the outline. Keep your chocolate very warm so that it will flow freely to fill the space. Use a small spatula or knife to spread it smooth. The backside will be the shiny side so remember to reverse the image if this is will be the front side you want to show.
4. You can make a couple of hours before using or just put them in a wax paper lined container and store in the fridge once set. The chocolate will set up very quickly once it cools.
I love doing this method..The kids love giant chocolate numbers. Writing messages, freehanding on a cake top, drizzling, lacing and filigree are so nice and neat this way and once you get going let your imagination run wild. Remember, chocolate melts in hot weather so I keep them cold until the last minute and then I apply them to the cake.
Quote by @%username% on %date%
%body%