Fonant Cut-Outs

Decorating By sugaah Updated 5 Dec 2008 , 6:55pm by sugaah

sugaah Cake Central Cake Decorator Profile
sugaah Posted 5 Dec 2008 , 2:44pm
post #1 of 10

Could you please instruct me step-by-step on creating fondant cut-outs? Love the effect cc'er Kaat achieves and with trouble with e-mail haven't heard back from her. Anything would be appreciated. Thanx

9 replies
kaat Cake Central Cake Decorator Profile
kaat Posted 5 Dec 2008 , 3:23pm
post #2 of 10

Hi - sorry. I did reply but I have noticed that a reply to another discussion also failed to go through.
I don't have any cakes planned right now so I may just have to "make one" so I can take pics of the process.
It's smilar to the FBCT in that you need to think backwards. Start from the bottom up.
Let me see if I can get to some pics today.
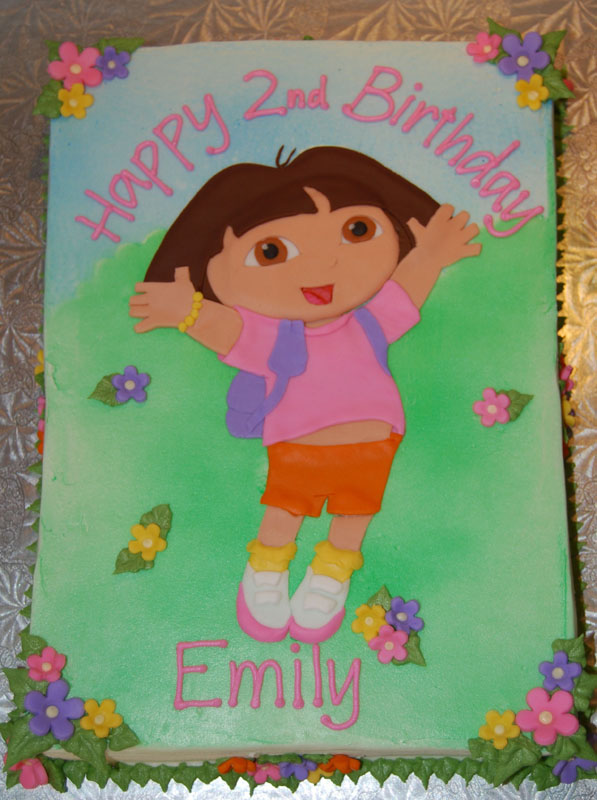
sugaah Cake Central Cake Decorator Profile
sugaah Posted 5 Dec 2008 , 3:43pm
post #3 of 10

Thank You - looking forward to it!!

kaat Cake Central Cake Decorator Profile
kaat Posted 5 Dec 2008 , 4:26pm
post #4 of 10

Fondant Cut-outs
Here are the basic instructions for my technique. I am still working on the technique and it gets better each time I do it. I did this quickly this morning so its pretty cheesy but hopefully youll get the drift. Ready?

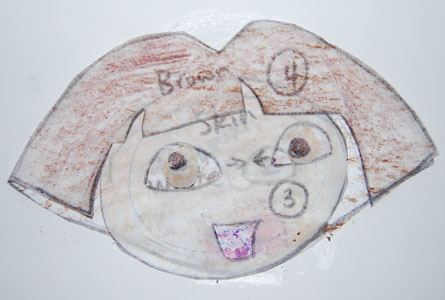
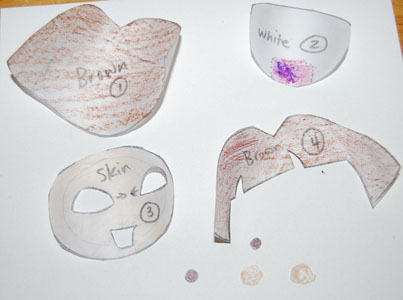
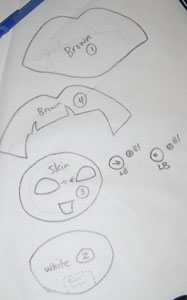
1. Size image and trace onto parchment. Plan out colours and layout (what goes down first) I usually write this down for reference. (pic 1)
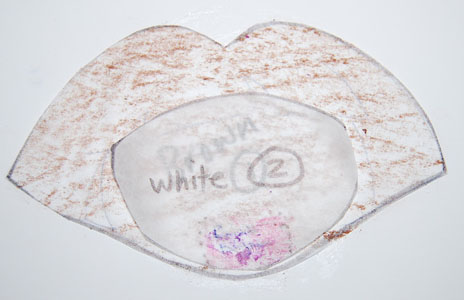
2. Trace the sections you will need to cut out in some cases you will need to do multiple tracing. (I cut out the back of her hair as well as the front) (pic 2)
3. Cut the pieces out of fondant (pic3)
4. Layer the pieces on a sheet of parchment onto of a cutting board or firm surface that can be moved. (I use water and a paintbrush to get the fondant pieces to stick together) (pics 4 & 5)
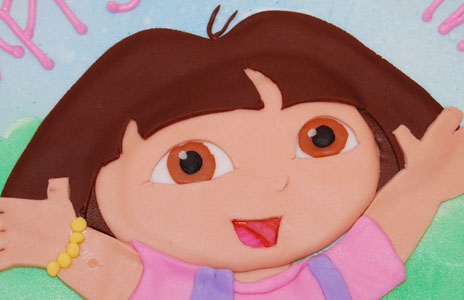
5. Add details. For indents such as the hair and the nose I used the back of a knife. (pic 6 & 7) Then I added the hair stickyupies (that is a technical term!) with fondant I rolled by hand (pic icon_cool.gif

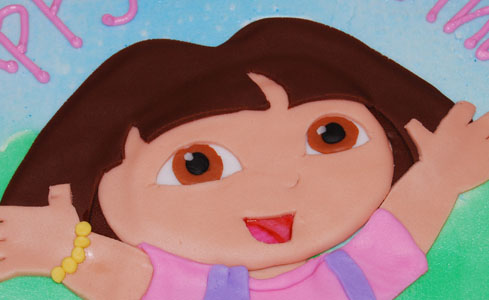
I will let it sit on my cutting board and the prep the cake (ice and decorate background) this seems to give it enough time to firm up a little and still be pliable enough not to crack when I put it on the cake. Once cake is iced I slide the cutout onto the cake and Voila!

Sorry for the crappy pics, theyll do for now. Il post better pics soon!
LL
LL
LL
LL
LL
LL
LL
LL

kaat Cake Central Cake Decorator Profile
kaat Posted 5 Dec 2008 , 4:32pm
post #5 of 10

hmmm, for some reason the pics posted backwards....

KHalstead Cake Central Cake Decorator Profile
KHalstead Posted 5 Dec 2008 , 4:44pm
post #6 of 10

they always do! lol

That is awesome!!!!!!!! Soooooooooooooo much work though........I can't believe you just popped that out this morning! Awesome job!!!

kaat Cake Central Cake Decorator Profile
kaat Posted 5 Dec 2008 , 4:47pm
post #7 of 10

Oh, just the paperwork is from today.... the original cake was from last month. I always think "gee, i should really document this process as I'm doing it..." Then I never do. icon_rolleyes.gif
Here's the finished cake...
LL

sugaah Cake Central Cake Decorator Profile
sugaah Posted 5 Dec 2008 , 5:38pm
post #8 of 10

The finished product is so well done! Thank you very much for the post. I'll try on a small scale to get my thinking in-line then Watch-Out. Keep up the good work!!

tblide Cake Central Cake Decorator Profile
tblide Posted 5 Dec 2008 , 6:36pm
post #9 of 10

You know what your pattern reminded me of. The children's color by number coloring pages. Couldn't you use those and do the same thing?

sugaah Cake Central Cake Decorator Profile
sugaah Posted 5 Dec 2008 , 6:55pm
post #10 of 10

OOOOhhhhh tblide - that's a good idea!

Quote by @%username% on %date%

%body%