

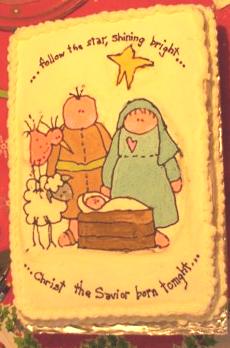
This is my first attempt at fbct. (Sorry about the lighting. It was much prettier in real life. The light in that room was not so good.) I needed a cake for my daughter's church youth group Christmas party. I was surprised at how long it took me to "color" in the transfer. It turned out ok, I guess, but I have two questions...
1. After I placed the transfer on the cake, there was a lip of icing around the transfer that was a lot higer than the cake. I tried to smooth it the best I could, but it still had a lump all the way around it. Is there a way to avoid this or fix it?
2. How do you smooth the icing as you color the transfer? Some of mine looked like little squiggles of icing in the spaces.

I haven't done a fbct yet. So, I can't answer your questions.
BUT, your cake looks great!

Love the cake and transfer, and of course the cake's message as well!  Unfortunately I have no experience with FBCT, but I just wanted to say - GREAT JOB!
 ![]()


The cake looks great!
I'm not sure what to tell you about the lip of icing around the image. But as for the "squiggles"...after my image has lightly crusted, I gently tap on the icing to press it against the board I am working on, and the front of my images always come out smooth - no squiggles!
(Also, I like to work these on my glass cutting board...that way i can slide the image out from under my work, hold up to the light, and see the front of my image. It helps me to fill any voids I may not have otherwiase seen!)


Looking good.
Afer you place the fbct on the cake, take some cornstarch on your finger and smooth out the wrinkles.
Some people put a border around the fbct.

so cute!
to avoid the 'lip' i do one of two things:
1. (like mentioned before) put a border around it
2. make the transfer to cover the whole cake. for example, if you're making a 8" round, trace the pan onto the paper with your picture on it. draw your picture, then fill in the background as part of the transfer. (basically make an 8" round transfer) then it'll go all the way to the edge of the cake and there will be no lip
sorry it's so wordy, i'm not that good at explaining stuff.
hope this helps ![]()


I just have to add my compliment too! Super cute cake! I love those country crafty looking designs! I bet everyone loved it!
Great job,
Heather

Your cake is wonderful. The transfer came out great.
When I do transfers, I use an 8X12 acrylic picture frame, the cheap box-y kind, and take out the cardboard insert. I do the transfer on the frame so when I'm done, I hold it up to the ceiling light and look under it to see where I need to smooth out the transfer more. That seems to help. (It's much like gmcakes glass cuttingboard)
kos

Quote by @%username% on %date%
%body%